What Is a WordPress Category Page and 3 Methods to Create One
A WordPress category page makes it easy for users to navigate through your website. On the page, users can browse through different categories of website content to find what they are looking for.
In this article, we’ll define the WordPress category page, how it works, and why you should create one. We’ll explore three methods to make a category page using the Site Editor, the Beaver Builder plugin, and creating a custom category page template.

What Is a WordPress Category Page?
A WordPress category page is a page where users can view posts grouped by their assigned category. When a user clicks on a category link, WordPress queries the database for all posts assigned to that category, retrieves them, and displays them according to any set conditions.
How Does a WordPress Category Page Work
WordPress category pages use the WordPress Loop to display posts that are assigned to a particular category. The Loop uses a PHP code structure to display posts retrieved from the WordPress database.
By default, the Loop checks a number of factors, including the number of posts to display per page, whether the full blog post content or only the excerpt is displayed, and whether commenting is enabled. Then, WordPress checks what the user requested to determine which posts to fetch from the database.
Why You Should Create a WordPress Category Page
WordPress automatically generates pages for categories based on available template files. However, those category archive pages might not be optimized for search engines or user experience.
By creating your own custom WordPress category pages, you have the opportunity to not only improve SEO but also strategically add posts to these pages. This further optimizes your site for both search engines and your audience, ensuring your content is both accessible and engaging.
Improve SEO
Here are ways to improve SEO on a category page:
- Add relevant keywords in titles, headings, and content.
- Include related posts and links to other content within your site.
- Use canonical tags to avoid duplicate content.
- Implement breadcrumb navigation to provide a clear and hierarchical structure for users and search engines.
These SEO techniques can help establish value and authority in category pages, resulting in higher search rankings.
Provide a Better User Experience
Make your WordPress site content more accessible and user-friendly by creating mobile-optimized category pages with additional context, features, and information.
Add these to your page for a better user experience:
- Child categories below the parent category.
- A prominent search bar at the top of your category archive pages.
- Featured posts.
- WordPress tags.
- Content filters, such as sorting by the newest or most popular posts.
- Related posts below your main categories section.
- A newsletter signup form.
- Pagination for easier navigation and faster load times.
You can also enhance the user experience by customizing your category pages’ layout, color scheme, and typography to match your website’s brand identity.
By creating WordPress category pages with customized content and design, you will keep users engaged and leave a lasting impression.

How to Create a WordPress Category Page
We will explore three methods to create WordPress category pages – using the Site Editor, with a page builder plugin, or by creating a PHP category template. For this article, we’ll use Beaver Builder as the page builder example.
Before building a category page, create WordPress categories and assign relevant posts to each category.
How to Create a WordPress Category Page Using the Site Editor
If you’re using a block theme, use the built-in Site Editor to design and customize category pages in WordPress. If you’re working with a live site, we recommend creating a WordPress staging environment to test changes safely.
Proceed with these steps to create a category page using WordPress Site Editor:
- In your WordPress dashboard, navigate to Appearance → Editor. If you don’t see Editor and instead see Customizer or Theme File Editor, your theme is not a block theme. If you don’t want to switch to a block theme, try the other methods.
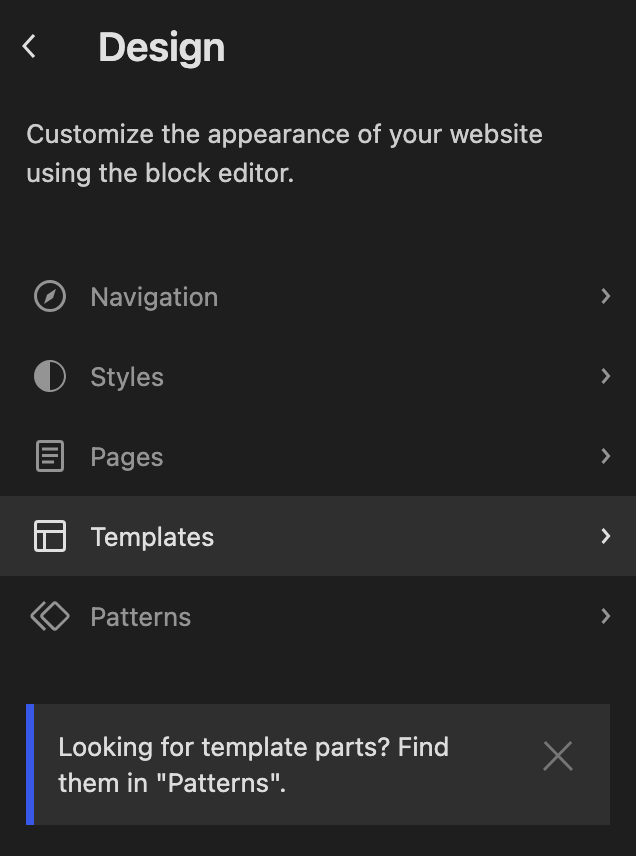
- In the Editor screen, go to Design → Templates.
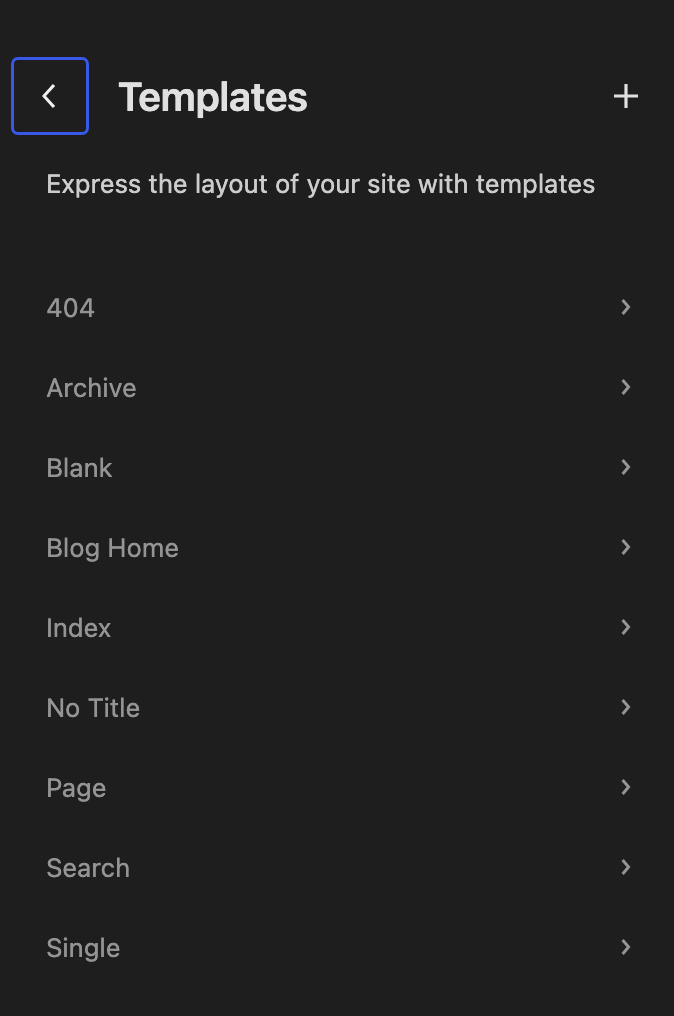
- Click the + icon in the upper right corner of the Templates menu.
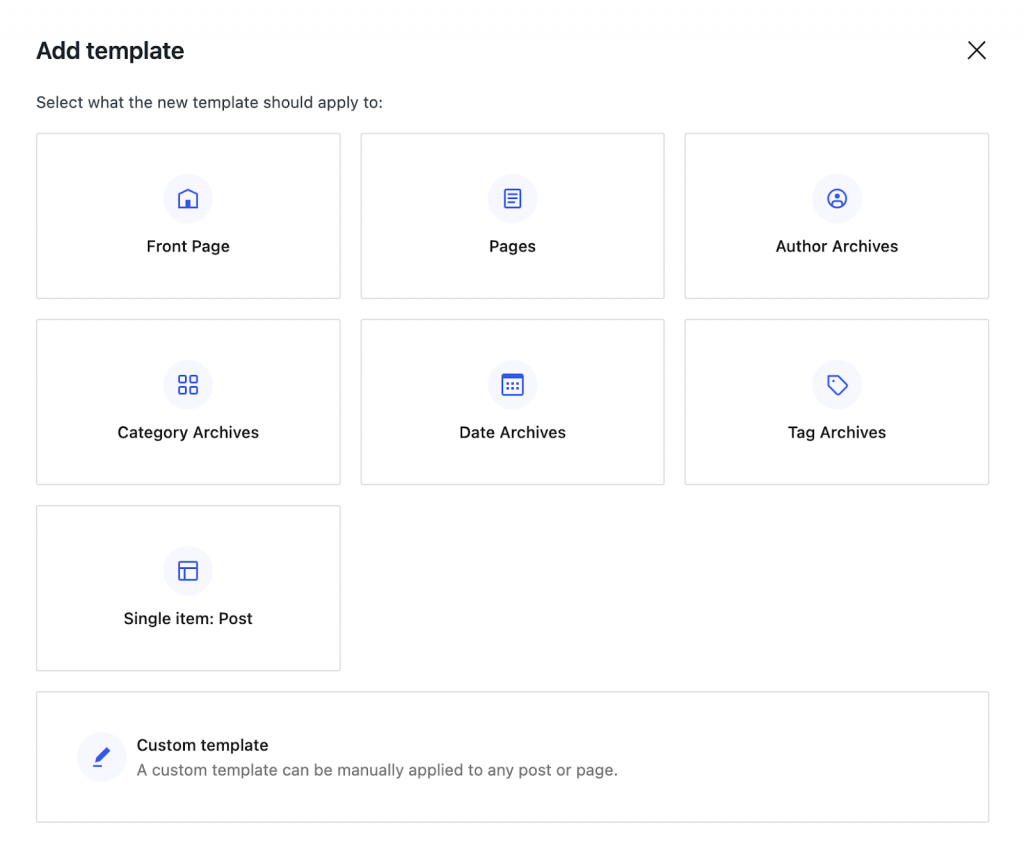
- Select Category Archives.
- Choose whether you want your template to apply to all categories or a particular category. For this example, we’ll choose a specific Category.
- Choose which category to assign.
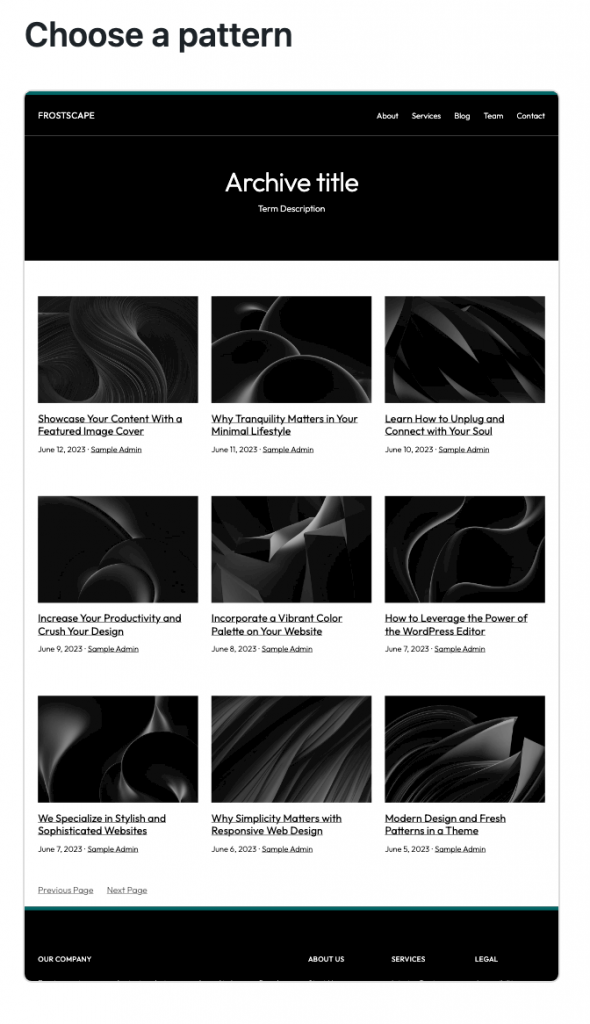
- Choose a pre-designed layout. Alternatively, skip this step and create a new page design from scratch. For this example, we’ll use an existing category archive pattern and add some custom content.
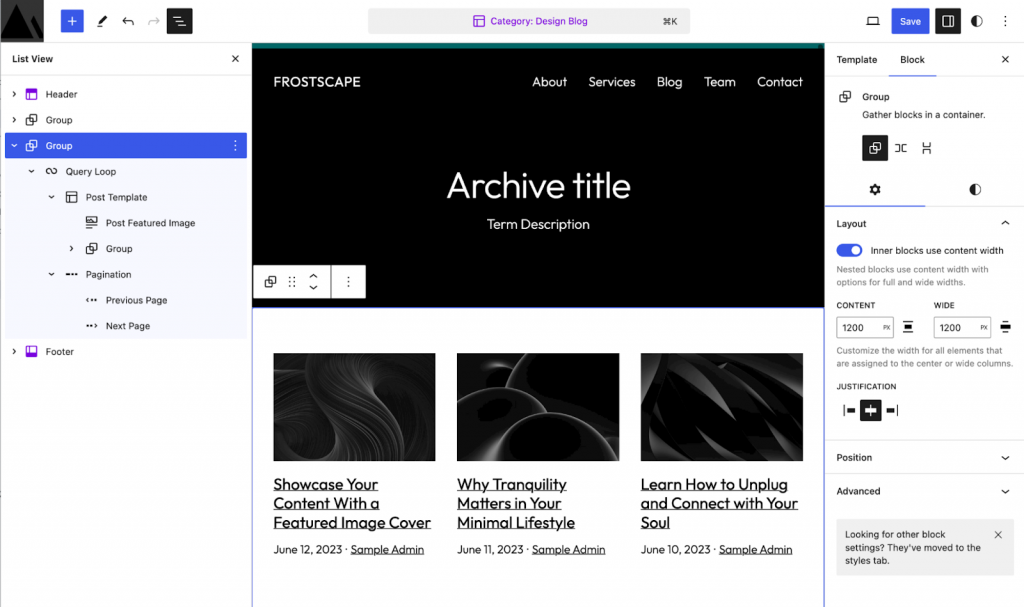
- In Site Editor, click List View to see the hierarchy of blocks in your template. Your view may look different depending on the pattern you use. If you’re starting from scratch, the only thing you’ll see in the List View is a Paragraph block.
Now, it’s time to customize the new category page. You can add and rearrange patterns and blocks, insert custom code, and adjust the category page’s design and style.
Click the + icon in the top left corner of Site Editor to add patterns or blocks, such as paragraphs, images, and headings.
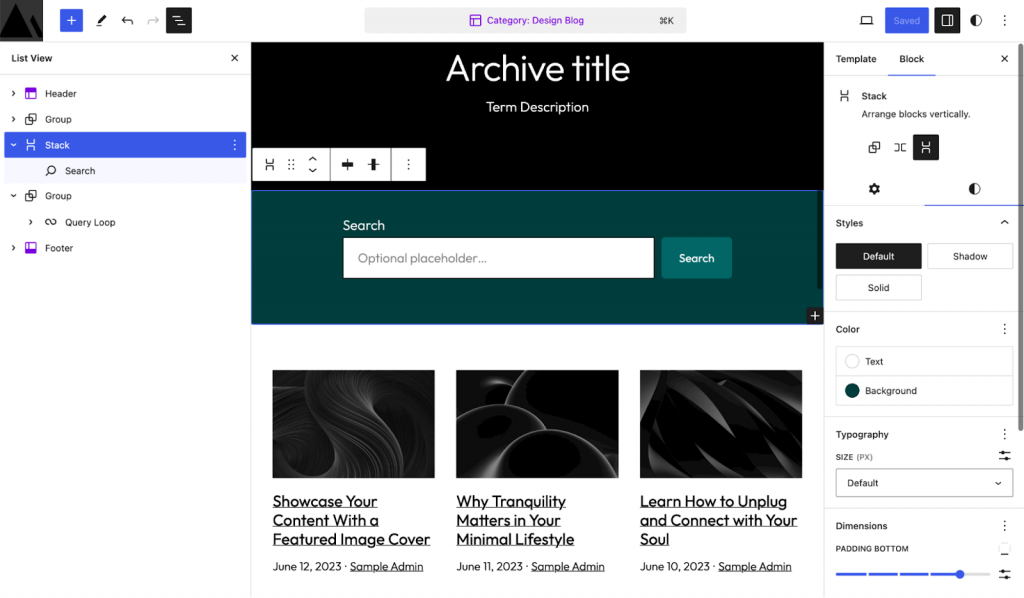
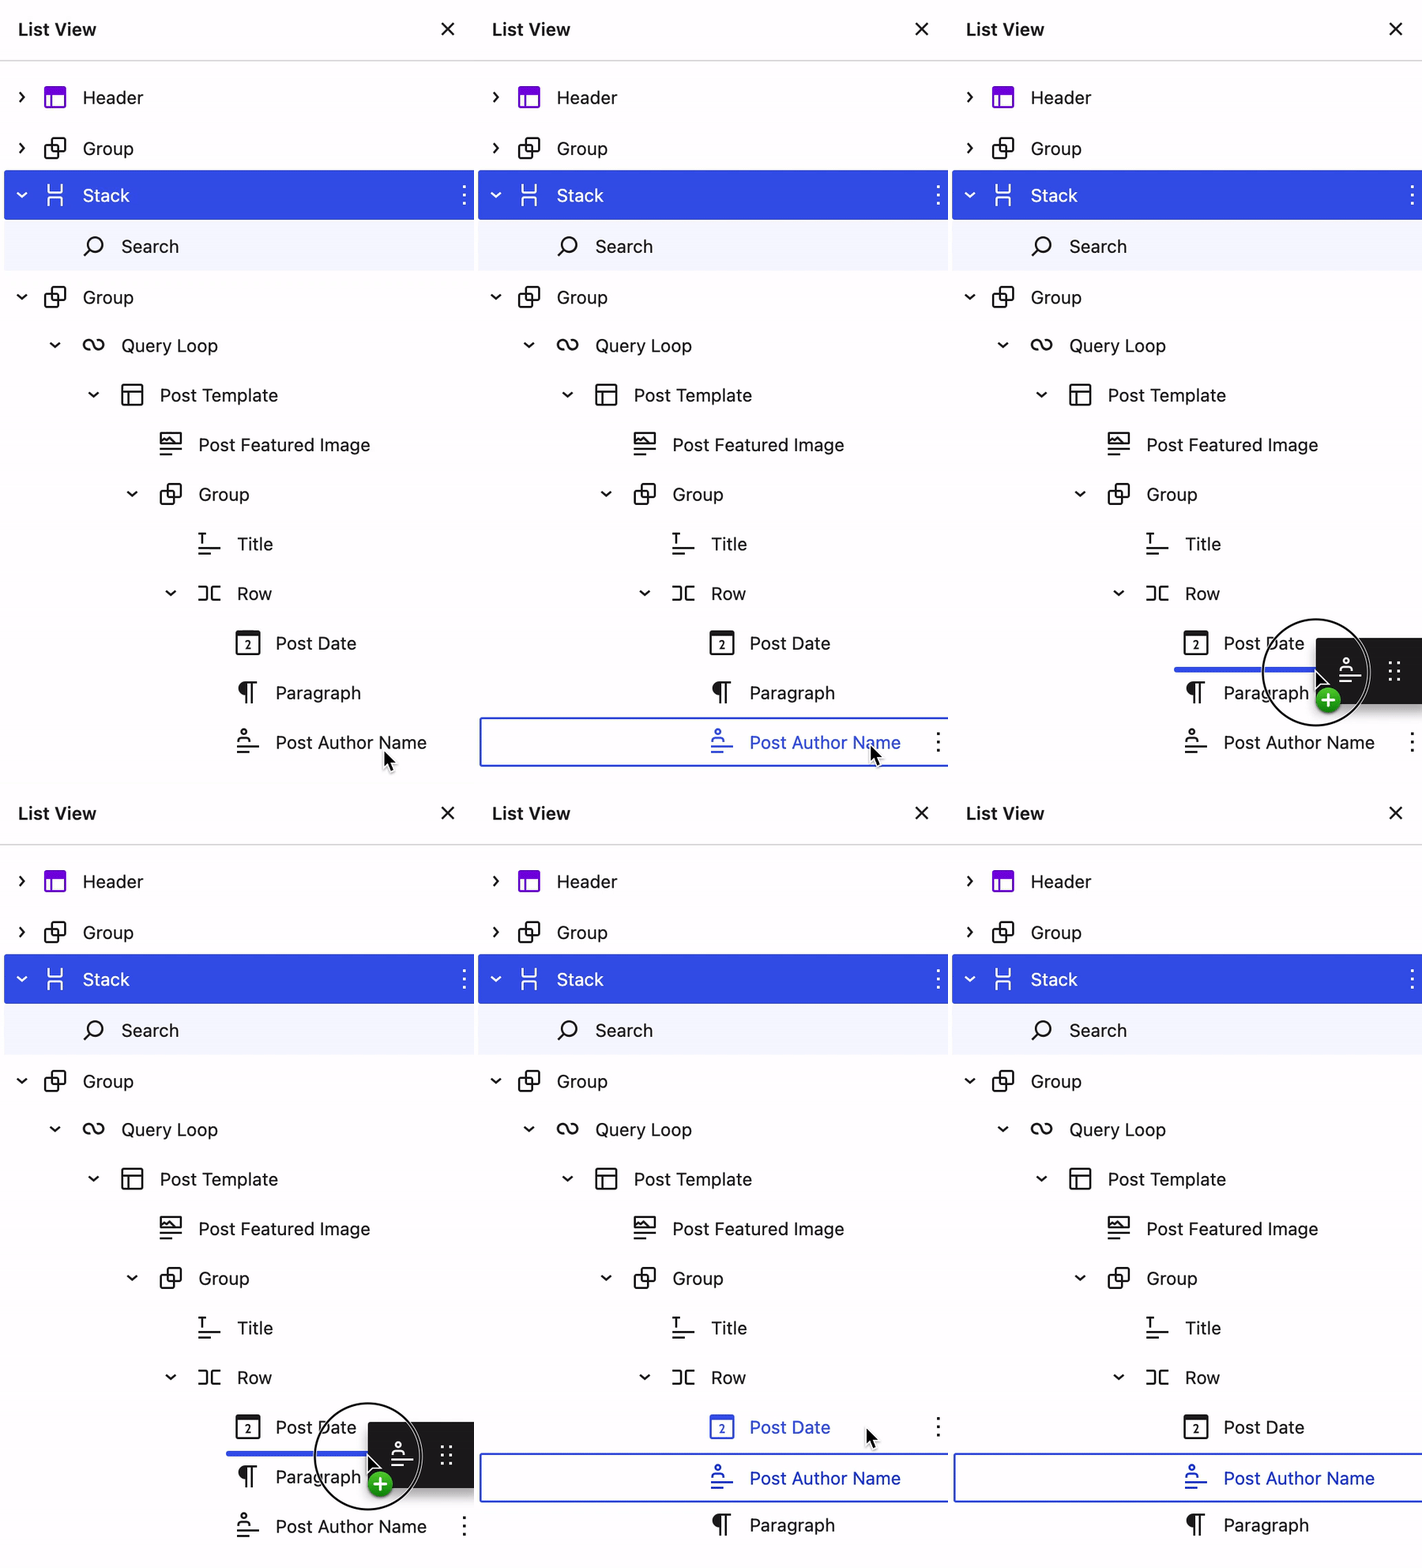
For this example, we’ve added a Stack with a Search block just below the title and category description. You can rearrange your blocks any way you’d like by dragging and dropping.
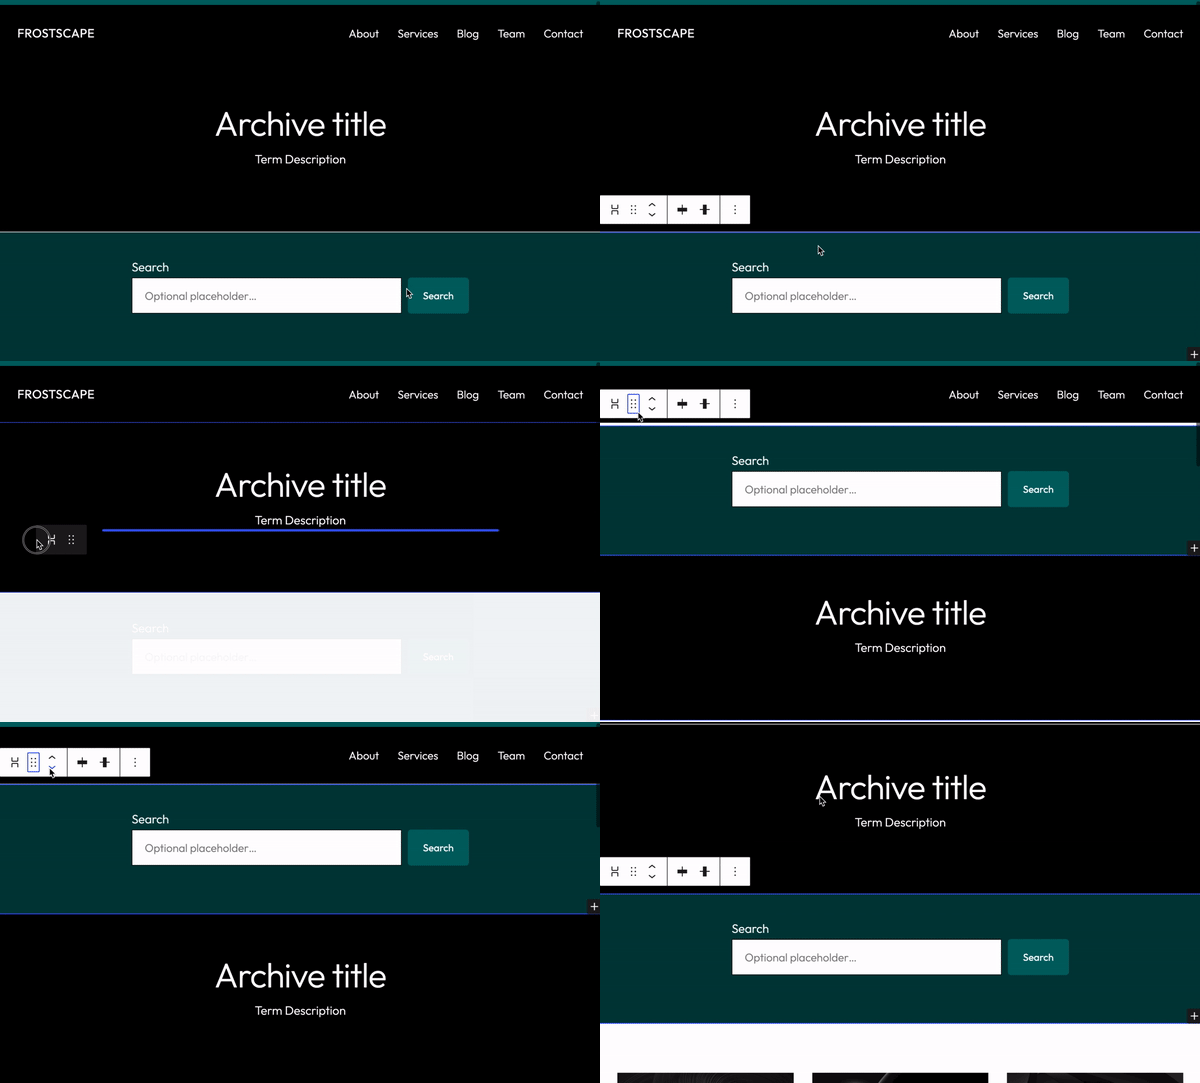
If you have many nested blocks, it might be easier to select them in the List View and drag and drop them to the desired location.
If you want to add custom code, use blocks like Custom HTML or Shortcode to incorporate custom widgets, plugins, or third-party integrations.
In the example below, we’ve used a Custom HTML block to display an embedded newsletter signup form. Copy and paste the code into the HTML view and click Preview to see it in action.
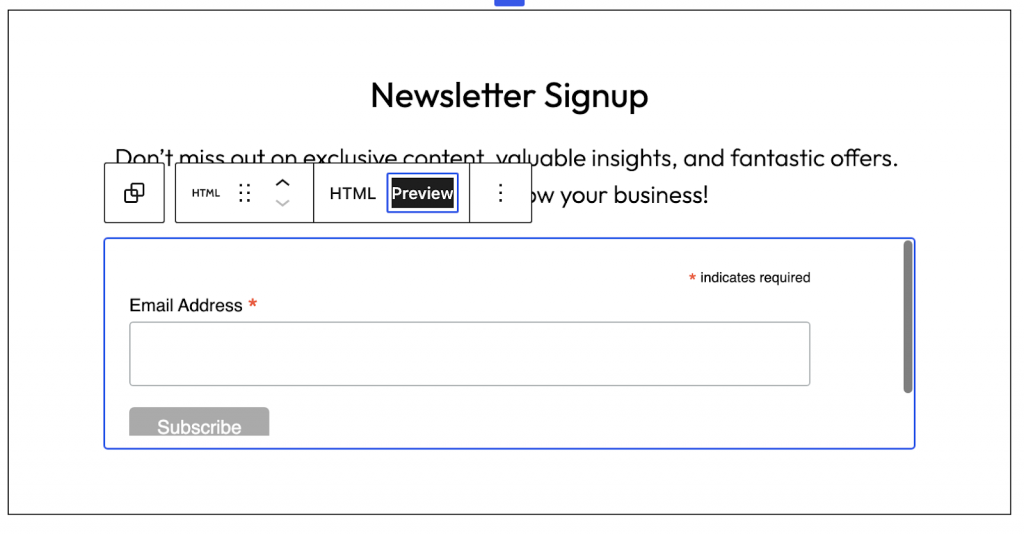
Note that embedded HTML may appear differently in preview mode. Always check the live site and make sure it shows up as intended.
Next, customize the style and appearance using block settings like colors, backgrounds, and typography.
Finally, preview your customized category archive page on different devices by clicking View at the top right corner. Check whether the page looks good on Desktop, Tablet, and Mobile.
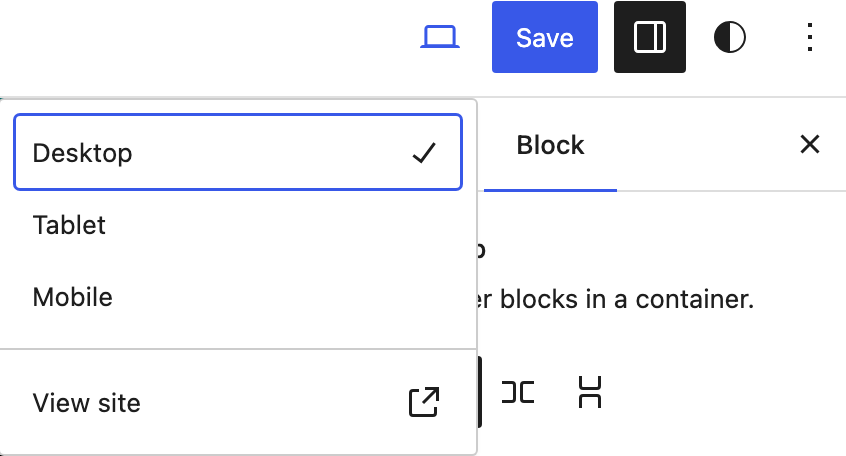
Once you’re satisfied with the page’s appearance, click Save.
How to Create a WordPress Category Page Using Beaver Builder
Another way to create a WordPress category page is by using the Beaver Builder plugin.
Before we begin, make sure to install and activate the WordPress plugin.
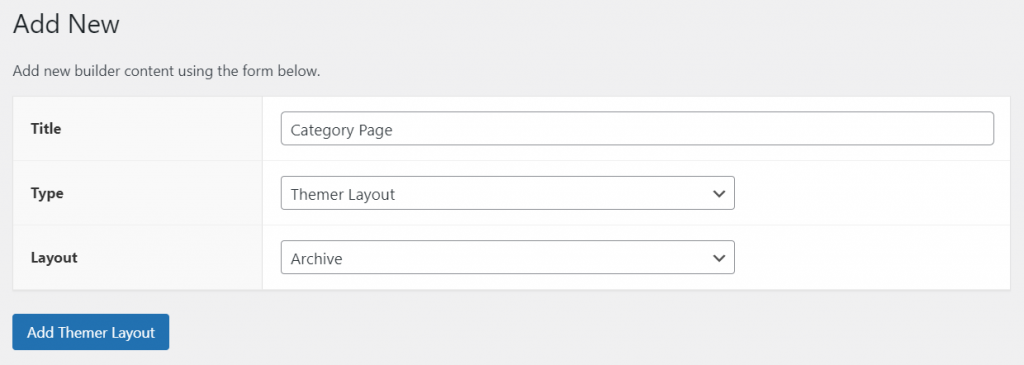
- From the WordPress admin dashboard, go to Beaver Builder → Themer Layouts.
- Click Add New.
- Enter the Title of the page, choose Themer Layout as the Type, and Archive as the Layout. Proceed by clicking Add Themer Layout.
- In the Edit Themer Layout screen, find the Location dropdown menu and choose one of the following under Post Archives:
- Post Archives – lists all the posts regardless of category.
- Post Category Archive – lists all posts assigned to the selected category or multiple categories.
- Post Tag Archive – lists all posts assigned to the chosen tag(s).
For example, we will choose Post Category Archive for this tutorial. This will allow us to create a page dedicated to one category.
- In the dropdown menu next to Post Category Archive, select the category you want to make the new page for.
- Click Publish.
- To start designing the category page, click Launch Beaver Builder.
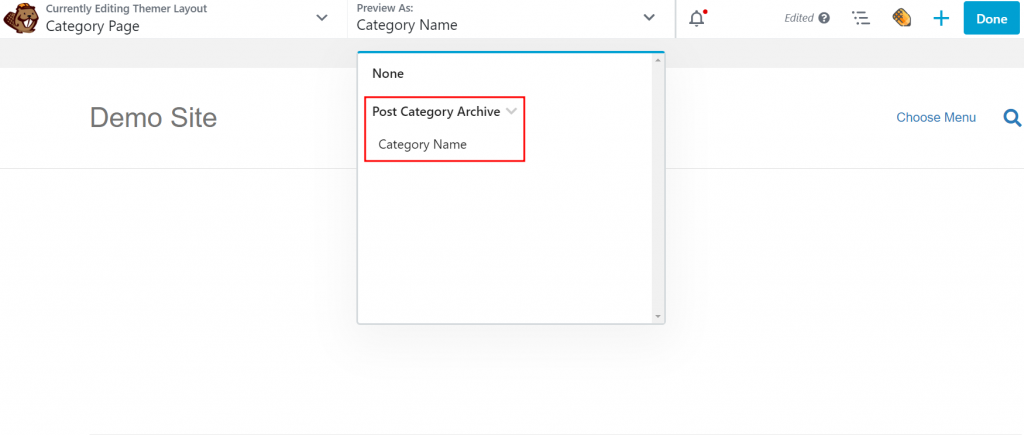
- In the Preview as menu at the top of the page, expand Post Category Archive and choose the category’s name.
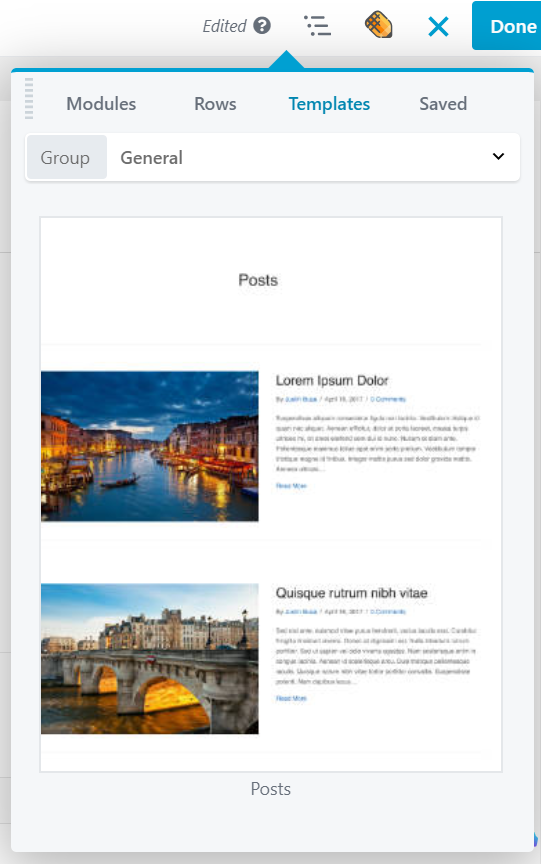
- Click the + button at the top right of the builder and open Templates.
- Choose the General group and pick the Posts template. Confirm that you want to replace the existing layout.
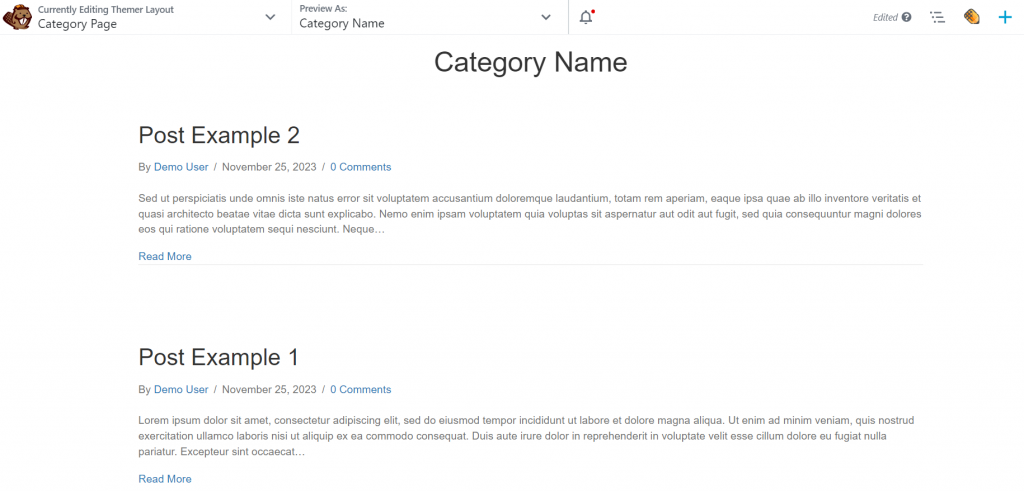
- You will see a preview showing the category’s title with a list of its related posts underneath. Feel free to customize the category page further to your liking.
- Once you’ve finished customizing the category page, click Done.
How to Create a WordPress Category Page Manually
This method involves creating a page template by adding and customizing PHP, HTML, and CSS. If you’re not comfortable editing code, you might want to hire a WordPress developer.
- Access your WordPress theme files via an FTP client like FileZilla or your hosting control panel. At Hostinger, the File Manager is easily accessible via hPanel.
- In File Manager, navigate to the /wp-content/themes directory.
- Create a child theme to ensure the changes you make won’t be overridden when updating the parent theme.
- To create a page template for all WordPress categories, use the file editor to create a new category.php file. If you’d like your page template to apply to a desired category, name it category-[your-category-name].php.
- Add the following code to the beginning of the new PHP file. Don’t forget to change “Category Slug” to your category’s name.
<?php
/*
Category Template: Category Slug
*/
get_header(); ?>
- Create the layout for your custom category page with HTML, CSS, and PHP, and standard WordPress template tags. The following example will display the main category title, show the titles and post excerpts, as well as link the title of each post to the full content. Note that the comments after each // are for descriptive purposes only. You can remove them if you’d like:
<section id="primary" class="site-content">
<div id="content" role="main">
// Display the category's title
<h1 class="archive-title"><?php single_cat_title(); ?></h1>
// Display the category posts
<?php if (have_posts()) : while (have_posts()) : the_post(); ?>
    // Display the post title and link the title to the full post
    <h2><a href="<?php the_permalink(); ?>"><?php the_title(); ?></a></h2>
   // Declare the div class to style the post excerpt entry
    <div class="entry-content">
        // Display the post excerpt
        <?php the_excerpt(); ?>
    </div>
 // Close the loop, and if no posts are found, return a statement to that effect
<?php endwhile; else : ?>
    <p>No posts found in this category.</p>
<?php endif; ?>
</div>
</section>
 // Display the footer
<?php get_footer(); ?>
You can customize the code further to add multiple tags to display posts based on broad categories, subcategories, category IDs, custom post types, custom taxonomies, and category tags. In addition, feel free to add category descriptions, a featured image, and post meta.
- Save the file on your server’s child theme folder. Make sure the file name ends with .php.
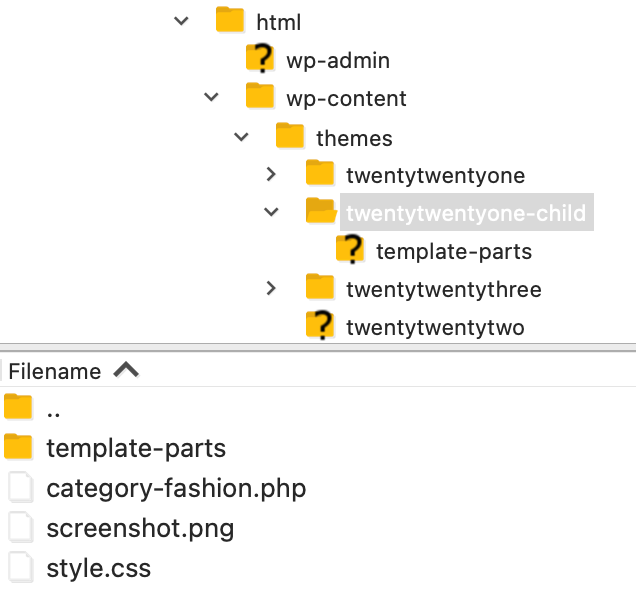
- Check the staging environment or live site to make sure the page appears as expected.
Conclusion
Now you know what a WordPress category page is and why you should create one for your site. You’ve also learned three ways to build custom WordPress pages for all your categories using the Site Editor, Beaver Builder or manually written code.
Start experimenting with different content and design elements in your category pages in WordPress to see which layouts work best for your goals and resonate with your visitors.
Read our WordPress SEO guide and apply proper techniques to search engine optimize your WordPress category pages. Don’t forget to regularly check your overall domain authority and Core Web Vitals using website optimization tools like Google Search Console.
A well-designed and optimized WordPress category page lets you enhance user experience, boost search engine ranking, and increase readership.
WordPress Category Page FAQ
If you still have questions about WordPress category pages, check out these answers to frequently asked inquiries.
What Is the Difference Between a WordPress Category Page and a Category Template?
A category page exists at a specific URL. It is dynamically generated based on the default category templates in the WordPress template hierarchy. Meanwhile, a category template is the code framework used to generate the content displayed on the category page.
Can a Page Have a Category in WordPress?
By default, WordPress pages do not have categories – posts do. However, you can assign categories to WordPress pages by using a plugin or adding the some code in your child theme’s functions.php file.
What Is the Purpose of a Category Page?
The purpose of a category page in WordPress is to organize related content, making it easier for visitors to find what they are looking for.
All of the tutorial content on this website is subject to Hostinger's rigorous editorial standards and values.
