How to install Visual Studio Code on Ubuntu
Visual Studio Code (VS Code) is a popular open-source code editor developed by Microsoft. VS Code Server, an extension of this software, lets you access the editor through a web browser, making it an ideal choice for remote development.
Similar to the desktop version, VS Code Server offers features like syntax highlighting, integrated debugging, embedded Git control, and support for various programming languages.
In this article, you’ll learn how to install VS Code Server on an Ubuntu virtual private server (VPS). By the end of this guide, you’ll be able to manage and edit your code remotely with a full-featured, browser-accessible code editor.
Prerequisites
Before installing VS Code Server on Ubuntu, ensure your server meets the following requirements.
First, it should run a long-term support (LTS) version of Ubuntu, such as Ubuntu 20.04 or later. Your VPS should also have at least 1 GB of RAM and 200 MB of available disk space to accommodate the installation and operation.
Next, use a stable internet connection to download the necessary installation files and dependencies. Additionally, you’ll need administrative or sudo access on your VPS to install the software.
Installing VS Code on Ubuntu methods
There are several ways to install VS Code Server on Ubuntu, either automatically via a template or manually using Linux commands. Choose one that best suits your VPS setup and technical expertise. Please note that for each method, we use Ubuntu 24.04.
Installing using the Hostinger VPS template
Using Hostinger’s VPS template is the simplest way to install VS Code Server on Ubuntu. Available on all our VPS hosting plans, this template lets you run the code editor with just a few clicks.
It also comes with a preconfigured environment, so you don’t need to manually set up the necessary dependencies and components, which can be error-prone for beginners.
Follow these steps to install the VS Code Server template on Hostinger’s VPS:
- Log in to hPanel with your Hostinger account and access VPS → Manage.
- In the left sidebar, go to OS & Panel → Operating System.
- Select the Application tab and click VS Code.
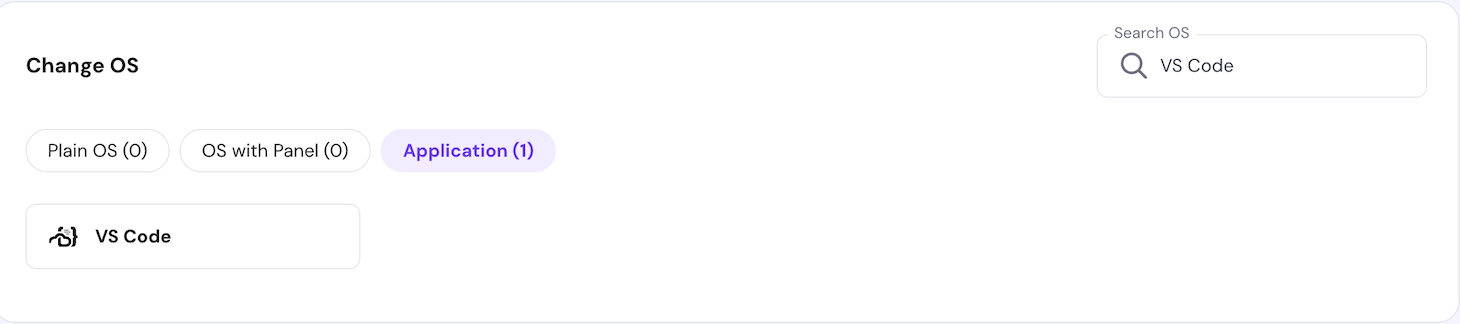
- Hit Change OS and follow the on-screen prompts to set up a new password for VS Code Server.
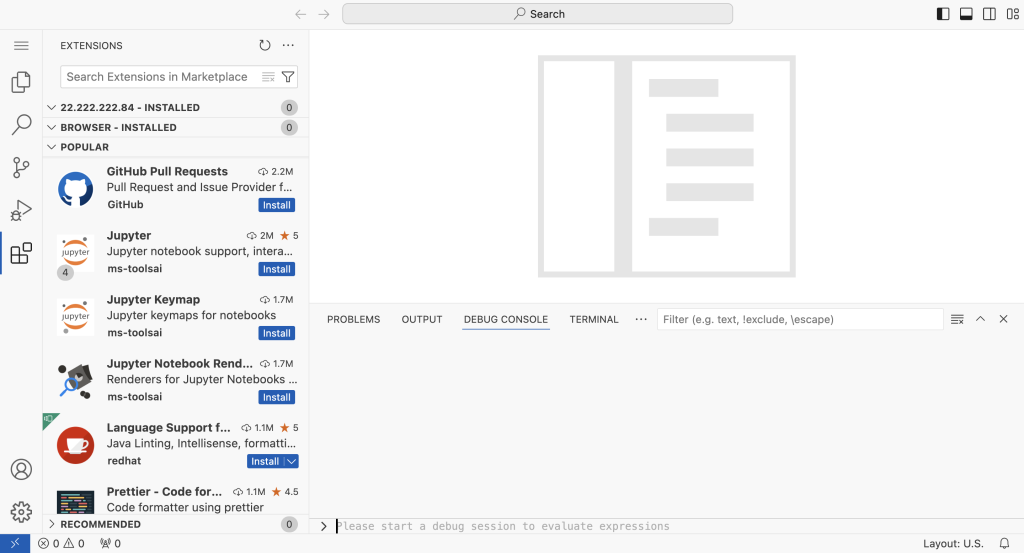
Wait for the installation process to complete, which should take about five minutes. Once done, go to the VPS Overview page and click the Manage App to access the editor. Enter the password you set up earlier.

After the setup, you can start customizing your environment, installing third-party extensions, and managing your code repositories. Check out our guide on using the VS Code VPS template to explore all available features fully.

Installing through the install.sh script
You can also use the install.sh script to install VS Code Server on your Ubuntu VPS. This script automatically detects your system’s package manager and installs the appropriate package, minimizing potential compatibility issues.
Here’s how:
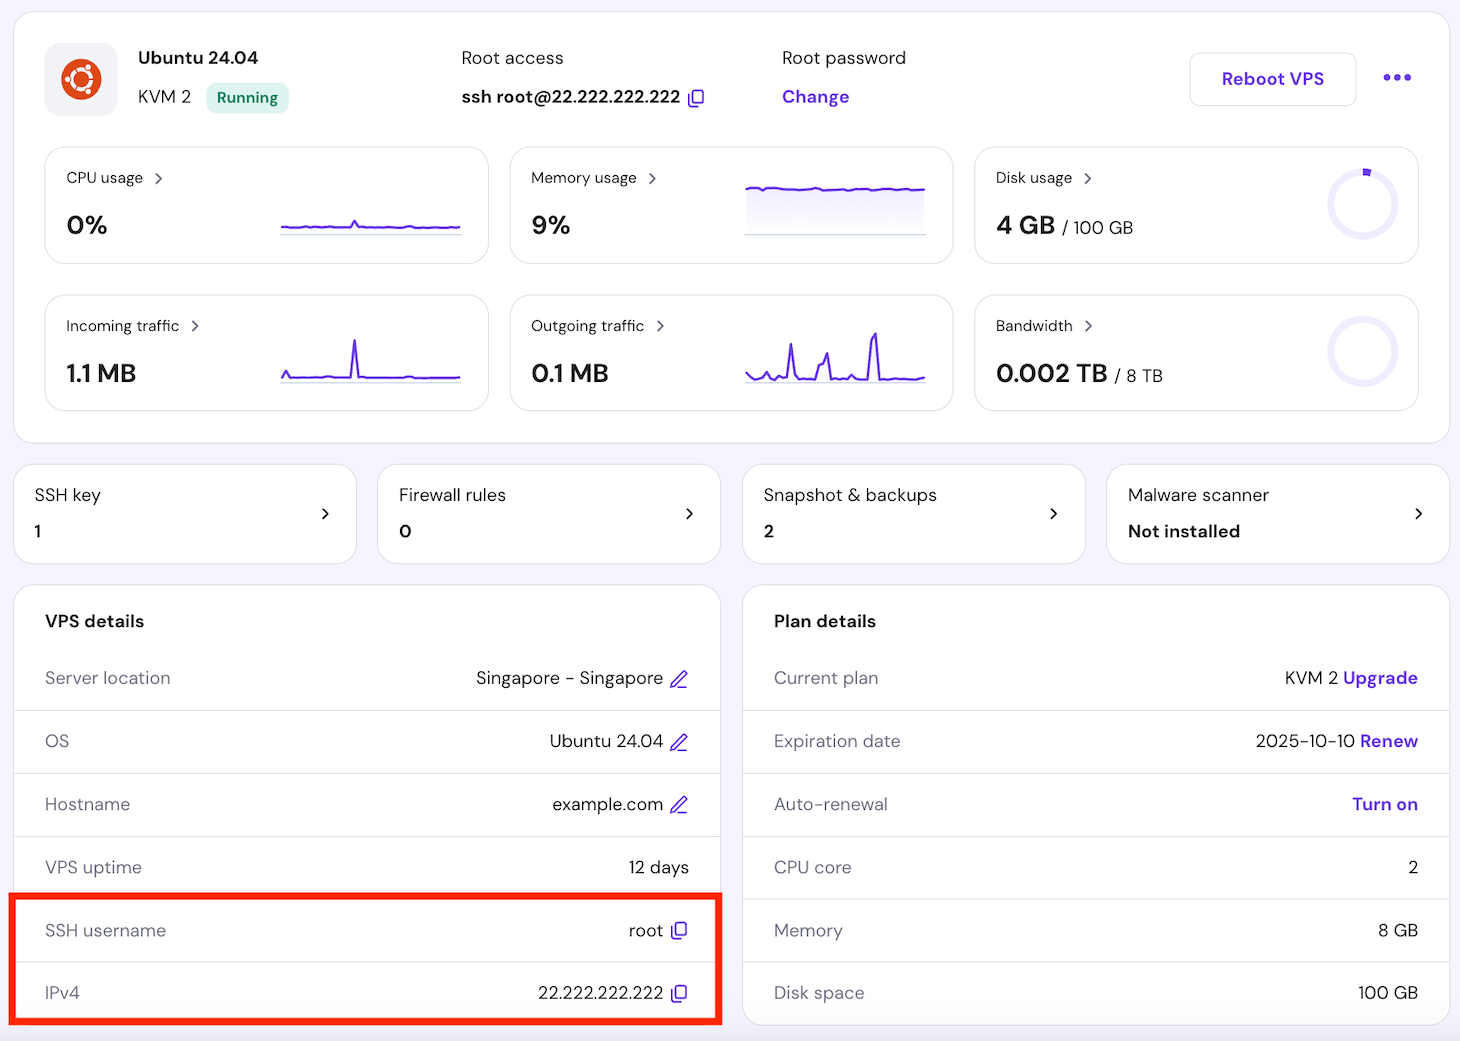
- Log in to your server via a terminal or SSH client application like PuTTY. For Hostinger VPS customers, find your credentials by navigating to the VPS details section at the bottom of your VPS Overview page.
- Run the following curl command to begin the installation:
curl -fsSL https://code-server.dev/install.sh | sh
You can also customize the command. For example, to install a specific version instead of the latest release, execute:
curl -fsSL https://code-server.dev/install.sh | sh -s -- --version=X.X.X
Replace X.X.X with the specific version you want to use.
- Open the configuration file with the nano text editor to edit the bind address and retrieve the password:
nano ~/.config/code-server/config.yaml
Find the line that starts with bind-addr: and update it to match your server’s IP address:
bind-addr: your_vps_ip:8080
While in the file, copy the password for use when logging in.

Save your changes and exit nano by pressing Ctrl + X → Y → Enter.
- Start VS Code Server by running:
code-server
- Open your web browser and go to http://your_vps_ip:8080. Log in with the same password from the configuration file.
Installing via a .deb package
Manually configuring VS Code Server via a .deb package provides more control over the installation process. With this method, you can choose the software version that best suits your needs and ensure everything is set up exactly as you want.
Here are the instructions:
- Download the specific .deb package from the VS Code Server GitHub releases page. Replace $VERSION with the desired release:
curl -fOL https://github.com/coder/code-server/releases/download/v$VERSION/code-server_$VERSION_amd64.deb
- Install the package using the dpkg command:
sudo dpkg -i code-server_${VERSION}_amd64.deb
If any dependency issues arise during the installation, resolve them by running:
sudo apt --fix-broken install
- Edit the configuration file to set the correct bind address and note down the password, similar to the previous method:
nano ~/.config/code-server/config.yaml
- Enable and start the VS Code Server service to ensure it starts automatically whenever your VPS reboots:
sudo systemctl enable --now code-server@$USER
- To check that VS Code Server is running, use the following command:
systemctl status code-server@$USER
If the service is active, access VS Code Server via http://your_vps_ip:8080.
Installing using a standalone release
The standalone release method lets you set up VS Code Server without relying on the system’s package manager. It’s ideal for advanced users who require custom environments or where you need to isolate the installation.
Here’s a guide to installing VS Code Server through a standalone release:
- Download the latest standalone release .tar.gz archive from the official GitHub repository:
curl -fL https://github.com/coder/code-server/releases/download/v$VERSION/code-server-$VERSION-linux-amd64.tar.gz -o code-server-$VERSION-linux-amd64.tar.gz
- Extract the archive contents to your preferred directory using the tar command. For example, extract to ~/.local/lib:
mkdir -p ~/.local/lib ~/.local/bin

tar -xzvf code-server-$VERSION-linux-amd64.tar.gz -C ~/.local/lib
- Rename the directory for easier access:
mv ~/.local/lib/code-server-$VERSION-linux-amd64 ~/.local/lib/code-server-$VERSION
- Create a symbolic link in your ~/.local/bin directory to make it easier to run the code-server command from anywhere:
ln -s ~/.local/lib/code-server-$VERSION/bin/code-server ~/.local/bin/code-server
- Add code-server to your system PATH. This allows you to run the command without needing to specify the full path every time:
export PATH="~/.local/bin:$PATH"
- To make this change permanent, add the export command to your shell’s startup file, such as .bashrc:
echo 'export PATH="~/.local/bin:$PATH"' >> ~/.bashrc

source ~/.bashrc
- Adjust the bind address with your server’s IP and copy the password for later use:
nano ~/.config/code-server/config.yaml
- Start VS Code Server by executing the following:
code-server
After that, access your VS Code Server by opening your web browser.
How to uninstall Visual Studio Code on Ubuntu
You might want to uninstall VS Code Server from Ubuntu for several reasons, such as switching to another code editor, freeing up disk space, or reconfiguring your server environment.
The removal process varies depending on how it was installed.
Hostinger VPS template
If you installed VS Code Server using Hostinger’s VPS template, you can uninstall it by switching to another template.
Select a different template or Linux distribution on the same Operating System page. Then, follow the on-screen prompts to complete the change. This will automatically remove the existing VS Code Server setup.
Important! Make sure to back up your server data before switching templates, as this process will remove all existing data on the server.
install.sh script
If you used the install.sh script to install VS Code Server, first remove its installation files:
rm -rf ~/.local/lib/code-server-*
Next, delete any remaining configuration files on your system:
rm -rf ~/.config/code-server
.deb package
For users who configured VS Code Server via a .deb package, use APT to uninstall the software:
sudo apt remove code-server
You can also clean up any residual configuration files with:
sudo apt autoremove
Standalone release
For installations done using a standalone release, you need to remove the installation directory manually:
rm -rf ~/.local/lib/code-server-*
If you created a symbolic link for easier access to the code-server command, delete it:
rm ~/.local/bin/code-server
Remove any remaining user data, settings, or configuration files:
rm -rf ~/.local/share/code-server ~/.config/code-server
Conclusion
This guide has covered different methods for installing VS Code Server on Ubuntu, including using Hostinger’s VPS template and the install.sh script. Each technique offers further levels of control and flexibility, so choose the one that best fits your needs.
Be sure to keep VS Code Server up to date to access the latest features, performance boosts, and security improvements. We also recommend trying out extensions to enhance your coding experience further.
How to install VS Code on Ubuntu FAQ
What are the system requirements for installing Visual Studio Code?
To install Visual Studio Code on Ubuntu, you’ll need a system running Ubuntu 20.04 or later, with at least 1 GB of RAM and 200 MB of available storage. A stable internet connection is also required to download the installation files.
Is there a package repository for VS Code?
Yes, the VS Code desktop version has an official Microsoft APT repository. You can also install VS Code Server on VPS by downloading a .deb package using the curl command.
Do I have to uninstall any other text editors before installing VS Code?
No, you don’t need to uninstall other text editors before installing VS Code. Multiple code editors can coexist on the same system without issues, and you can easily switch between them as needed.

Ariffud is a Technical Content Writer with an educational background in Informatics. He has extensive expertise in Linux and VPS, authoring over 200 articles on server management and web development. Follow him on LinkedIn.
