How to run Nginx in a Docker container: From image pull to configuration
Nginx is a high-performance web server often used as a reverse proxy, load balancer, and content cache. Its efficiency and flexibility have made it a go-to choice for serving static files, managing traffic, and improving application speed. Running Nginx inside a Docker container takes things further, giving you portability, quick deployment, and cleaner management.
In this guide, we’ll walk you through setting up Nginx with Docker from scratch. You’ll learn how to pull the official image, run Nginx in a Docker container, map ports, and serve custom content. We’ll also cover how to use your own configuration files, manage containers efficiently, and use Docker Compose for more complex setups.
This step-by-step guide will help you get Nginx running the way you want – quickly and cleanly.
Prerequisites for running Nginx with Docker
Before you start, make sure you have the following:
- Access to a VPS – if you don’t yet have one, Hostinger offers a range of VPS hosting options.
- Docker installed on your server.
- Basic familiarity with Docker commands.
- Docker Compose installed for advanced configurations.
With the above prerequisites in place, you’ll be ready to begin.
Important! Docker commands require sudo privileges. To simplify usage, you can configure Docker to run without sudo by adding your user to the Docker group. This guide omits sudo for brevity; however, ensure you either prepend sudo to commands or set up Docker not to require it.

1. Pull the Nginx Docker image
To get started, you’ll need the official Nginx image for Docker. Pull it using:
docker pull nginx
This command fetches the latest stable Nginx image from Docker Hub. It’s recommended that you use the official image that is maintained by the Nginx team, as it is regularly updated and free of unnecessary extras.
Once the Nginx image is downloaded, you can confirm it’s available locally by running:
docker images

Look for nginx in the repository column – this identifies the image we’re looking for.
2. Run Nginx in detached mode
With the Nginx image ready, you can run it using docker run nginx. In this example, we run it in detached mode:
docker run -d --name nginx-server -p 80:80 nginx
Here’s what the command does:
- -d – runs the Docker container in detached mode (in the background).
- –name – gives your container a name, in this case, nginx-server.
- -p 80:80 – maps your machine’s port 80 to the container’s port 80, which we’ll explore more in depth in the next section.
Detached mode allows you to run processes in the background, thus leaving your terminal open for other commands and interactions. It’s beneficial when using web servers like Nginx, which are meant to run continuously in the background.
After starting the container, you can confirm it’s running with the docker ps command:

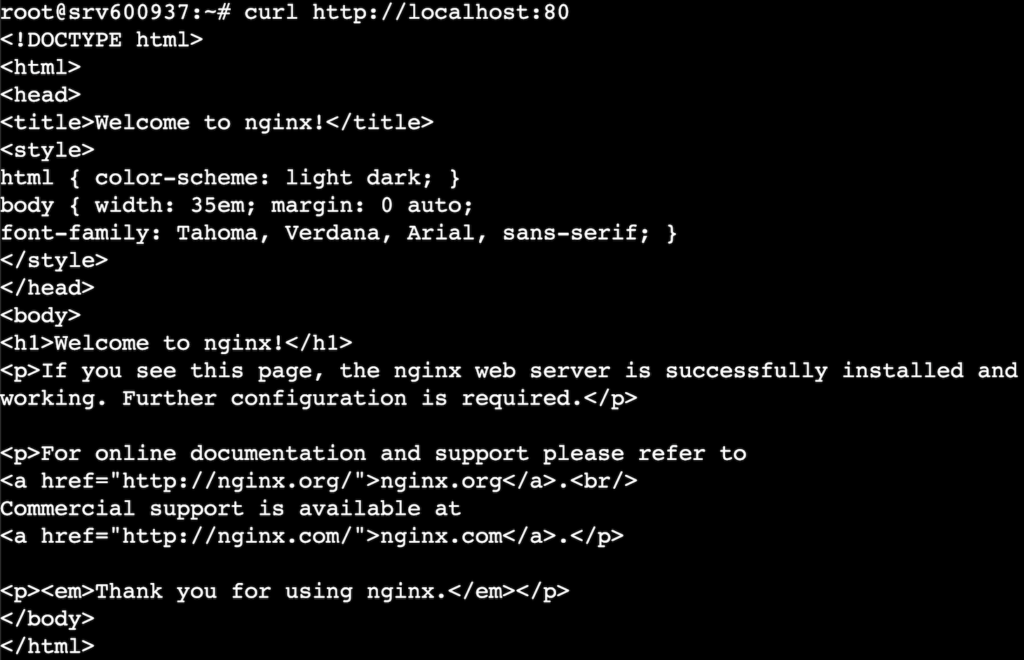
And Nginx is now accessible over port 80, which we can confirm by running:
curl http://localhost:80
This will return the default Nginx web page, which will be similar to this:
3. Expose ports for Nginx
By default, Nginx listens on port 80 inside the container. The -p flag tells Docker which host port to connect to that internal one. The example provided in the previous section mapped port 80 to the same port on the Docker container.
docker run -d --name nginx-server -p 80:80 nginx
If port 80 is already in use or you want to run multiple Nginx containers, you can map to a different host port like this:
docker run -d --name nginx-alt -p 8080:80 nginx
In the port section -p 8080:80, we use the first value (8080) to tell which port on the machine corresponds to port 80 on the container. You can now run docker ps to see available containers, the PORTS column will indicate this mapping:

If you ever see an error saying the port is “already allocated,” it means something else is using it. Pick any other unused port and map the container port to it instead.
Important! Tools like lsof -i :80 or netstat can help you figure out what’s using a port and which ports are free.
4. Configure Nginx with custom settings
To customize Nginx, you can mount your own Nginx configuration files or custom HTML content.
Using a custom nginx.conf file
Using Nginx as a reverse proxy is a common setup when you’re running a web application backend (like Node.js, Flask, or Express) and want Nginx to sit in front of it to manage traffic, caching, or SSL. You can do this by mounting a custom nginx.conf file.
- Create and open a custom nginx.conf file in your project directory:
nano nginx.conf
- Add configuration to your nginx.conf file. For this example, we’ll configure Nginx to proxy requests to a backend service running on http://127.0.0.1:3000 (localhost):
#configure number of worker processes. 1 is enough for lightweight setups
worker_processes 1;
#configure number of simultaneous connections per worker
events {
    worker_connections 1024;
}
#create HTTP block to define how to handle HTTP requests
http {
    #start a web server block listening to port 80 inside the Docker container
    server {
        listen 80;
        #match all requests at the root path
        location / {
            #define where to forward requests
            proxy_pass http://127.0.0.1:3000;
            #define HTTP version
            proxy_http_version 1.1;
            #add support for connection upgrades (websocket use cases)
            proxy_set_header Upgrade $http_upgrade;
            proxy_set_header Connection 'upgrade';
            #pass original Host header to the backend
            proxy_set_header Host $host;
            #add cache bypass for upgraded connections
            proxy_cache_bypass $http_upgrade;
        }
    }
}
- Run the container with your custom configuration:
docker run -d --name nginx-reverse-proxy \
  -p 8080:80 \
  -v /full/path/to/nginx.conf:/etc/nginx/nginx.conf:ro \
  Nginx
-v /path/to/nginx.conf:/etc/nginx/nginx.conf:ro – mounts your custom config inside the container and makes it read-only (:ro) to prevent unintended edits. Don’t forget to replace /full/path/to/nginx.conf with the actual path to your nginx.conf file.
- Test the configuration with curl:
curl http://localhost:8080
This command should return content from your backend, now through port 8080.
- If you need to edit your nginx.conf, don’t forget to restart the container afterward:
docker restart nginx-reverse-proxy
Mount HTML content
One of the most common and straightforward use cases for Nginx is serving static websites made up of HTML, CSS, JavaScript, and image files. With Docker and Nginx, you can do this easily by mounting your local website directory into the Docker container.
We’ll again use the -v flag in the docker run command:
docker run -d --name nginx-static \
  -p 8080:80 \
  -v /path/to/site:/usr/share/nginx/html:ro \
  Nginx
Replace /path/to/site with the full path to your HTML content. In this case, we’ll mount it to /usr/share/nginx/html directory inside the container, from which Nginx is configured to serve static content. We add the :ro flag to make it read-only, avoiding unwanted edits to files from inside the container.
The default Nginx configuration will:
- Look for index.html in the root directory.
- Handle basic content types (HTML, CSS, JS, images, etc.).
- Serve the files as-is with minimal overhead.
You will, however, need a custom nginx.conf file if you want to:
- Serve files from a different directory inside the container.
- Add custom headers, redirects, caching rules, or access controls.
- Use Nginx for more complex tasks (like reverse proxying, load balancing, etc.).
For basic static site hosting, the default configuration works out of the box.
5. Manage Nginx containers
Managing your Nginx container is easy once it’s running. Here are some essential commands to help you out.
Starting and stopping containers
To stop a Docker container, use the docker stop command:
docker stop nginx-server
If you want to start a stopped container, use docker start:
docker start nginx-server
If you want to restart a running container, use docker restart:
docker restart nginx-server
Replace nginx-server with your Docker container’s name if it’s different.
Inspecting logs
There might be occasions where you want to review your container logs. You can do that with the docker logs command:
docker logs nginx-server
This shows the container’s output, which can be useful for checking errors or confirming it started correctly:

Removing old containers
If you no longer need a container, stop it first and then remove it with docker rm command:
docker stop nginx-server
docker rm nginx-server
Cleaning up helps to keep your Docker environment tidy and prevents conflicts.
6. Use Docker compose with Nginx
As your project grows, managing multiple containers manually with long docker run commands becomes tedious. That’s where Docker Compose comes into play. It lets you define services, ports, volumes, and networks in a single YAML file, making your stack easy to spin up, version, and maintain.
Here’s a sample docker-compose.yml file:
#specify the Compose file format. Version 3 is stable and widely supported
version: '3'
#start the services block
services:
  #define a service block for Nginx
  nginx:
      #define what image to use, in this case official image
	image: nginx
      #name the container
	container_name: nginx-compose
      #define port mapping. Here 8080 on host to 80 in the container
	ports:
  	- "8080:80"
      #define volumes
	volumes:
      #mount local HTML folder to containers web root
  	- ./html:/usr/share/nginx/html:ro
      #mount custom Nginx config file
  	- ./nginx.conf:/etc/nginx/nginx.conf:ro
Put this in the same folder as your nginx.conf and HTML files.
Next, start the container with:
docker-compose up -d
The -d flag runs it in the background, otherwise known as detached mode, as we previously learned. Make sure you run this command in the same folder where your docker-compose.yml file is.
When you’re done, you can stop and remove it with:
docker-compose down
Multi-service setup
Another area where Docker Compose shines is when running multiple services at once. Let’s say you have a back-end service, like a Node.js API or a Flask app, to which you want Nginx to proxy requests.
Your docker-compose.yml file for this setup would look something like this:
#define Compose file format/version
version: '3'
#start services block
services:
  #start backend block
  backend:
    #build Node.js app from local Dockerfile
    build: ./backend
    #name the backend container
    container_name: node-app
    #map the ports
    ports:
      - "3000:3000"
    #connect to shared network for communication with Nginx
    networks:
      - app-network
  #define Nginx block
  nginx:
    #use the official image
    image: nginx
    #name the Nginx container
    container_name: nginx-proxy
    #map the ports
    ports:
      - "8080:80"
    #mount Nginx config
    volumes:
      - ./nginx/nginx.conf:/etc/nginx/nginx.conf:ro
    #add dependency on backend (to start Nginx after backend)
    depends_on:
      - backend
    #connect to shared network for communication with backend
    networks:
      - app-network
#define isolated network for both services
networks:
  App-network:
Next, you’ll need a nginx.conf file for reverse proxying. We’ll reuse the same file used before with minor changes:
worker_processes 1;

events {
    worker_connections 1024;
}

http {
    server {
        listen 80;

        location / {
            proxy_pass http://backend:3000;
            proxy_http_version 1.1;
            proxy_set_header Upgrade $http_upgrade;
            proxy_set_header Connection 'upgrade';
            proxy_set_header Host $host;
            proxy_cache_bypass $http_upgrade;
        }
    }
}
The only difference between this configuration and the previous one we used for reverse proxy setup is the proxy_pass http://backend:3000; line, pointing to the service name defined in the Compose file.
With this configuration in place, you can now run Docker Compose to execute both services at the same time, with a single command:
docker-compose up -d
You can also stop both services with:
docker-compose down
Docker Compose is more than a shortcut – it’s the backbone of clean, repeatable infrastructure. Whether you’re working solo or building production-ready stacks, learning to use Compose effectively sets you up for smooth scaling, testing, and deployment.
Conclusion
You’ve just gone through the process of running Nginx inside a Docker container – from pulling the official image to serving content and customizing the configuration. If you followed this guide thoroughly, you’ll now know how to:
- Run containers in detached mode so they keep working in the background.
- Map ports between your host and the container to control how traffic flows.
- Mount custom Nginx configuration files to tailor its behavior for specific use cases.
- Serve static files with zero configuration using the default Nginx setup.
- Manage containers easily with start, stop, restart, and log inspection commands.
- Use Docker Compose to simplify multi-container setups or create reusable workflows.
Whether hosting a landing page, building a containerized development stack, or fine-tuning Nginx’s performance, this should give you a strong foundation for working with Nginx and Docker.
You’ve got the tools – now it’s time to build your next world-changing project.
How to run Nginx in Docker FAQ
How can I run multiple Nginx containers on the same server?
Yes, you can run multiple Nginx containers by mapping each to a different host port using the -p flag (like -p 8081:80, -p 8082:80). Ensure each container has a unique name and port binding.
Can I use Docker Compose with other services alongside Nginx?
Absolutely. Docker Compose is designed to run multi-container applications. You can define Nginx alongside other services like Node.js, PHP, or a database in the same docker-compose.yml file and manage them together.
Can I run a specific version of Nginx in Docker?
Yes, you can specify the version in the docker run or docker-compose.yml file. For example, use nginx:1.21 to run version 1.21. The official Nginx image on Docker Hub supports version tagging.

Dominykas is a Technical Content Writer with a background in cloud engineering and technical support. He’s operated in fields like fintech and point-of-sale and is passionate about software development, DevOps, and AI. Find him on LinkedIn.
