How to Host a dedicated Terraria server using Hostinger Game Panel and manual configuration
A dedicated Terraria server gives you more flexibility and customization options that make the gameplay more interesting. For example, you can install various mods, set up a custom world, and play multiplayer with friends.
In this tutorial, we will explain how to host a dedicated Terraria server using two methods – with Hostinger’s Game Panel and manually with commands via Terminal. Since they differ in use cases and difficulty, choose according to your preferences and needs.
Prerequisites
To set up a dedicated Terraria host, you need a virtual private server (VPS) hosting plan from a provider like Hostinger. Ideally, it runs a newer version of the Linux operating system since the steps and commands will differ otherwise. In this tutorial, we will use Debian 12.
Your server should also have sufficient hardware resources to ensure optimal performance and gameplay responsiveness. While there are no strict requirements, we recommend a machine with at least 1 GB of RAM, a multi-core processor, and a solid-state drive (SSD).
The Hostinger KVM 2 plan is an excellent choice. In addition to powerful hardware, it provides various features that help simplify the game server setup process, like our VPS AI assistant Kodee, which generates commands with simple prompts.
If you prefer a graphical user interface (GUI), use our Game Panel 2 plan of dedicated Terraria server hosting. It offers similar hardware and features as KVM 2 but with additional tools like the one-click installer for various games with dedicated server compatibility.

How to host a dedicated Terraria server with Hostinger Game Panel
Hostinger Game Panel lets you set up and manage a private game server without commands, making it suitable for beginners. In addition to being more efficient, this method is safer since you won’t run the wrong utilities.
Once you purchase a Game Panel hosting plan and finish the onboarding process, follow these steps to set up a Terraria dedicated server:
- On hPanel, click VPS at the sidebar.
- Click Manage on your gaming VPS.
- In the VPS Overview menu, click Manage panel.

- On the login page, enter your credentials and click Login. You can obtain these details from the previous Overview menu.
- Click Create instance and select Terraria from the drop-down list.
- Click Create Instance to confirm.
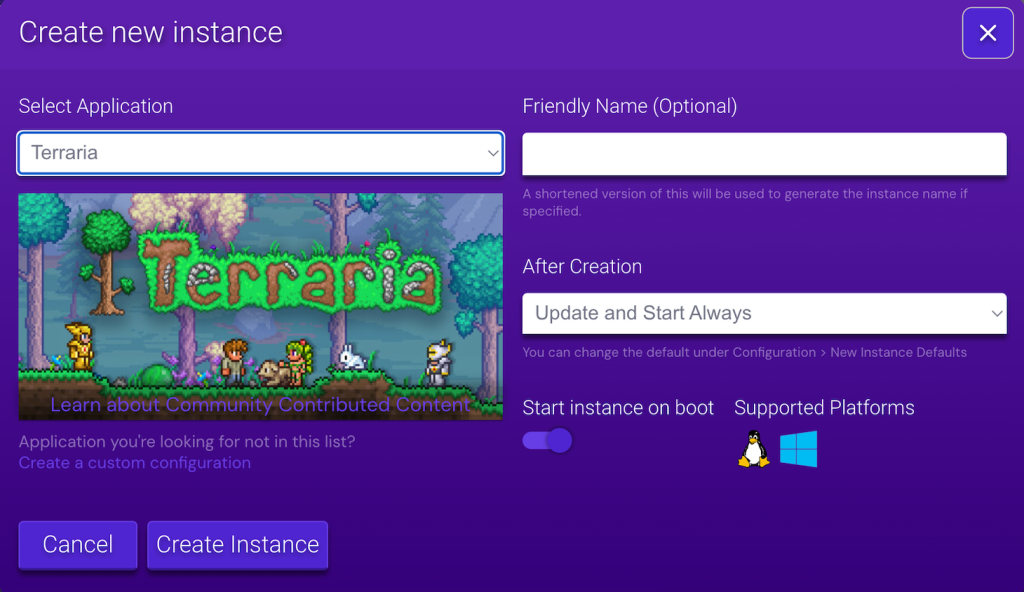
Wait until the installation process is finished, which should take a couple of minutes. Once finished, double-click the instance, click Start, and enter your Steam account credentials for authentication.
Pro Tip
Hostinger Game Panel also supports custom Terraria servers like tModLoader and Tshock. You can install them by selecting these applications when creating an instance.
That’s it! Now, scroll down to the Connection info section to obtain the IP address. Then, open the Terraria Game Client → Multiplayer and enter the details to connect to the server.
How to manually host a dedicated server in Terraria
If you wish to use another operating system or configure additional software components, set up your dedicated Terraria Server manually. Before proceeding, we recommend downloading the cheat sheet below to help understand what the commands do.

1. Log in to your VPS via SSH
To run commands on your VPS, you must connect via SSH using an application like PuTTY or Terminal. Alternatively, Hostinger customers can do so via their web browser using the Browser terminal feature.
You can find the login credentials under the VPS details section at the bottom of the VPS Overview menu in hPanel.
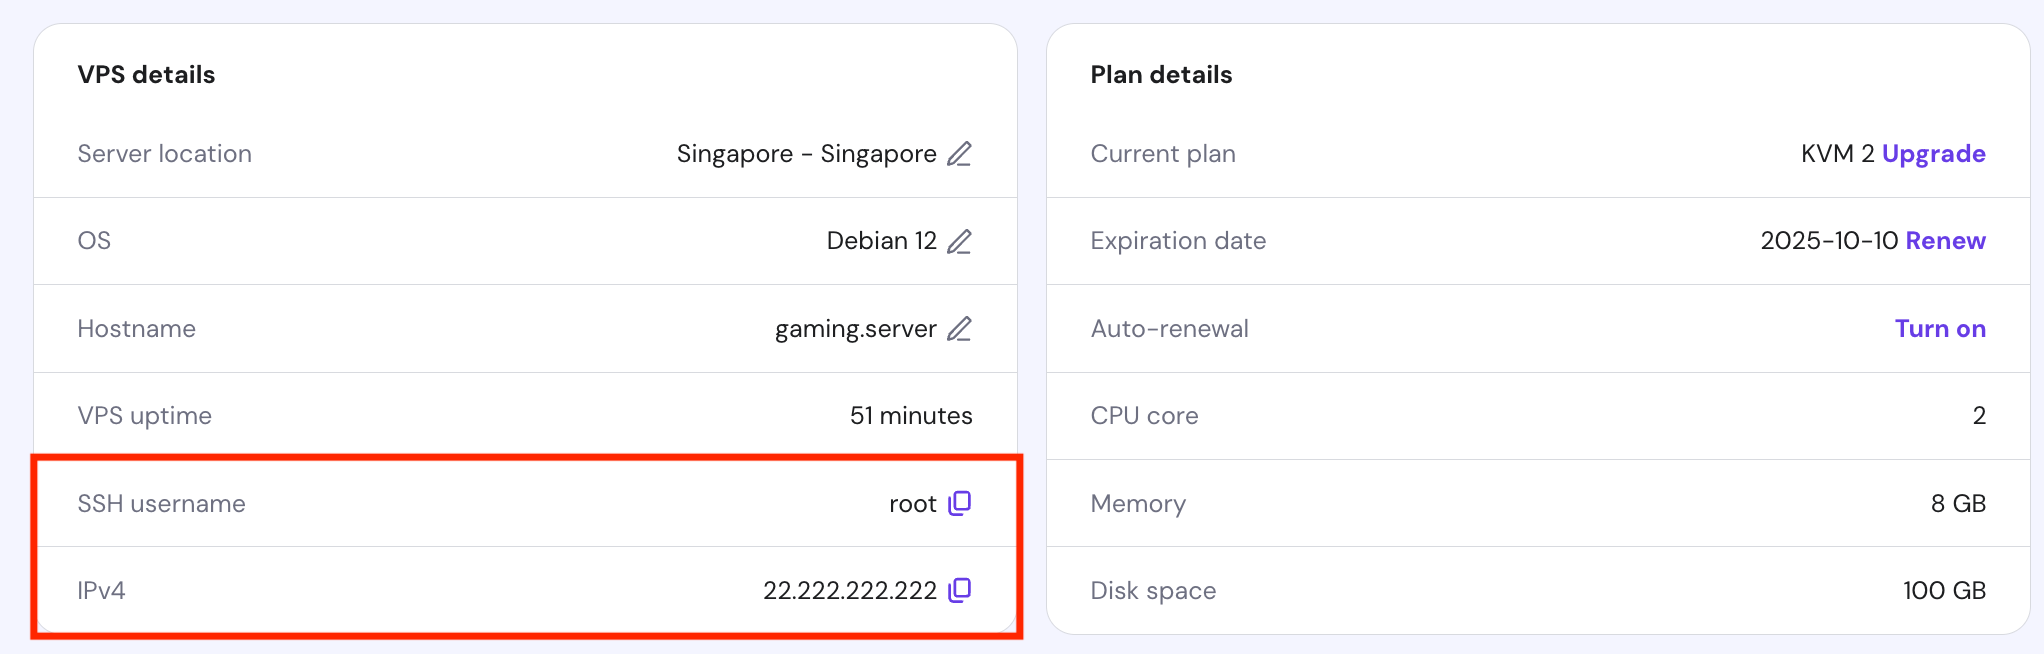
By default, you will connect as root, which can run administrative commands without confirmation. Using this account to manage your server can be risky since you might accidentally execute the wrong utility.
With that in mind, let’s use a superuser instead. Running administrative utilities with this account requires a password and the sudo prefix, minimizing the risk of accidental execution.
Create one by entering the following, with username being your desired account name:
useradd username
Enter a new password and other details. Once created, add the new user to the sudoers group to grant it the superuser privileges:
usermod -a -G sudo username
Now, let’s switch to the new user by running the following command:
su username
Enter cd to return to the main directory. We are set! Now, let’s start installing the required tools and server software components.
2. Download the required tools
The Terraria server doesn’t require any dependency to run. However, we must install several tools to download and extract the components. Before doing so, let’s update the system library using this command:
sudo apt update && sudo apt upgrade
Now install the following tools:
- Wget — a utility for downloading the Terraria server components from its website.
- Unzip — a tool for extracting an archive file.
- Screen — a terminal multiplexer for running the Terraria server in the background.
Configure them by running this command:
sudo apt install wget tar screen
Now, enter the following commands one by one to check if these tools are installed properly:
unzip --version

wget --version

screen --version
If your command-line interface outputs version numbers like the following, the tools are properly configured. Otherwise, you will see the “command not found error” and must rerun the installation commands.
3. Download the Terraria server files
Download the Terraria server components using the wget command. Remember to replace URL with the actual download link:
sudo wget URL
Check out the Terraria wiki to learn more about the available server version and their download URLs. For example, we will use version 1.4.2.3:
sudo wget https://terraria.org/api/download/pc-dedicated-server/terraria-server-1423.zip
Once the download is finished, extract the file using the following command:
sudo unzip terraria-server-1423.zip
Terminal will extract all the software components into a new folder, whose name depends on the version number. For example, if you install version 1.4.2.3, the name will be 1423. You can check if it exists by running this command:
ls

Now, navigate to the new folder using the cd command. Remember to change the name accordingly:
cd 1423
List the directory’s content by running ls again. You should see a folder called Linux. Let’s navigate to it using this command:
cd Linux
Within the folder, check whether you have TerrariaServer.bin.x86_64 – the file we will use to start the game server. You can do so by running ls and filtering the output with grep like so:
ls | grep TerrariaServer.bin.x86_64
If the binary file doesn’t exist, try downloading and extracting the server archive again. Otherwise, allow the current user to run it by changing the permission using this command:
sudo chmod +x TerrariaServer.bin.x86_64
4. Start the server
Now, let’s start the Terraria server by running the following command:
./TerrariaServer.bin.x86_64
During the first startup, Terraria will ask you to enter information about your new game world, like its size and difficulty. You can find the acceptable values at the top of the question.
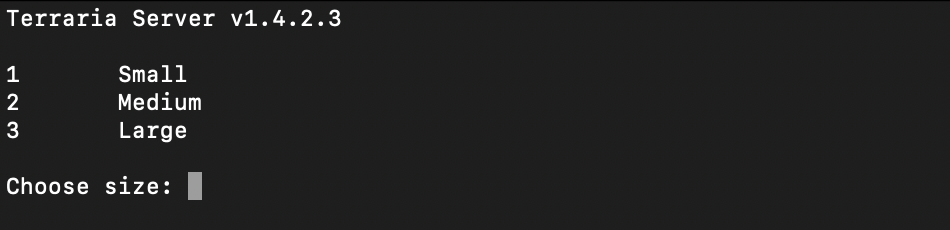
Wait until Terraria finishes generating your new world. Once completed, select it as the area to load. Then, enter other details like the maximum number of players, the port number, and the port forwarding option.
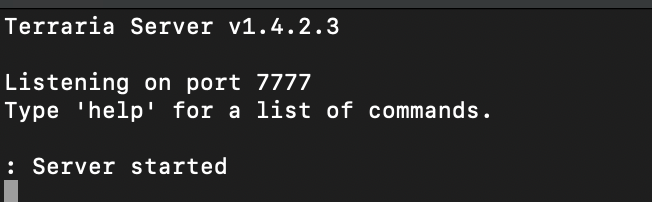
You will learn about ports in the later section. For now, let’s use the default value by hitting Enter. That’s it! The terminal should show that your server has started.
Terraria will save your world files in the ~/.local/share/Terraria/Worlds/ directory. You can also upload an existing area to the folder using a file transfer protocol (FTP) client like FileZilla.
However, running the server directly on the main Terminal shell can be unreliable. Since it will shut down when you terminate the SSH session, you must maintain the connection to your VPS.
To keep your Terraria server running in the background, launch it using a multiplexer like Screen. Create a new virtual shell with this command:
screen
Then, navigate to the Terraria folder and run the startup script normally:
cd 1423/Linux

./TerrariaServer.bin.x86_64
Press Ctrl + A and D to detach from the Screen session and return to the main Terminal shell. Now, you can disconnect from your VPS without interrupting the Terraria server.
To return to the Screen session where the Terraria server is running, enter the following command:
screen -r
Advanced Terraria server configurations
While you use the default settings, changing several configurations helps optimize your game server performance and security. Here are several tasks to consider.
Customizing server settings
You can change your Terraria server configuration by entering various console commands into Terminal. For instance, you can modify the number of player slots and the room’s password.
Alternatively, you can create a configuration file to apply the settings automatically during the server startup. Here’s how to do so:
- Navigate to the folder where you want to create the configuration file. You can use any location, but we recommend the root Terraria directory:
cd ~/.config/TerrariaServer
- Create the file using the Nano text editor:
sudo nano serverconfig.txt
- Enter your desired server settings. Check the Terraria wiki guide to learn more about the configurations.
- Once finished, press Ctrl + X, Y, and Enter to save the changes.
Now when you start the Terraria server, apply the settings by calling the file using the -config option like so:
./TerrariaServer.bin.x86_64 -config serverconfig.txt
While you can specify several server settings in the configuration file, it won’t let you modify your Terraria world. You must use the console commands to do so.
Hostinger Game Panel users can directly edit the server configuration by navigating to the Terraria instance → sidebar → configurations → Terraria Server. Meanwhile, go to Terraria Generator Settings to modify your game world.
Port forwarding and firewall setup
Hostinger Game Panel automatically configures your Terraria server’s network settings to ensure players can connect seamlessly. However, if you set up the host manually, you might need to adjust port and firewall configurations.
Port forwarding means opening a specific endpoint to allow clients to connect to your VPS and use the hosted service. During the startup process, Terraria should ask you to enter the port number to enable connection.
If you encounter issues, however, open the port manually by creating a new firewall rule. For Debian, the easiest way to do it is using the Uncomplicated Firewall (UFW). Install it by running:
sudo apt install ufw
Then, add port 7777 for Terraria and 22 for SSH by entering these commands subsequently:
sudo ufw allow 7777/tcp

sudo ufw allow 22/tcp
Enable UFW to apply the rules by running the following. If you already have the firewall running, replace enable with reload:
sudo ufw enable
In Hostinger VPS, you can add firewall rules without any command via hPanel. To do so, open your VPS Overview menu and follow these steps:
- Navigate to the sidebar → Security → Firewall.
- Click Create firewall configuration.
- Enter a name and hit Create.
- From the list, you will see the newly created rule. Click the three-dot icon → Edit.
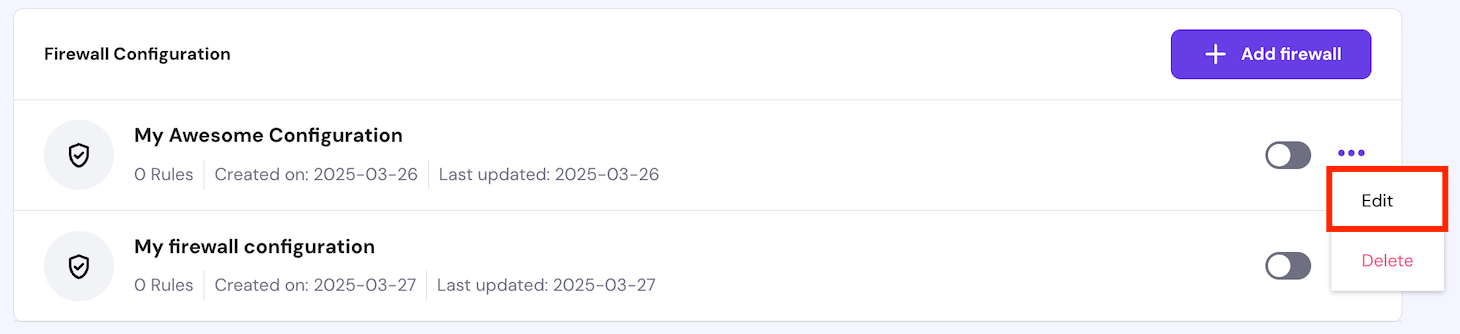
- Add two rules that accept connections to ports 7777 and 22 from any source.
- Click the Arrow icon to return to the main page and click Activate on your new rule.
Managing server backups and restorations
Regularly back up your server files to ensure you can quickly recover your game data after errors or cyber-attacks. The steps to do so differ depending on game hosting providers’ features.
At Hostinger, our gaming VPS provides an automatic weekly backup that simplifies the data restoration process. We also include a free snapshot that captures your server configuration at a specific time.
To enable automatic backup in your Hostinger Game Panel hosting, open the VPS Overview page and navigate to the sidebar → Settings → Backup & Monitoring. Select Snapshots & Backups.
Click Auto-backups settings, select the Weekly option, and hit Save. That’s it! From this menu, you can also manage all the restore points and snapshots easily without commands.
Conclusion
Creating a dedicated Terraria server enables you to install mods, customize the world settings, and manage players to improve gameplay. In this article, we have explained how to do so using Hostinger’s Game Panel and commands.
To set up a Terraria server in the Hostinger Game Panel, simply log in and create an instance. From this menu, you can also install mods and configure the game settings without commands.
If you want to set up the game server manually, connect to your VPS via SSH and create a new superuser. Install the tools required to set up the software, like unzip, wget, and Linux Screen.
Download the Terraria server archive, extract it, and run the startup file. You can also launch it in the background via Screen and apply additional settings by calling a configuration file. If you encounter an error, make sure to forward the right port using your firewall.
How to host a dedicated Terraria server FAQ
How many players can join a dedicated Terraria server?
While Terraria doesn’t specify the limit, the slot is limited to 16 by default. However, the maximum number depends on your system’s hardware. For example, a server with 1 GB of RAM is ideal for 16 players.
Can I modify the game settings on a dedicated Terraria server?
Absolutely! You can modify game settings on your Terraria server using console commands via Terminal. You can also create a file that loads configurations automatically during startup. Meanwhile, Hostinger Game Panel users can modify the game using a graphical user interface.
Can I install mods on a dedicated Terraria server?
Yes, you can install mods on your Terraria server by configuring tModLoader from its official GitHub repository. Alternatively, Hostinger Game Panel users can set up the tool by creating an instance and managing the mods directly from the same menu.

Aris is a Content Writer specializing in Linux and WordPress development. He has a passion for networking, front-end web development, and server administration. By combining his IT and writing experience, Aris creates content that helps people easily understand complex technical topics to start their online journey. Follow him on LinkedIn.