Dec 22, 2025
Aris S.
10min Read
Compression makes your video file smaller without losing quality. In addition to saving storage space for more content, it helps minimize bandwidth and hardware usage for self-hosted streaming platforms.
Moreover, the smaller file sizes also enable faster transmission and improve accessibility for users with a slower internet connection. Understanding how to do so is crucial if you want to start your video streaming service.
In this article, we will explain how to compress video files without losing quality. You will also learn the best practices for this task and how to efficiently upload the compressed video to your host server.
Video compression means reducing a media file’s size without significantly sacrificing quality. Methods to do so include changing the format, adjusting the bitrate, and trimming its length. Smaller video files help save storage space, minimize bandwidth usage, and offload hardware consumption, resulting in a faster streaming server.
Without further ado, let’s go over the most popular methods of video compression to reduce the file size without losing its quality.
Your video format can significantly affect the file size since it uses different codecs to compress and decompress visual data. Choosing the right extension is crucial to balance size and picture quality.
However, changing the format can impact compatibility since media players support different formats. In addition, converting videos to another extension with a higher compression rate can erase data permanently.
Here are our recommendations for widely supported video file formats with their codec and best use cases:
You can change the file format using a media player like VLC. However, we recommend using a video compression tool like FFmpeg or HandBrake since they provide more settings.
For example, you can fine-tune the bitrate, codecs, framerate, and resolution to adjust the video compression rate based on your size and quality standard. We will explain how to choose the right settings in later sections.
Bitrate is the amount of data that a media player processes at an interval when loading a video measured in bits per second (bps). This data includes visual information about the footage, like color, brightness, and motion.
Even if your footage is high-resolution, it might show artifacts and appear pixelated if you set the bitrate too low. Conversely, a high setting will significantly increase the file size, potentially causing issues like buffering or lags.
Several platforms also don’t support large video files with higher bitrate due to resource constraints. For reference, here are several recommended settings from three popular streaming websites:
The recommended value also differs depending on the file format and codec. You can change the bitrate using a media player or compression tool. However, if the output file shows visual errors like artifacts, re-render it using a video editor.
If you are broadcasting your video live, you can directly apply settings like bitrate to your streaming tools to optimize the footage in real time without compression.
Resolution is the dimension of your videos in pixels. The larger it is, the more details and data your content has, resulting in a bigger video file size. While reducing it affects quality, the impact might be negligible for specific use cases.
For example, if most users watch your content via mobile phones with smaller screens, the quality differences between 720p and 4K footage might be subtle. Moreover, the distinction will be increasingly unnoticeable if you use platforms with built-in compression, like YouTube.
We recommend 1080p as this dimension offers high-quality and detailed footage while remaining relatively small in size. Moreover, it is the most common video resolution for modern devices and is compatible with the majority of platforms.
You can change your video resolution using editing software or a compression tool. However, once converted to a lower dimension, you can’t recover the details since several visual data are permanently deleted.
Trimming videos is the easiest way to reduce file size while maintaining the exact same quality. Deleting frames removes unnecessary data and makes the encoding process more efficient.
You can do so by cutting unnecessary content using video editing tools like Adobe Premiere or DaVinci Resolve. However, it can be impractical if the entire video length is essential.
Alternatively, remove duplicate frames from your video that show up due to the editing process or specific format encoding. Even so, this method might not always be applicable since such redundancy doesn’t always exist.
The most effective way is to lower the framerate, decreasing the frequency of images shown in the video sequence. This method selectively deletes particular frames to maintain the footage’s continuity and smoothness.
You can reduce the framerate using a compression tool like HandBrake or re-render the video with editing software using different settings.
Avoid setting the frame per second (FPS) count too low since it results in laggy footage. We recommend using at least 24 FPS, a popular setting for TVs and movies.
Various tools let you adjust your video settings to reduce the file size without losing quality. In this section, we will explain some of the most common options, their advantages, and their best use cases.
VLC is a free and open-source media player whose built-in conversion feature lets you adjust various settings to reduce video size. In addition to choosing multiple file formats, you can change the bitrate, framerate, and codec.
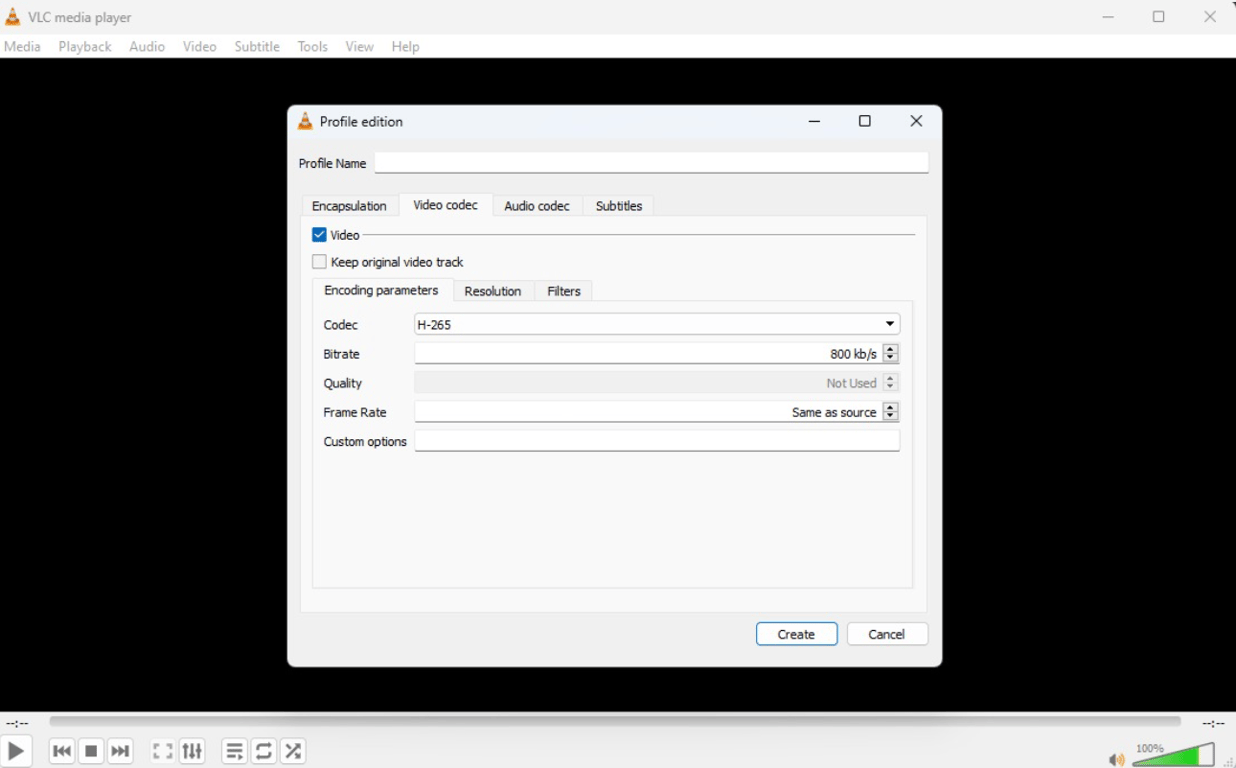
To do so, open VLC and navigate to Media → Convert/Save. Click Add, select your video, and hit Convert/Save. Click the wrench icon under the Settings menu, and you will be prompted a screen for adjusting the video configurations.
Due to its simplicity, VLC is ideal if you want to quickly compress videos without adjusting many settings. It is also cross-platform and available in popular operating systems like Windows, macOS, Linux, and Android.
HandBrake is a free video transcoder popular for its simplicity and customization options. It provides an advanced compression feature with various settings, including constant rate factor (CRF) encoding, that helps balance size and quality more efficiently.
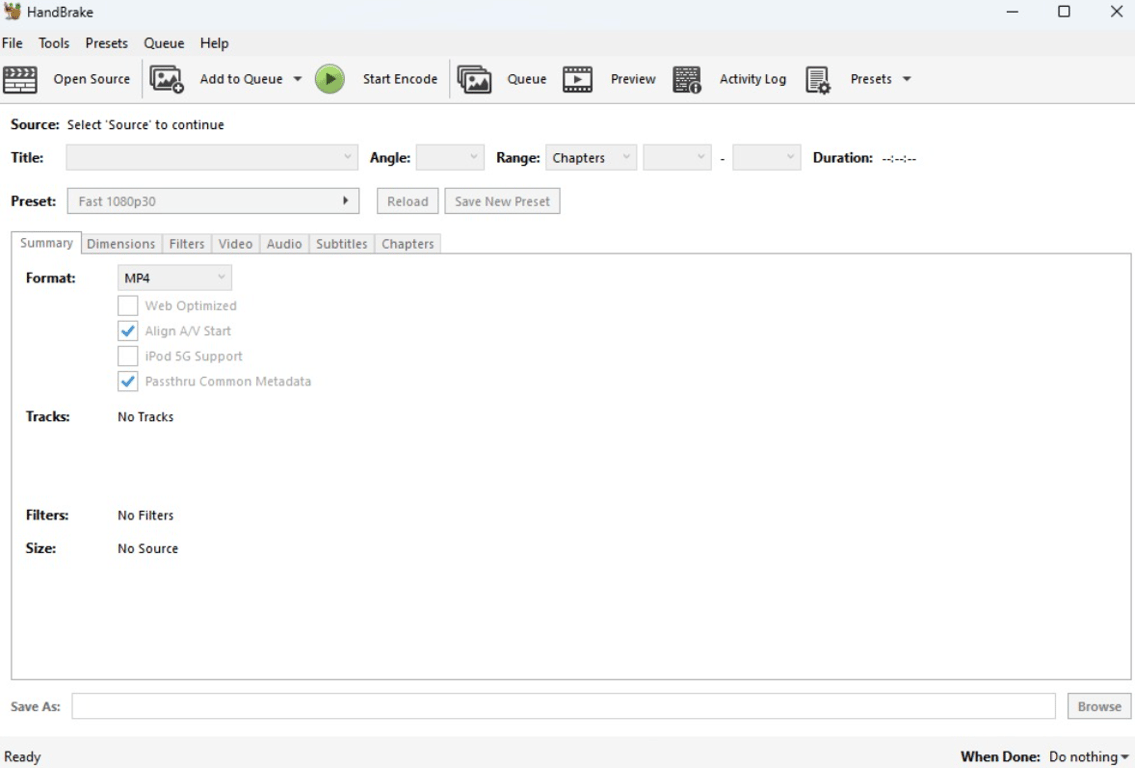
You can also use presets to set the compression settings across multiple files consistently. Moreover, HandBrake offers batch processing to compress the entire library of videos more easily, saving time and effort.
To compress videos using HandBrake, simply choose the files and presets. Click Browse to select the destination folder for the final video, adjust the settings if needed, and hit Start.
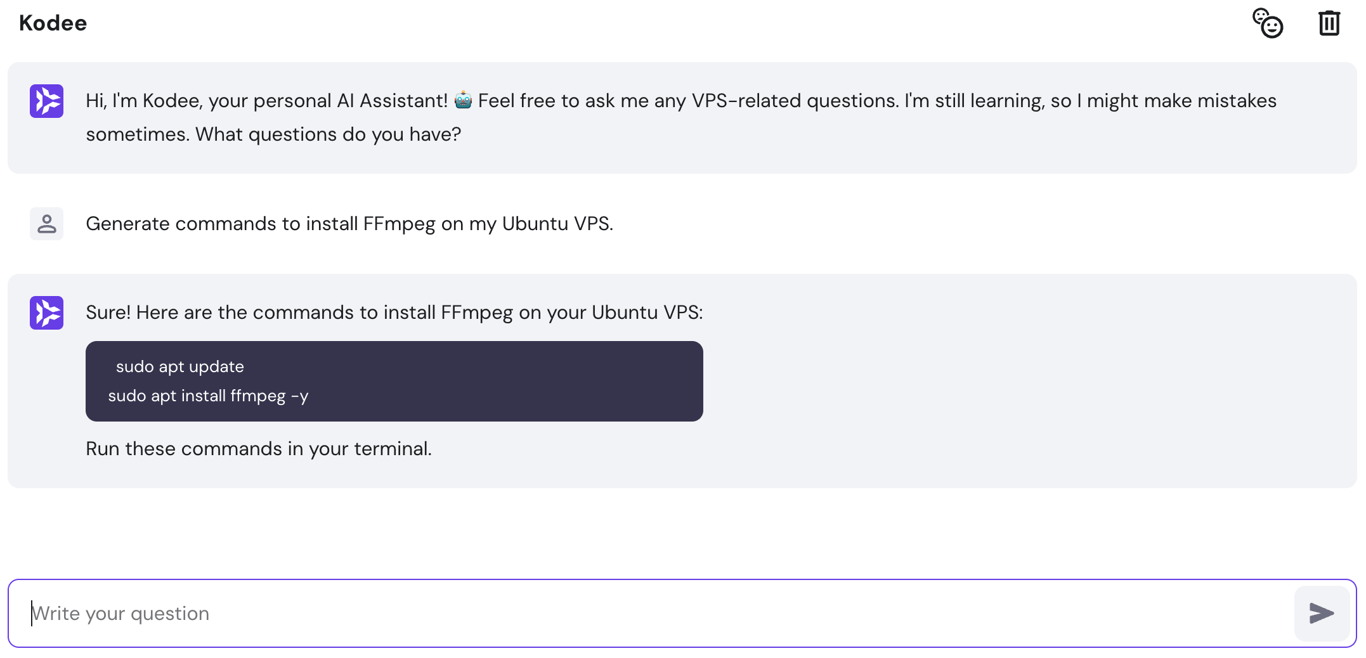
FFmpeg is a command-line video transcoder without a graphical user interface (GUI). While this tool is not suitable for beginners, it is efficient for compressing media directly on a remote archive system like a VPS.
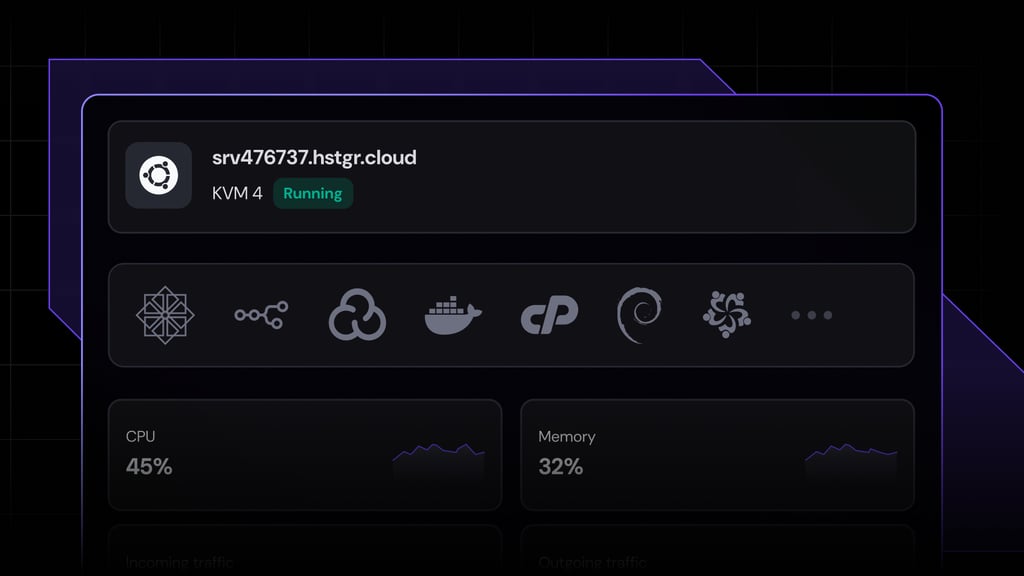
In addition to the extensive customization settings, FFmpeg offers real-time video compression for live streaming. As it also supports hardware acceleration and multi-threading, we recommend you use it with powerful VPS solutions like Hostinger’s KVM 8 plan.
Since the FFmpeg installation and compression involve commands, we recommend using Kodee, Hostinger’s own AI assistant, to help generate them. Simply enter prompts like, “Generate commands to install FFmpeg on my Ubuntu VPS.”
If you want to trim your footage to reduce the file size, use a video editing tool like Blackmagic’s DaVinci Resolve.
Unlike most video editing software, it offers a free version with ample compression features. If you want more comprehensive visual effects, color correction functionality, and performance enhancement, upgrade to the DaVinci Resolve Studio.
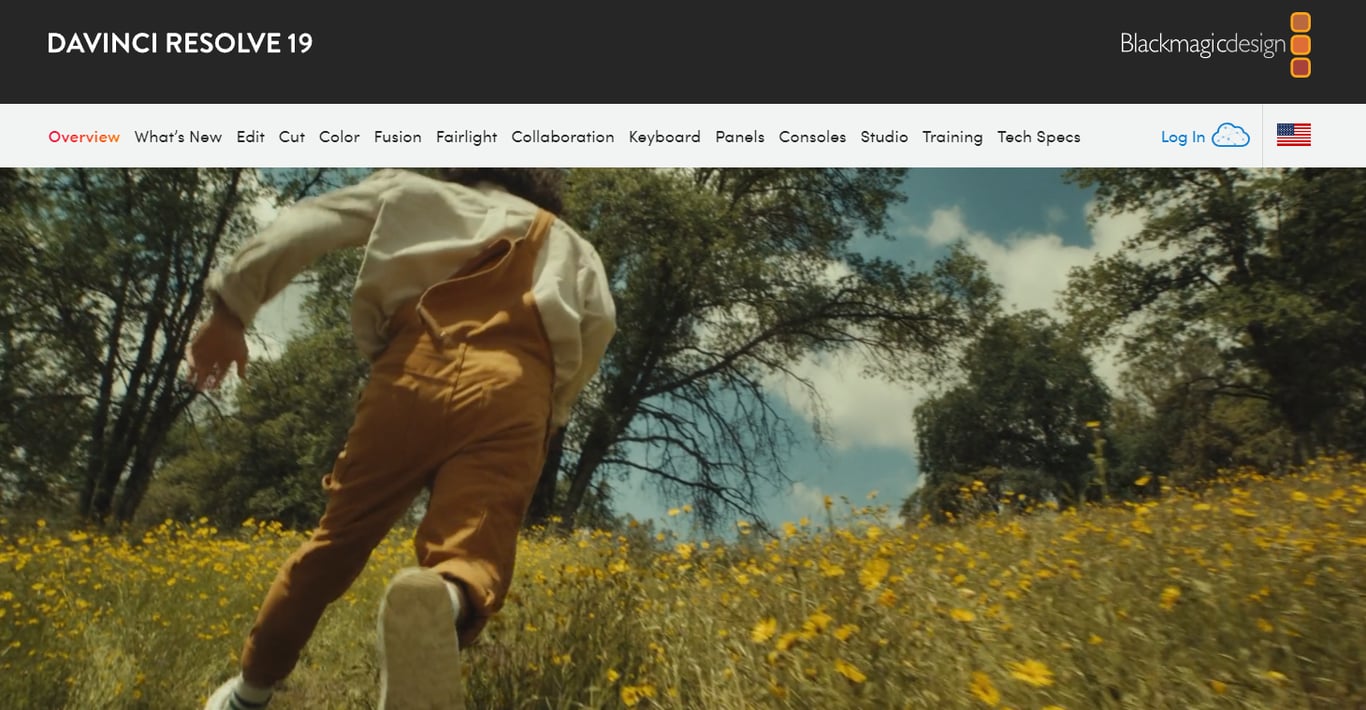
To reduce your video size, open the file by going to File → Import → Media. Trim the unnecessary content from the Cut menu and click Deliver once finished. Select your preferred render settings, locations, and name. Click Export once finished.
Due to various editing features, DaVinci Resolve can be resource-heavy and complicated to use. We recommend this tool only if you want to edit the footage in addition to compressing it.
FreeConvert is an online video compressor that lets you reduce the file size by changing the resolution, bitrate, codec, and CRF. It can also adjust the settings automatically based on your target file size.
While it offers comprehensive settings, you can only choose from six file formats and two codecs. Moreover, this free video compressor supports up to 1 GB of footage with a maximum duration of five minutes. You must upgrade to unlock the limit.
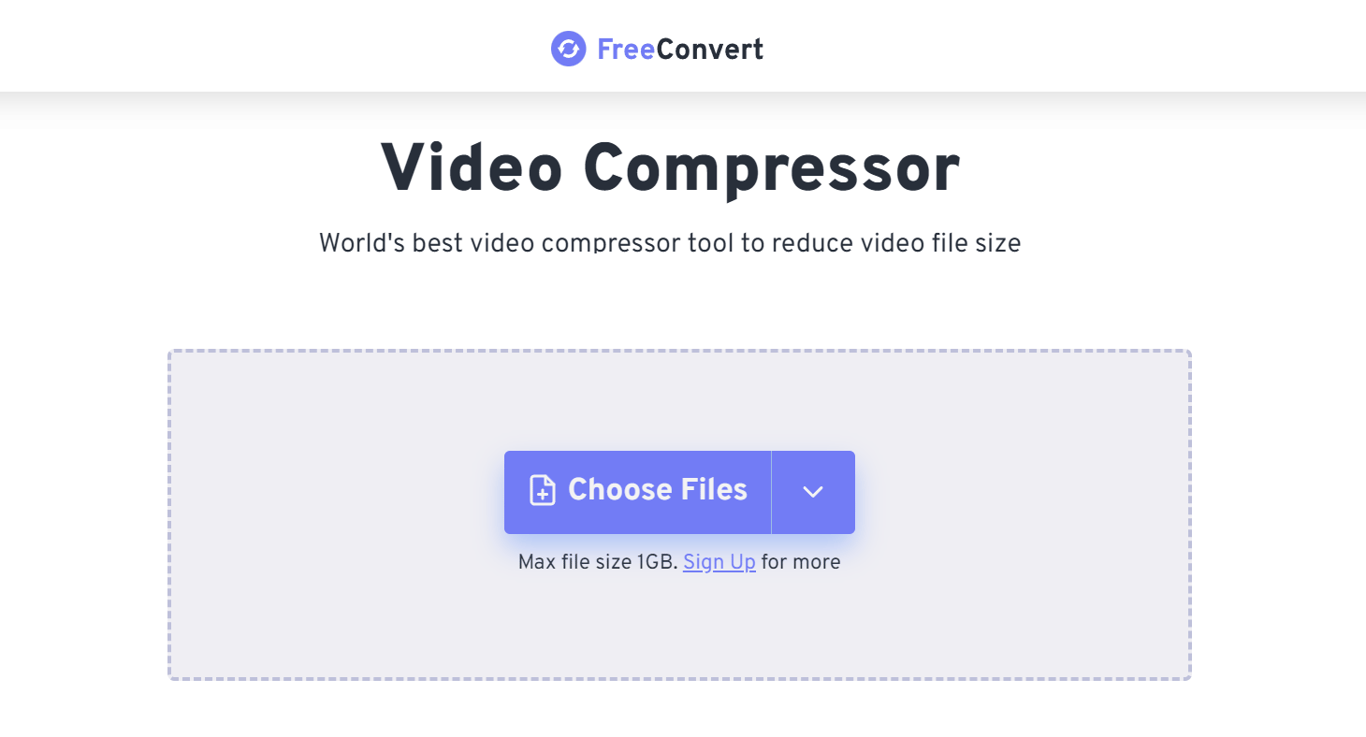
To compress videos online using this tool, simply upload the files, adjust the advanced settings at the bottom, and click the Compress Now! Button. Since FreeConvert is web-based, it might be slower than software that runs locally on your computer.
To maintain optimal quality and improve efficiency when compressing video, consider the following best practices.
Video compression might also affect its audio quality. When setting up your compression profile, consider factors like sound bitrate, codecs, and format to preserve clarity.
Another factor to consider is sample rates and bit depths, which determine the amount of information your audio has. To balance quality and compression, we recommend using MP3 or AAC with 16-bit depth and 44.1 kHz sampling rate.
Avoid lowering the audio settings if you work with an already compressed file since transcoding it multiple times will significantly degrade the quality. Instead, reinsert the original track using an editor tool like DaVinci Resolve.
If you are archiving a library of videos, compressing them separately can be time-consuming. Moreover, it is prone to misconfigurations since you might accidentally apply different settings, resulting in quality inconsistencies.
To avoid this issue and improve efficiency, create a compression profile and simply apply it to each video. Furthermore, use HandBrake’s batch-processing feature to automate the task.
If you use FFmpeg, you can create a bash script to compress videos automatically whenever you upload them to your server. It processes multiple files simultaneously using a single command.
The variable bitrate (VBR) encodes the data of your video dynamically, using different bitrates across the footage. This method helps maintain consistent quality since it ensures each scene uses the right bitrate.
Conversely, consistent bitrate (CBR) encoding uses the same value for the entire video length. It might cause pixelations or artifacts if your footage contains scenes with complex visual data, like high-speed motion or complicated elements.
Displaying confetti in a video file is often considered complex since there are a lot of elements, colors, contrasts, and motions. Such a scene often appears pixelated since it requires more data per second to render properly.
VBR maintains consistent quality by allocating different bitrates across scenes depending on their complexity. Since each scene in your video footage uses the correct bitrate, it won’t have excessive data, resulting in a lower file size.
However, VBR-encoded video file sizes are unpredictable and vary a lot. CBR encoding is also quicker since the media player doesn’t have to analyze the visual complexity and adjust the bitrate, making it more suitable for lower-performance systems.
After compressing a video, always thoroughly check its quality to ensure it meets your standards. This process is integral since the result might be unpredictable, especially if you don’t use consistent settings.
Moreover, it helps you determine if the converted videos are responsive and compatible with your playback environments. Using these insights, you can reevaluate the compression profile to see whether it offers the right balance between quality, size, and performance.
For a live stream with the FFmpeg compression, test the quality by running a private broadcast. To restrict the public from accessing it, set up a firewall that only allows connection from and to your personal computer’s IP address.
After making your video files smaller, upload them to your virtual private server (VPS) for off-site archives or serve them to your streaming service.
There are different ways to do so. Linux users can synchronize files on their local computer and the remote server using the rsync command via Terminal. If they prefer a GUI, they can use a secure file transfer (SFTP) application like FileZilla.
For easier access and organization, name each file with a descriptive name in a fixed format, like season_episodename_epsiodenumber.MP4. For example, the ideal name for your first video should be 1_My Awesome Show_1.MP4.
To quickly upload multiple videos, merge them into a ZIP file. Once you transfer it, simply extract the archive inside your VPS.
Also, regularly back up your files to ensure your video content is safe from cyber attacks or errors. Hostinger’s VPS hosting plans implement free automatic weekly backups to ensure data safety and provide a snapshot to simplify the setting restoration process.
Moreover, apply the best VPS security practices to ensure data integrity. Important steps include restricting permissions of your private files, installing a secure sockets layer (SSL), and enforcing proper firewall rules.
We also recommend setting up a content delivery network (CDN), which caches your videos on multiple systems and serves users from the closest server. It helps reduce latency, minimize server load, and decrease bandwidth consumption.

Compressing video reduces the file size without significantly affecting its quality to minimize storage and resource usage. The most common method is converting the media to another format with a higher compression rate, like MP4.
Another way to compress a video file is to reduce its resolution, change the bitrate, and trim unnecessary content. You can do so using tools like HandBrake or VLC. Meanwhile, FFmpeg is an excellent solution for real-time compression on your server for streaming.
When compressing videos, maintain audio quality by choosing the right bitrate, format, and bit depth. To save time and effort, use HandBrake’s batch processing or create a bash script to automate FFmpeg when compressing multiple videos.
After compressing, name your video files descriptively and upload them to your VPS using an SFTP client like FileZilla. Enable automatic backup to safeguard your data and serve it using a CDN to improve server responsiveness.
This section will answer several common questions about how to compress video files without losing quality.
MP4 is typically the preferred format for high-quality compression for its efficient codecs and extensive compatibility with media players. However, the ideal extension differs depending on your preferences and use cases.
To maintain a high-quality video after compression, use a higher bitrate and efficient codec. For example, convert your footage to MP4 with H.264 and 3 Mbps of bitrate. Also, we recommend keeping the resolution at 1080p to ensure it looks sharp on different devices.
Consider your server hardware capability, network performance, and your audience’s devices. If you have a powerful server, high bandwidth allocation, and speedy internet connection, use MP4 since it offers the highest quality. Otherwise, use the more efficient extension with a higher compression rate, like HVEC.
You should re-compress the original video using different settings or re-render it from scratch. You can’t revert the changes by exporting the file back to a higher-quality format since several data are deleted permanently. With that in mind, keep the original file as a backup.
All of the tutorial content on this website is subject to Hostinger's rigorous editorial standards and values.

Aris is a Content Writer specializing in Linux and WordPress development. He has a passion for networking, front-end web development, and server administration. By combining his IT and writing experience, Aris creates content that helps people easily understand complex technical topics to start their online journey. Follow him on LinkedIn.

OpenClaw is a self-hosted, open-source AI personal assistant. It requires a VPS with root access, persistent resources, and always-on availability ...

Next.js is an open-source React framework for building production-ready, server-rendered, and full-stack web applications. Developed and maintained by...
Docker changed how apps are built and deployed. Instead of setting up a full server for every project, you package ...