How to Create and Edit Cloudflare Page Rules + The Most Common Rules to Consider
Using Cloudflare Page Rules is a great option for those looking to optimize their websites. It is a beginner-friendly method, as it is unnecessary to modify any code to enable it – Cloudflare dashboard has an easy-to-use menu for managing all settings.
Page rules are available on all Cloudflare plans and can be used for setting up cache rules, forwarding URLs, and more. In this article, we will discuss the importance of these rules and how to set them up. On top of that, we will explain the 13 most common page rules.

Why Page Rules Are Important
Page rules trigger certain actions whenever a request matches one of the defined domain patterns. They let you customize Cloudflare settings and values for all or specific web pages. Additionally, they help improve the site’s performance, security, reliability, and user experience.
Cloudflare rules have two basic behaviors:
- Only the highest priority matching rule works on a request.
- Cloudflare prioritizes the settings in descending order, from the highest priority rule to the lowest.
A page rule matches a URL pattern based on five segments:
- Scheme. Indicates the communication protocol used.
- Hostname. Specifies the domain name.
- Port. Indicates the protocol’s port.
- Path. Specifies the file or directory path.
- Query string. A set of parameters attached to the end of the URL to assign values to certain attributes.
The resulting format will look like this:
<scheme>://<hostname><:port>/<path>?<query_string>
However, the scheme and port elements are optional. If omitted, the scheme matches both HTTPS and HTTP protocols. On the other hand, if the port is not specified, the page rule matches all ports.
When creating a page rule, use an asterisk (*) in any URL segment to indicate a wildcard for matching specific patterns. For example:
https://example.com/image*
How to Set Up Cloudflare Page Rules
The following sections will show you how to set up Cloudflare Page Rules.
Learn More About Cloudflare
What Is a CDN?
How to Set Up a CDN: Tips to Improve Website Performance
How to Set Up Cloudflare CDN on WordPress
How to Create a Page Rule in Cloudflare
Here’s how to create a rule in Cloudflare:
Pro Tip
Ensure to list the page rules from the most to the least specific.
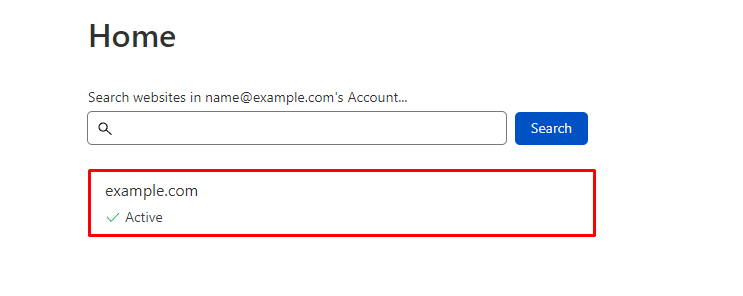
- Log in to your Cloudflare dashboard and choose a domain.
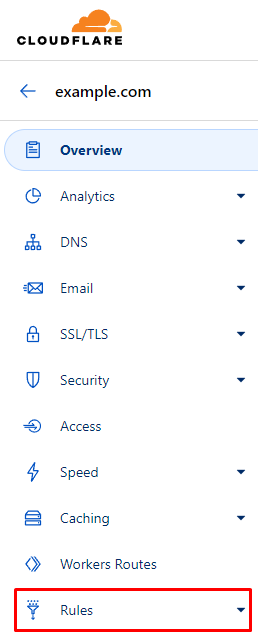
- Select the Rules menu.
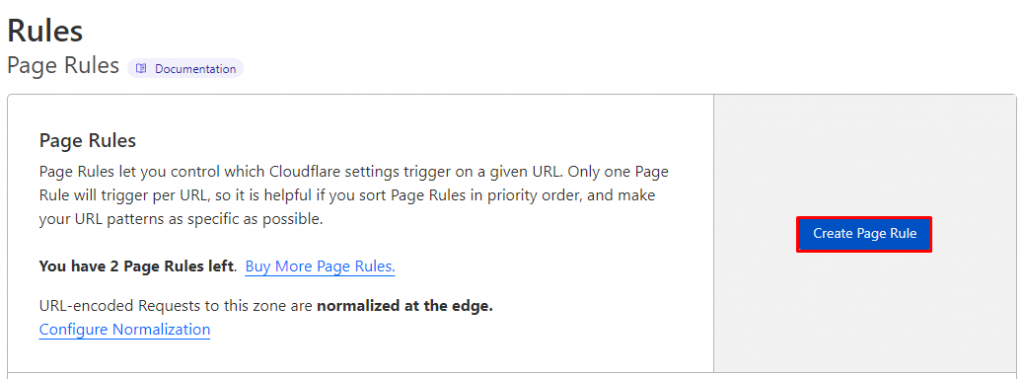
- Click Create Page Rule.
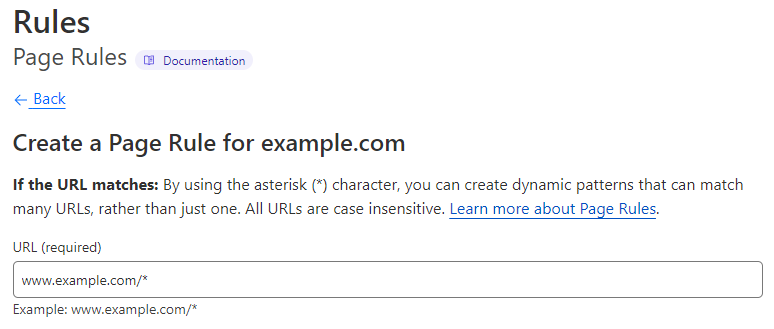
- On the If the URL matches tab, insert the URL or URL pattern that should match the page rule.
- Under Then the settings are tab, pick an option and choose the status code by selecting the down arrows in each box. In this example, we’re using Forwarding URL and 301 – Permanent Redirect.

- Type the destination URL.

- Save the changes. For this example, we’re choosing the second option.
- Save as Draft to save the settings.
- Save and Deploy Page Rule to save and apply it immediately.

Pro Tip
Cloudflare doesn’t accept non-ASCII characters in Page Rules. Try to URL-encode the string using a Punycode converter.
How to Edit Cloudflare Page Rules
Follow these instructions to edit a page rule in Cloudflare:
- Choose the page rule that you want to edit.
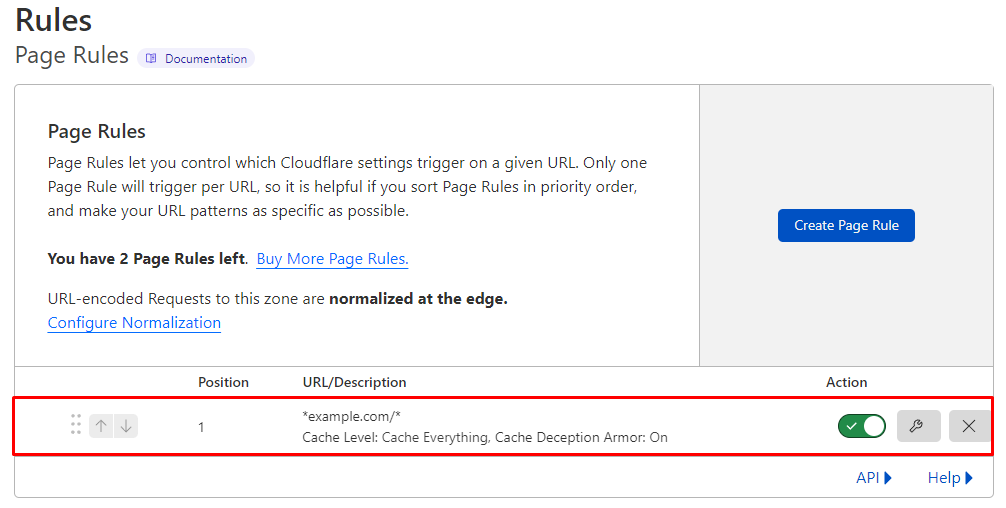
- To enable or disable it, toggle the On and Off buttons.
- Select the Edit button to change the URL or URL pattern, settings, and order.

- To delete a rule, click the Delete button and choose Delete on the pop-up window.

Pro Tip
When a page rule is disabled, it won’t trigger actions, but it will still appear in the Page Rules tab. The rule is editable and counts towards the number of rules allowed for the domain.
Common Cloudflare Page Rules to Consider
There are hundreds of rules you can create for your website, but here are the 13 essential ones.
301/302 Forward URL
Use the Forwarding URL setting to direct visitors to a specific page or define the root as your domain’s canonical version. You can choose either the HTTP 301 Permanent Redirect or HTTP 302 Temporary Redirect. The asterisk (*) creates dynamic patterns that ensure every variation will be redirected to the destination URL.
In addition, reference a matched wildcard using the $X syntax, where X means the index of a glob pattern. Hence, $1 refers to the first wildcard match, and so on.
For example, to redirect visitors from a specific page to the root domain, enter these settings:
- If the URL matches: *www.example.com/home
- Setting: Forwarding URL
- Select status code: 301 Permanent Redirect
- Enter destination URL: https://www.example.com/
On the other hand, to redirect visitors to a specific web page, use the following settings:
- If the URL matches: *www.example.com/tw*
- Setting: Forwarding URL
- Select status code: 302 Temporary Redirect
- Enter destination URL: https://www.twitter.com/username
Pro Tip
Avoid redirecting your domain to itself as the destination, as it can cause an infinite redirect error.
Forward to “WWW”
Choose URL forwarding to redirect a domain’s pages and subdomains to www. For instance:
- If the URL matches: example.com/*
- Setting: Forwarding URL
- Select status code: 301 Permanent Redirect
- Enter destination URL: https://www.example.com/$1
Always Use HTTPS
This page rule forces visitors to use an HTTPS connection when visiting the website. Adding * to the URL ensures that Cloudflare will redirect all access made via HTTP to HTTPS.
To create the page rule, use the following setup:
- If the URL matches: http://*example.com/*
- Setting: Always Use HTTPS
If your website doesn’t have SSL installed, enable the Cloudflare Opportunistic Encryption feature. With it, visitors can access the site over an encrypted TLS channel. However, keep in mind this setting can’t replace SSL.
Add the following rule and turn it on:
- If the URL matches: http://*example.com/*
- Setting: Opportunistic Encryption
If you are a Hostinger user, note that all our hosting plans include unlimited SSL certificates.

Security Level & Cache Level
Some website pages, such as the user or admin dashboard, have different performance and security requirements than public sections. Using a page rule, you can adjust protection and cache configurations, especially for requests targeting specific paths.
To use the Security Level & Cache Level settings, enter:
- If the URL matches: example.com/client-page*
- Setting: Security Level
- Value: High
Depending on the threat score, visitors will encounter a challenge page requiring them to click the I’m not a robot box.
Enabling Origin Cache Control, Cloudflare will examine whether the file is cacheable. To do this, add another option to the same page rule and turn it on:
- Setting: Origin Cache Control
Alternatively, instruct Cloudflare to bypass cache using the Cache Level setting:
- Setting: Cache Level
- Value: Bypass
Disabling active Cloudflare apps and performance tools prevents software conflicts within the admin page. Insert the following rule and turn it on:
- Setting: Disable Apps
Disallow Cloudflare features like Auto Minify, Rocket Loader, Mirage, and Polish by activating this setting:
- Setting: Disable Performance
Instruct Cloudflare to scan the visitor’s browser for HTTP headers commonly associated with bots and spammers by turning on this option:
- Setting: Browser Integrity Check
Edge Cache TTL and Browser Cache TTL
Since some resources on your site don’t change constantly, enabling custom caching options can reduce the load and bandwidth usage for the origin server. It also overrides the default cache behavior for static files.
Set up a Browser Cache TTL rule to control how long the cache remains valid. In this example, we target the media folder and set the value to a day:
- If the URL matches: example.com/sites/content/media
- Setting: Browser Cache TTL
- Value: a day
As for Cache Level, apply the Cache Everything option to consider all content as static and store all file types. Unless Edge Cache TTL is enabled, it also respects cache headers from the origin server. When you combine both, Cloudflare deletes cookies from the origin web server response.
To enable it, add the following setting to the same page rule:
- Setting: Cache Level
- Value: Cache Everything
Edge Cache TTL refers to the cache duration in the Cloudflare edge network. This rule is invisible in the response headers. However, the minimum Edge Cache TTL value depends on the Cloudflare plan. For instance, if you have a free Cloudflare account, the value options start from 2 hours.
For this example, we set the duration to seven days:
- Setting: Edge Cache TTL
- Value: 7 days
Cache Everything
If your web pages rely on static content, set the Cloudflare Cache Level to Cache Everything. This ensures the fundamental elements, including HTML and JSON data, are cached. In this example, we will activate it for a Refund Policy page:
- If the URL matches: example.com/refund-policy
- Setting: Cache Level
- Value: Cache Everything
Cloudflare’s Business and Enterprise customers can cache static HTML data on their WordPress site using the Bypass Cache on Cookie feature.
Secure WordPress Log In Area
The login page of a WordPress site shouldn’t be cached as it contains sensitive information. Therefore, use the following setting on your site:
- If the URL matches: example.com/wp-admin*
- Setting: Security Level
- Value: High
To ensure Cloudflare doesn’t cache the content, enter:
- Setting: Cache Level
- Value: Bypass
Consider using the Cache Deception Armor feature to protect your page from web cache deception attacks. Ensure the Edge Cache TTL is off to avoid overriding the cache instructions.
To enable this rule, add the option and toggle the button to on:
- Setting: Cache Deception Armor
Forward Affiliate URL
With a page rule, you can cloak affiliate links using the Forwarding URL setting. Depending on your preference, you can either redirect it permanently or temporarily.
To enable it, add the following page rule:
- If the URL matches: example.com/product-affiliate
- Setting: Forwarding URL
- Status code: 301 Permanent Redirect
- Destination URL: https://product-affiliate.com/a/abc1234EFG
Decrease Bandwidth of WP Uploads
In most cases, items in your WP-Content folder don’t change frequently. To save bandwidth usage, set the Edge Cache TTL value to a month. This means Cloudflare will request new content from the origin server only once a month.
Here’s how to create the rule:
- If the URL matches: example.com/wp-content/uploads*
- Setting: Edge Cache TTL
- Value: a month
Configuring Cloudflare’s Cache Level to Cache Everything would look like this:
- Setting: Cache Level
- Value: Cache Everything
To prevent displaying old information on the site, add Browser Cache TTL and set the value to a day so the resources will expire from the visitor’s browsers after 24 hours. To apply it, add the following rule:
- Setting: Browser Cache TTL
- Value: a day
If you update or modify certain files or directories in less than a month, purge Cloudflare cache.
Don’t Cache Preview Pages
Preview pages shouldn’t be cached as they are not on the live website. Thus, adjust the settings to bypass cache to ensure you view the correct website version:
- If the URL matches: example.com/preview-website*
- Setting: Cache Level
- Value: Bypass
Forward XML-RPC URLs
Using the WordPress XML-RPC feature can make your site prone to security issues, such as DDoS and brute force attacks. In the first situation, attackers will use the xmlrpc.php file to send multiple pingbacks to your website simultaneously, causing an overload.
On brute force attacks, hackers will use the file to try various username and password combinations to enter your site.
As an additional security layer, a page rule can forward requests to the xmlrpc.php file to a desired destination. In this example, we’re using the homepage URL.
- If the URL matches: example.com/xmlrpc.php*
- Setting: Forwarding URL
- Status code: 301 Permanent Redirect
- Destination URL: https://example.com
Adding this page rule, Cloudflare CDN will stop the malicious traffic before it reaches your origin server.
Enable Email Obfuscation on the Contact Page Only
To avoid bots from adding your email address to their spam list, enable the Cloudflare Email Obfuscation feature for a specific page. This setting can encrypt email addresses while keeping them readable for humans.
To activate it, create the following page rule:
- If the URL matches: example.com/contact-us*
- Setting: Browser Cache TTL
- Value: a day
Allow Cloudflare to cache all elements:
- Setting: Cache Level
- Value: Cache Everything
Add the edge caching setting:
- Setting: Edge Cache TTL
- Value: a month
Lastly, add the email masking option and turn it on:
- Setting: Email Obfuscation
You can enable the Email Obfuscation rule on all pages using the Cloudflare Scrape Shield app. However, it may trigger the email-decode.min.js error on PageSpeed Insights and GTmetrix.
eCommerce Sites and Dynamic Content Using AJAX
eCommerce sites contain dynamic content that shouldn’t be cached. However, you still need to cache other elements to improve the website’s performance.
Therefore, we recommend caching the static elements while bypassing AJAX cache for the dynamic content. You can implement those settings using two-page rules.
The first instructs Cloudflare to bypass cache for AJAX:
- If the URL matches: example.com/ajax*
- Setting: Cache Level
- Value: Bypass
The second one lets Cloudflare cache other elements:
- If the URL matches: example.com/*
- Setting: Cache Level
- Value: Cache Everything
Alternatively, Cloudflare Enterprise users can utilize Cache Keys to control what to include when determining the cache settings.
How to Troubleshoot Common Page Rule Issues
Some issues may occur when setting up a page rule on your website. The most common is incorrect DNS settings. If your domain isn’t proxied and doesn’t point to Cloudflare, the rules won’t work. To solve it, ensure it is connected to Cloudflare’s nameservers.
A page rule may lead to an HTTP 500 internal server error due to a configuration issue. When using two wildcards, you may add the $2 placeholder on the second wildcard.
However, if you remove one of the wildcards when updating the rule, the placeholder will no longer be applicable, and it will trigger the error. To resolve it, update the page rule to remove the placeholder. If there’s only one wildcard, use $1 instead.
Conclusion
Page rules let you customize Cloudflare’s functionality to match your needs. It helps improve site performance, reliability, security, and user experience. You can also modify, remove, and prioritize the rules from the most to the least specific setting.
We have discussed the 13 most common rules for your website, including how to forward URLs, always use a secure connection, cache all contents, and enable email obfuscation.
We hope this article has helped you understand and configure Cloudflare Page Rules. If you have any questions or suggestions, leave them in the comments section below.
Cloudflare Page Rules FAQ
Here are the most frequently asked questions about Cloudflare Page Rules:
How Many Page Rules Can I Create?
The number of rules you can create depends on your Cloudflare plan. For example, the free package allows users to create up to three rules. However, you can purchase up to 100 rules individually for all Cloudflare plans except Enterprise.
What Are the Best Cloudflare Page Rules for WordPress?
For a WordPress site, we recommend setting up five essential page rules – securing the login page, forwarding XML-RPC URLs, encrypting email addresses, protecting the admin dashboard, and caching static elements.
What Do Asterisks in Cloudflare Page Rules Mean?
Asterisks are used in any URL segment to match certain patterns. For instance, setting example.com/shop* cache level to bypass means Cloudflare will not record the history data on all URLs with /shop/.
All of the tutorial content on this website is subject to Hostinger's rigorous editorial standards and values.
