How to make a photography website: 9 simple steps to attract clients and gain exposure
A professional photography website helps display your work, boost your visibility, and form connections with potential clients. It also strengthens your personal brand as a freelance photographer, setting you apart from the competition.
If you’re thinking about creating your own photography website, you’re in the right place. We will guide you through nine simple steps to create your website and establish an online store to sell your beautiful photos. Let’s get started!
Download website launch checklist
How to make a photography website in 9 Steps
Rest assured, these nine steps emphasize simplicity – empowering you to create your website quickly and easily.
1. Set goals for your photography website
Before creating a photography website, it’s essential to set goals so the site effectively serves your needs. To help set the goals, think about:
- Primary purpose. What do you want to achieve with the website? Is it to showcase your work, sell your photos, or both? Understanding your main objective will guide the design and functionality of your site.
- Target audience. Who are your ideal visitors? Are they potential clients, fellow photographers, or a broader audience interested in photography? Knowing who you want to attract helps tailor your content and marketing efforts.
- Content. What kind of content will best showcase your photography skills to new clients? Will you include photo galleries, blog posts, or both?
- Style. Do you want your photography website to be professional and sleek or more casual and personal? Consider your brand voice to create lasting impressions.
- Monetization. Will you sell prints, offer digital downloads, or book photography services through your website? Knowing this will help you grow your website in the long run.
Take your time during this process – there is no need to rush. But don’t overthink it, as you will always be able to customize your website.
2. Choose a platform for your photography website
All websites need a suitable platform to function properly. We recommend website builders for photographers because they’re easy to use. You will simply have to drag and drop elements to build your site.
Among many options, Hostinger Photography Website Builder is an excellent choice for photographers. It’s a website builder with a user-friendly interface, customizable and mobile-friendly templates, and eCommerce functionality for selling prints or digital downloads.
With Hostinger Photography Website Builder, you can:
- Create a website with AI or a pre-made template.
- Upload multimedia content in seconds.
- Customize your website with drag-and-drop tools via desktop or mobile devices.
- Enhance the website with various AI tools, like AI Writer and AI Logo Maker.
- Optimize the photography website for search engines.
- Manage your hosting account with a beginner-friendly control panel, hPanel.
- Integrate with third-party applications, including Google Analytics and WhatsApp, to reach a larger audience.
There are two Hostinger Photography Website Builder plans to choose from. The Premium Website Builder plan is $2.99/month and the Business Website Builder plan starts at $3.99/month.
The Premium plan works for a simple online portfolio site. But, if you want to add appointment bookings or sell pictures, you will need the Business plan. Think about your website’s goals to help pick the best plan.
Both of these plans also come with your own domain name for the first year and secure web hosting. These features help you create the best website for your photography business.
The rest of this article will focus on creating your website with Hostinger Website Builder. Let’s go through the process step-by-step.
3. Select your method to build your website
After choosing a Hostinger Photography Website Builder plan, the next step is creating your website. Hostinger Website Builder offers two ways to do so: create the website with AI or use a pre-made template.

To build the website with AI, click the Start creating button. Add your brand name, website type, and description. The more detailed your description is, the better AI can understand your needs and create a suitable website for you.
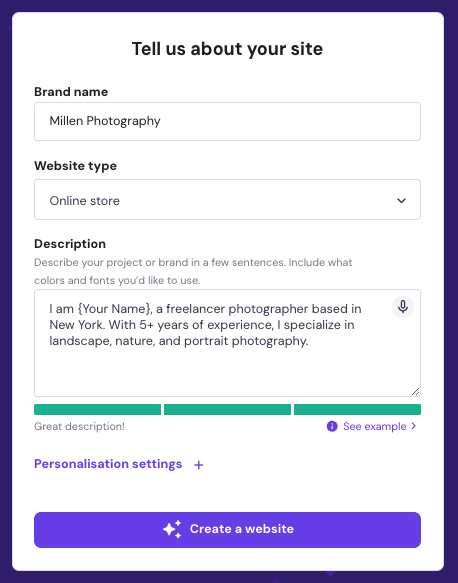
You can also choose the website style and use your own color palette for better personalization.
If you prefer to have more control over the design of your website, select the pre-made template option. After that, you’ll be taken to the template page. Here are the best templates we recommend for photography websites:
- Kofi. A great option for a simple website for a photography portfolio.
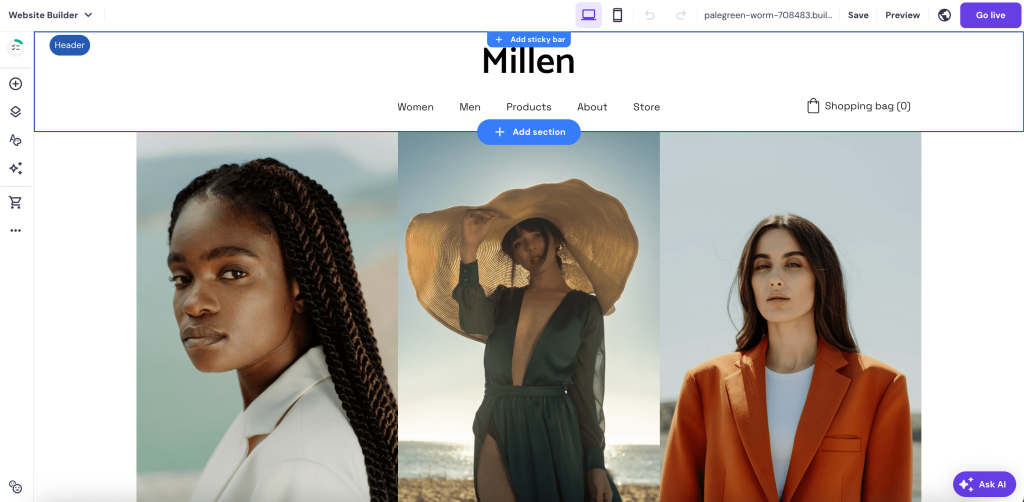
- Millen. Best photography website template with grid layout and large images.
- Eugenie. An attention-grabbing template to highlight your best images.
Feel free to explore more photography website designs in our library.
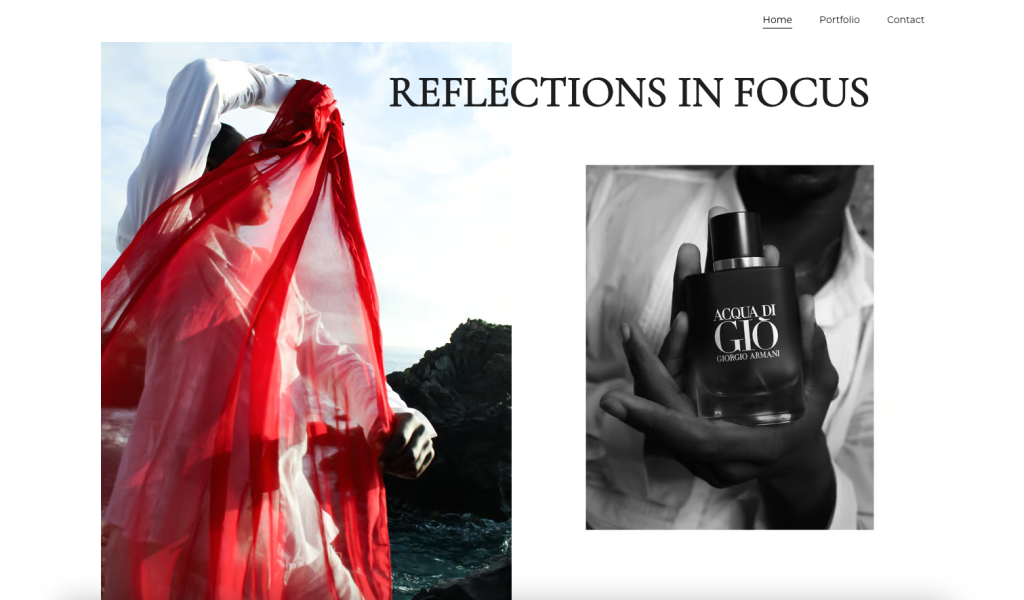
For inspiration, check Reflections In Focus, Tilly Rose Creative, and other photography website examples made with Hostinger Website Builder.
Once you’ve built the website with AI or a pre-made template, you’ll be directed to the editor page. Here, you’ll find pages and tools to customize your website.
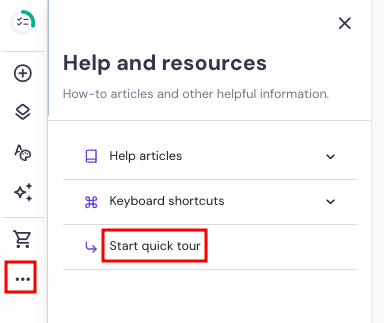
If needed, you can take a tour of the builder by clicking the website settings page marked with three horizontal dots. Then, click Help & Resources → Start quick tour.
4. Add pictures to your website
Now, let’s proceed with adding pictures to your website. To make it easier, let’s divide the process into three steps: uploading photos, adding a new photo gallery, and optimizing images.
Upload photos
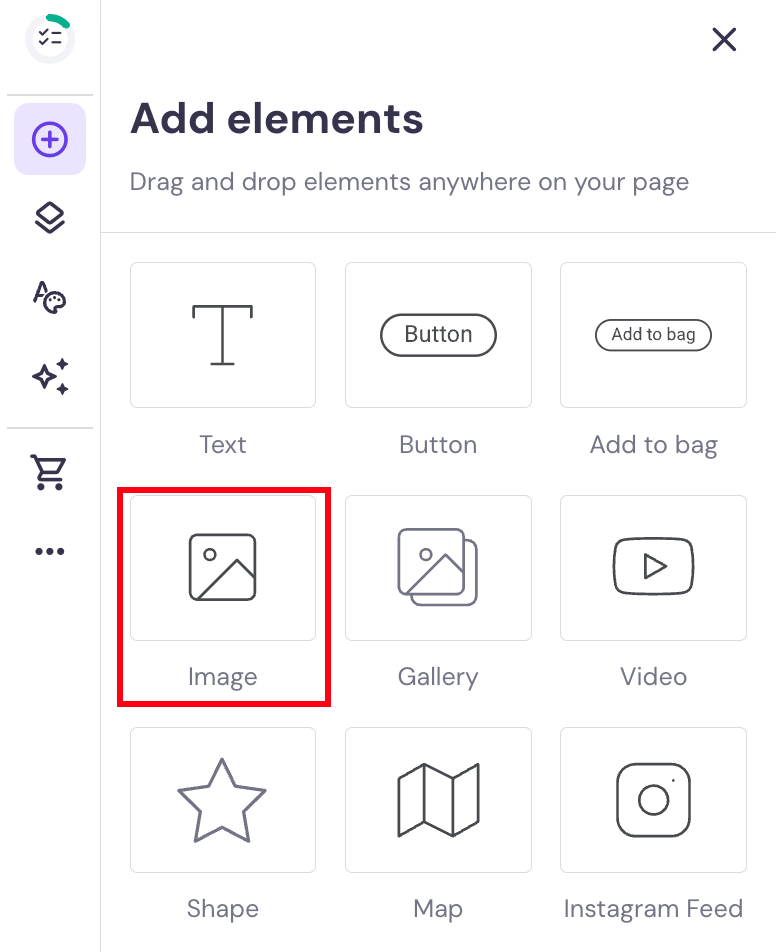
- Click Add elements on the left sidebar. Make sure you’re on the page or section where you want to add photos to.
- Choose Image from the options. This will add an image placeholder you can edit.
- Click Edit image → Replace image to open the media library.
- Select the Upload files button to add your photos.
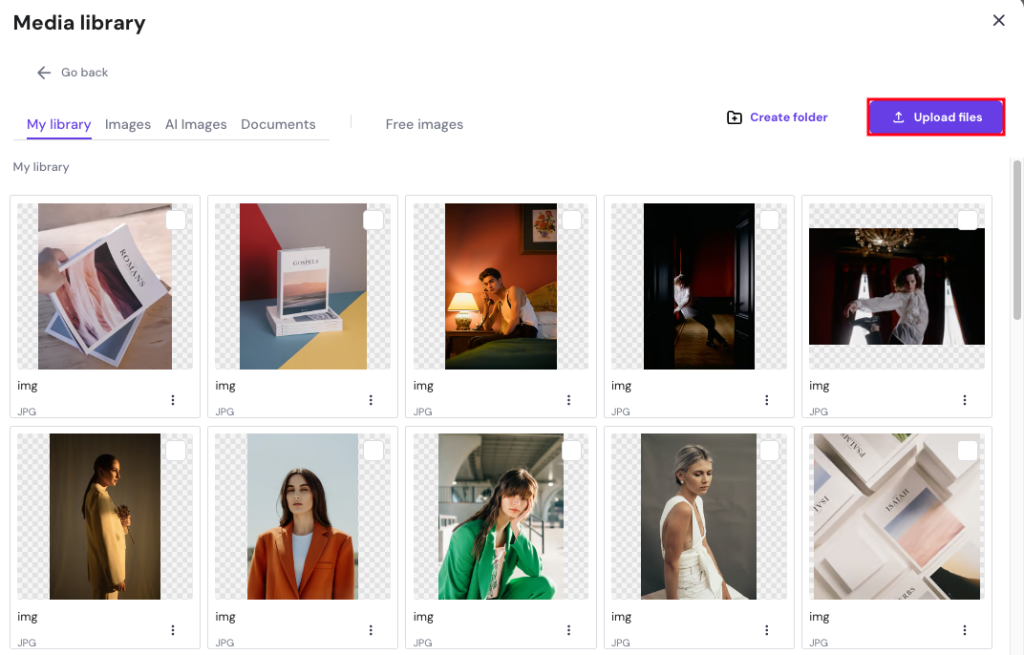
You can upload multiple photos at the same time. Additionally, you can create a folder to categorize your photos based on clients or projects.
Pro Tip
Resize and compress images before uploading them to the website. Image optimization helps improve loading times while still maintaining the image quality. Use tools like TinyPNG to compress your image file size.
Add a new gallery
- Click Add section on the page you prefer.
- Choose Gallery on the left sidebar.
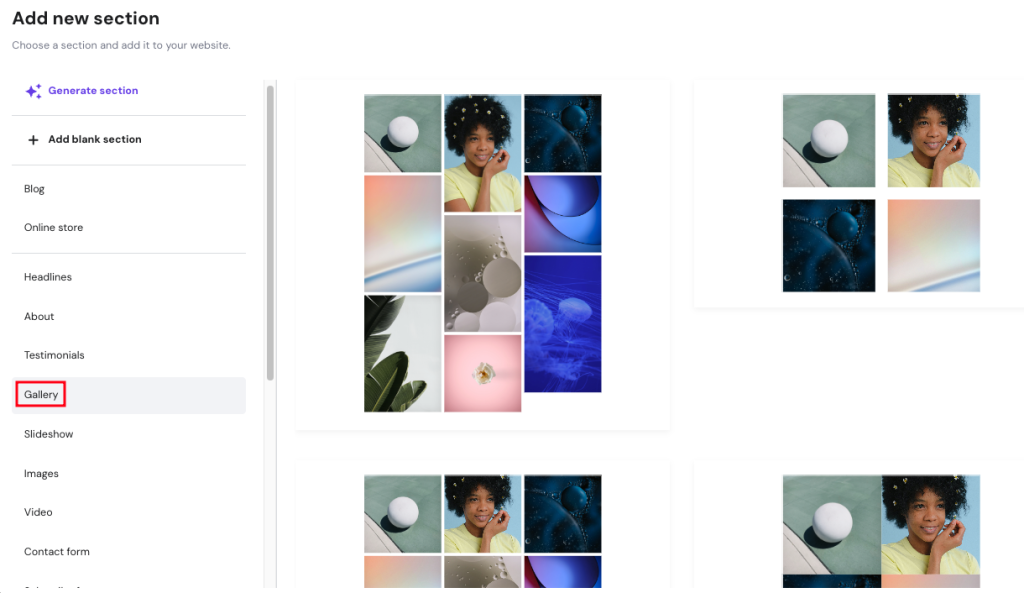
- Pick your favorite gallery format.
- Select an image to open the Edit gallery option. Click to customize it.
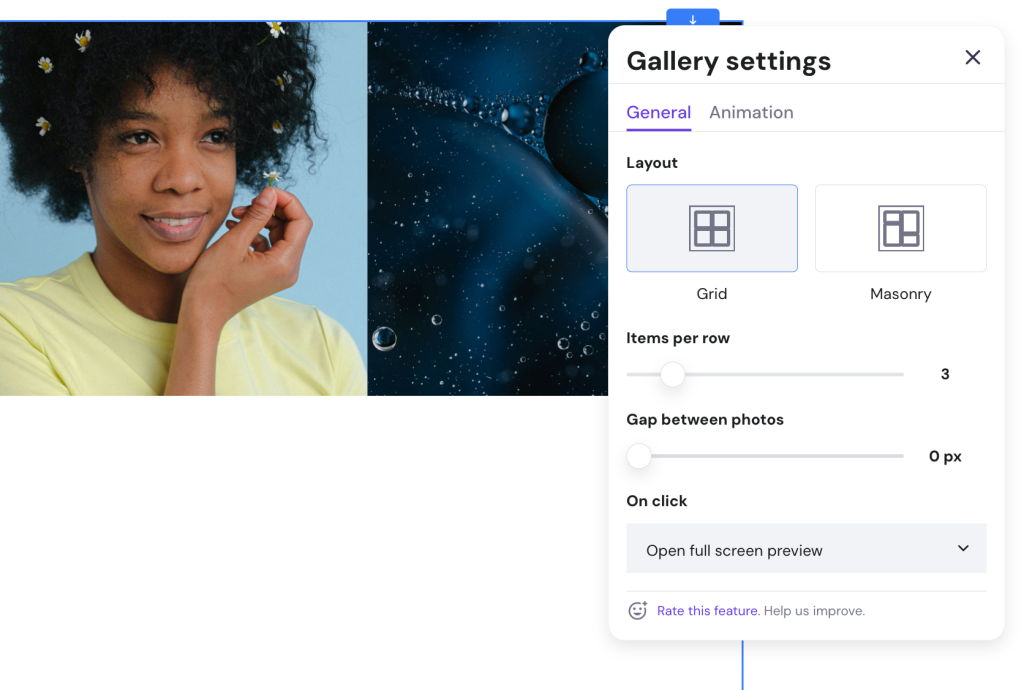
- Adjust the layout, items per row, and the gallery animation as needed.
You can also manage the gallery by rearranging, adding, or deleting the photos. To do so, click the Manage gallery button next to the Edit gallery option.

Add image alt text
Alt text is a brief description of the image for visually impaired users who use screen readers to access websites or those with a slow internet connection. It’s also a great search engine optimization (SEO) strategy.
To add alt text to your images, go to the Media library page and click Details on a photo. Note that you need to do this on all images on your website to maximize site accessibility.
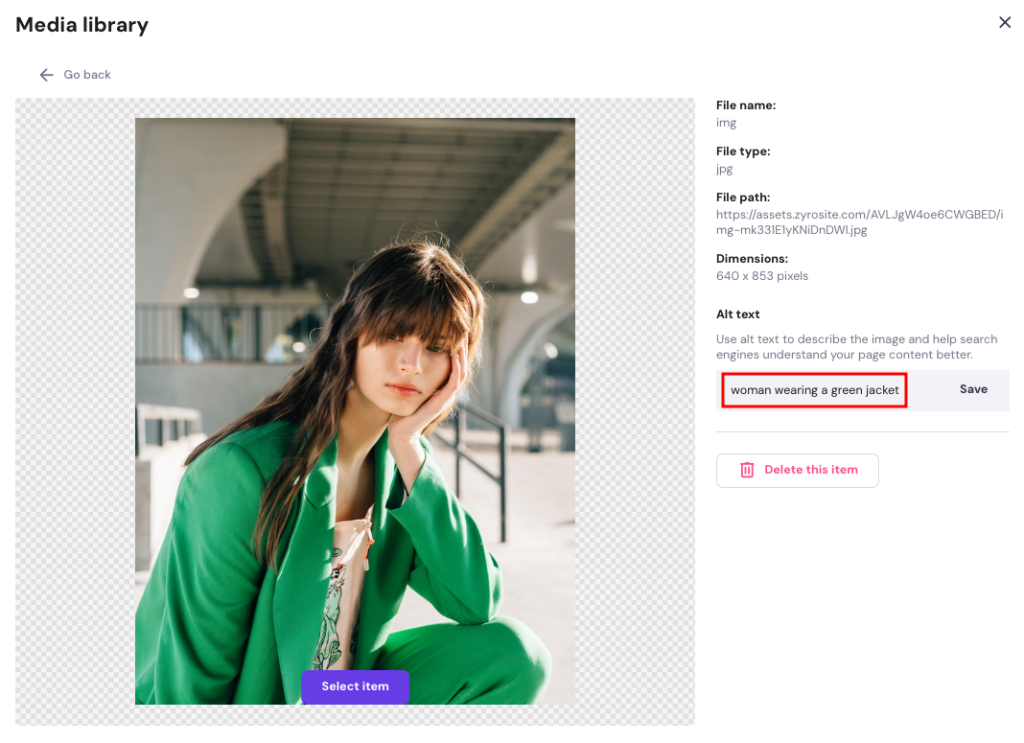
Avoid starting with generic phrases like “image of” or “picture of.” Instead, describe the content of the image in a few words.
5. Personalize your site
Customizing a photography website makes it stand out and highlights your unique photography style. Here are a few tips to help you:
Combine the About and Contact pages
The About and Contact pages are two of the most frequently visited pages on a website. For a simpler user experience, it’s best to combine both into one page. Below is an example from the Millen template.
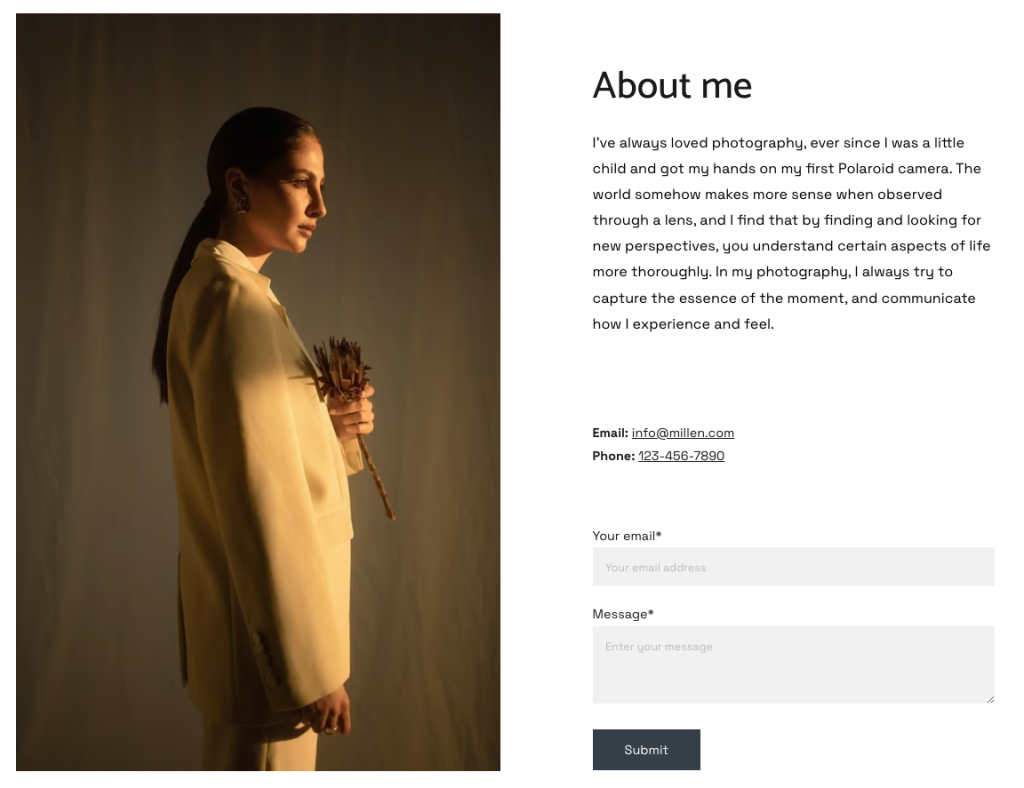
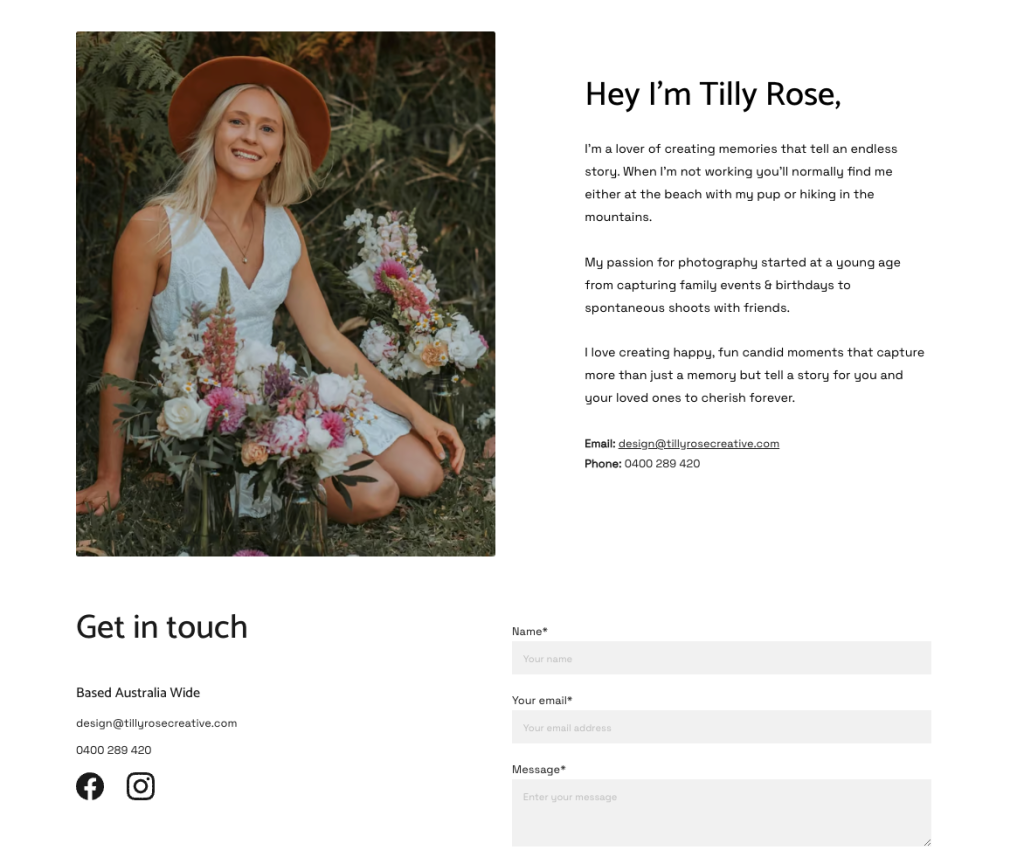
To see it in action, you can check Tilly Rose’s About page. Rose included a three-paragraph description detailing her passion for photography and herself.
Add your logo
To add your logo, open the Header settings and click the logo in the template located on the website header.
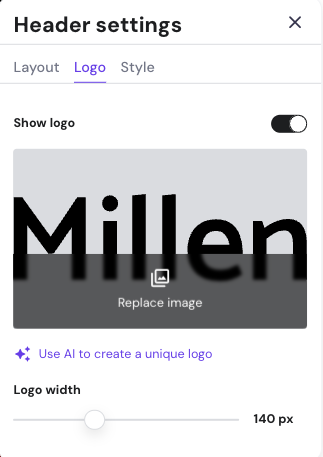
Click Replace image to add a new logo. Click Use AI to create a unique logo and design one yourself. Note that creating the logo yourself only works for typography logos.
After that, go to the Create yourself page and start designing it. You can choose from the font recommendation or pick your favorite.
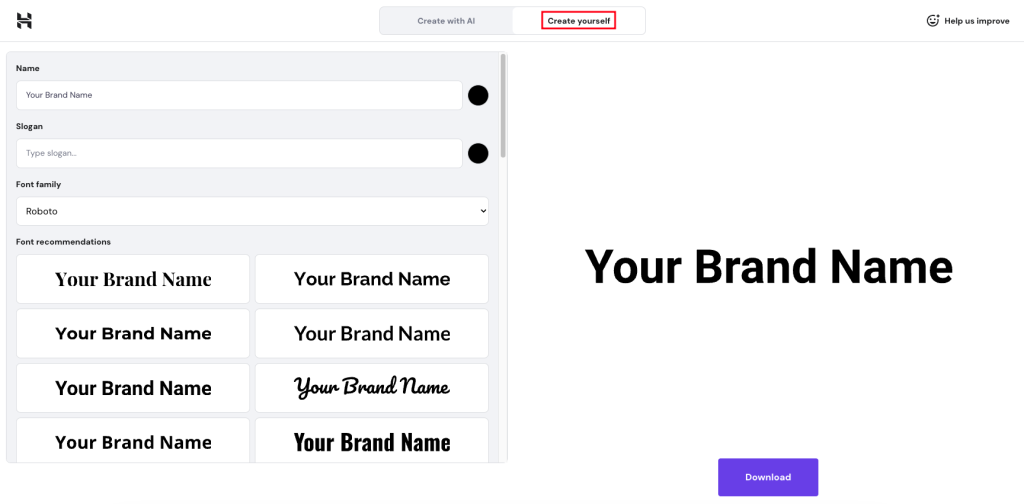
Once done, simply click Download. All files, including the entire logo and a favicon, will be saved to your device in the ZIP format.
Finally, upload the logo from the header settings page. Click Replace image → Upload files, then select your downloaded logo.
Showcase client projects
For the client projects page, the key is to choose projects that highlight your photography strengths and align with the type of work you want to attract.
Make sure to provide a brief description of each project, including the client’s goals and how you helped achieve them. You can also include testimonials from happy clients to add credibility.
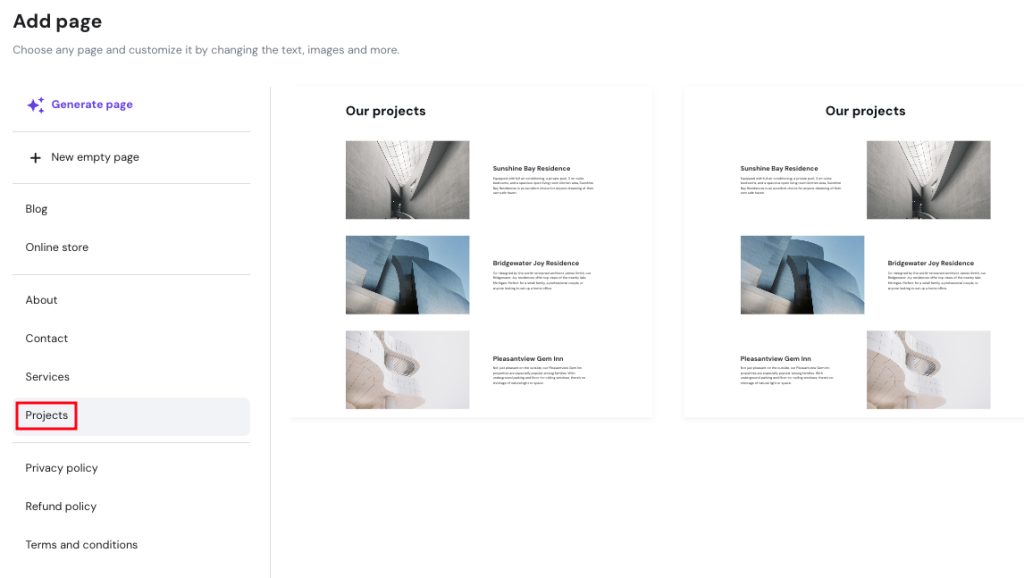
With Hostinger Photography Website Builder, you can categorize client projects by creating a new page or a dropdown of your projects page.
To create a new page, go to Pages and navigation → Projects. Similar to adding a gallery, pick a layout you prefer to add to the website.
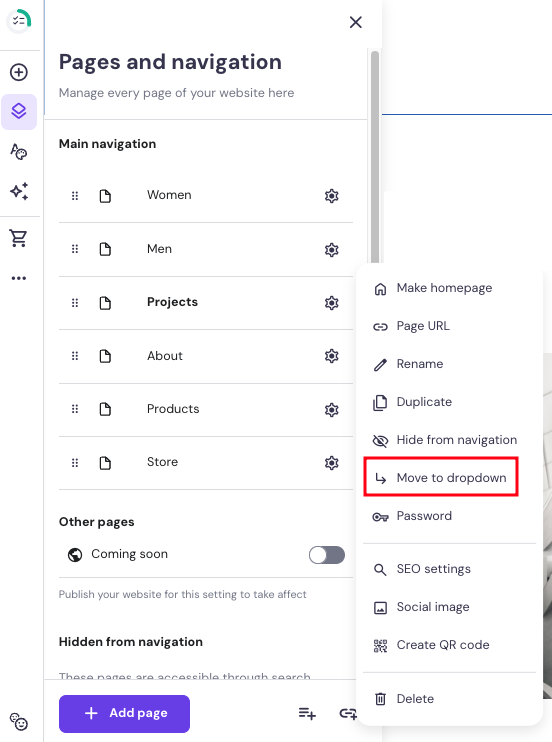
To create a dropdown, simply drag the Projects page to one of the existing pages. Click Move to dropdown.
For inspiration, check out how the Pinzoo photography website arranges client projects into a dropdown menu.
Add appointment booking functionality
Adding an appointment booking helps potential clients easily schedule a photoshoot with you. Here’s how to add the booking functionality using Hostinger Photography Website Builder:
- Go to the website settings page.
- Locate the Appointments option.
- Follow the setup process.
- On the store dashboard, go to Appointments → Enable appointments.
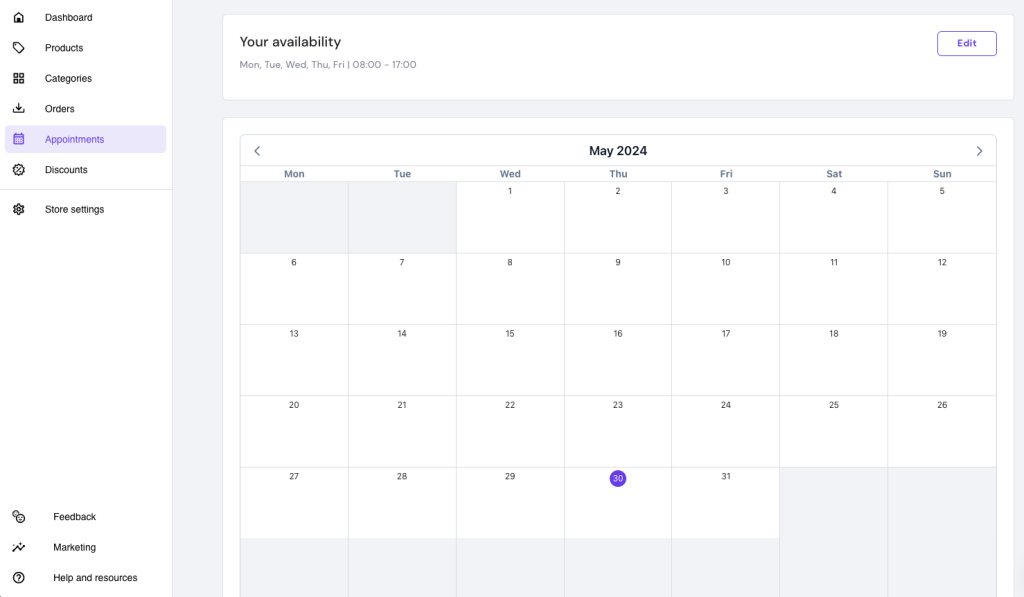
- Click the Edit button to set your schedule.
- Adjust the date and time, then click Save.
6. Optimize your photography website
Optimizing a website is a part of the SEO strategy. It may sound intimidating, but it’s actually quite simple with the right tools and knowledge. By following these steps, you can easily optimize your photography website.
- Run speed tests. After uploading new images, check your loading time using a speed testing tool to ensure a smooth-running site, such as Pingdom or Google PageSpeed Insights. This will also help you identify any issues that may be affecting your website’s performance.
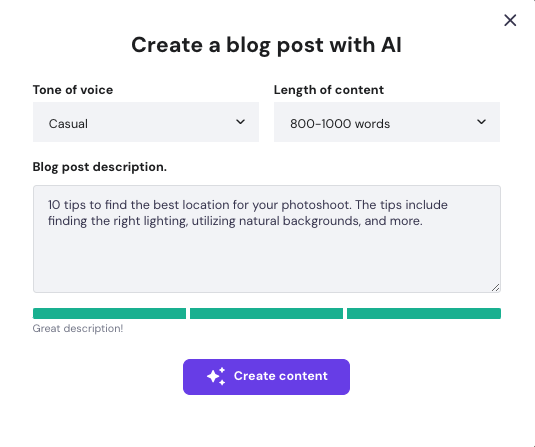
- Write blog posts. Blog posts help optimize your website when you use relevant keywords to the article. Use Hostinger’s AI Blog Generator to help write the content for your site.
- Keyword optimization. Choose a focus keyword for each post and page. Then, optimize your content around the keyword. This gives you better chances to rank with the correct search term in search engine results pages (SERPs).
- Internal linking. Add links to other pages on your site to get visitors to explore your website longer. This increases the chances of them converting into clients.
- Meta title and description. Write the meta title and description for your posts and pages to control how they appear on SERPs. Hostinger Photography Website Builder offers a built-in SEO page settings feature that allows you to write your meta title and description directly without additional SEO tools.
Follow these steps to add keywords, meta titles, and descriptions on Hostinger Photography Website Builder:
- Go to any page of your website.
- Locate website settings page → SEO settings.
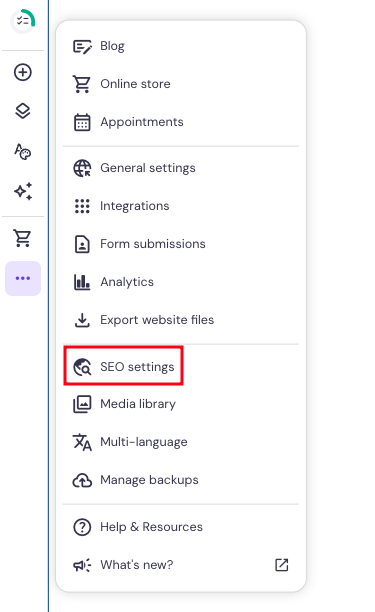
- Within the same page, you’ll be able to add focus keywords, along with meta titles and descriptions. Make sure to add them on each page of your website.
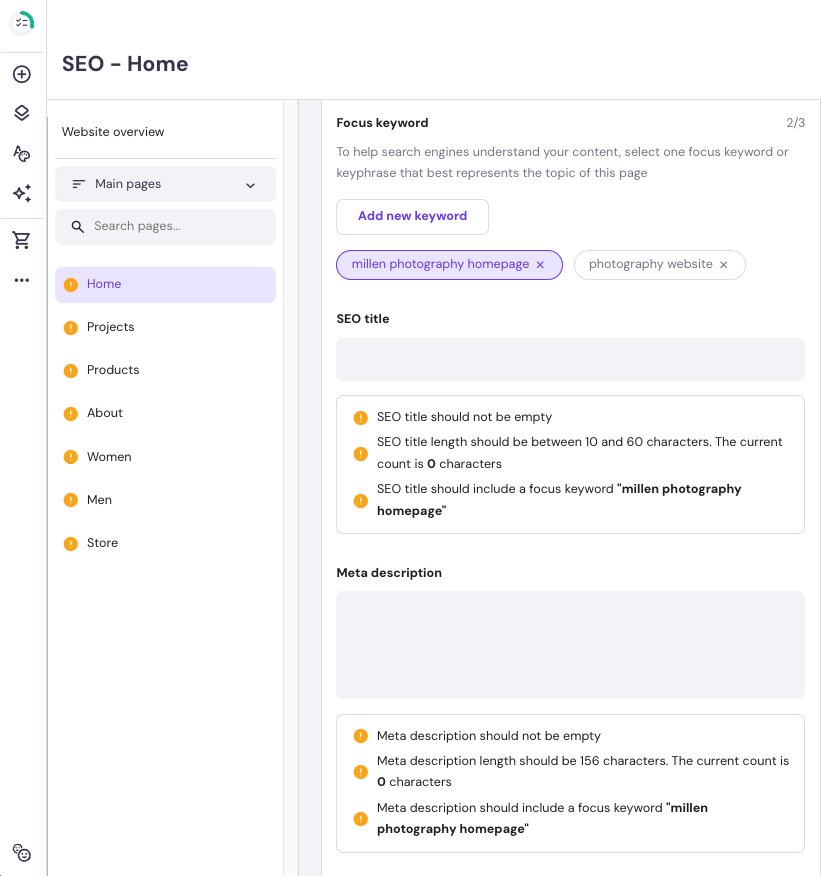
If you’re not sure where to start, use the AI SEO assistant located on the AI tools page. It helps write the meta titles and descriptions for you.
To do so, click the Generate new SEO button. Add your brand name and page description. Then, select the three keywords generated by AI, and click Finish to add them to your website.
In addition to these strategies, Hostinger offers features that further optimize your website, such as SSL certificates, Content Delivery Network (CDN), and a cache manager.
Available on both plans, an SSL (Secure Socket Layer) protects and optimizes your site by helping it rank better on search engines. Since search engine bots mark websites that don’t have SSL certificates as dangerous, they will have a harder time ranking.
Included in the Business plan, Hostinger’s CDN serves website resources from the location closest to the user – resulting in a 40% faster loading time.
Lastly, caching can make your website much faster. It saves copies of your web pages and shows them to visitors without reloading all elements each time. This leads to quicker access and a speedier browsing experience for your audience.
7. Promote your website
Promoting your website enhances search engine optimization (SEO) and drives more traffic to it. We’ll divide the marketing strategies into two: organic and non-organic.
Organic marketing
Organic promotion, or organic marketing, is a way to drive visitors to your website without using paid methods. This marketing strategy helps your website rank higher in search engines, resulting in more visitors.
Some organic marketing strategies to implement in your photography website are:
- Share the website. Promote the website using your preferred social media platforms. You can also share it on a freelance site, such as Upwork or Fiverr, to attract potential clients.
- Word-of-mouth marketing. Inform family, friends, photography community, and even existing clients about your website. They can spread the word and bring in potential clients.
To promote your website easier, consider creating a free QR code. This way, you can create stickers or share your website on slides, making it easier for people to access it.
Non-organic marketing
Compared to organic promotion, non-organic marketing involves paid methods to drive traffic to your website. These can include social media ads, search engine advertising, and influencer marketing.
Social media ads can be effective in reaching a large audience quickly, especially on platforms like Facebook and Instagram, where you can target specific demographics.
You can set ads leading to your website’s homepage or contact page so potential customers can easily find and learn more about your business.
Pro Tip
Read more about social media marketing and other paid marketing methods in our article on building a brand.
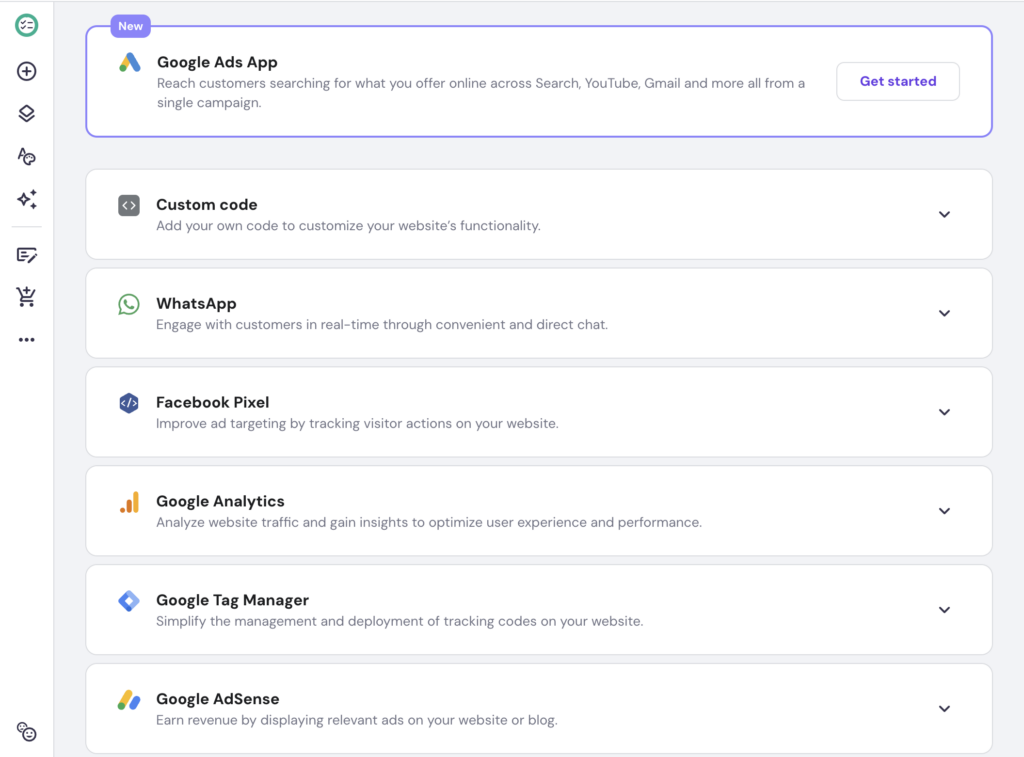
Use Hostinger Website Builder’s integration with the Google Ads App to create Performance Max campaigns, and leverage Facebook Pixel and Google Adsense to track the performance of your ads and optimize them for better results. To open the integration page, go to the website settings page → Integrations.
8. Sell your photos and prints online
Selling your photos is easy with Hostinger Photography Website Builder. However, you need to upgrade to the Business plan to enjoy the eCommerce functionality.
Follow these steps to add an online store to your website:
- On the left sidebar, find the website settings page.
- Choose Online store → Add store.
- You can start editing the products by clicking the Manager store or Manage products button. This will take you to the Store manager page.
- Go to the Products page to start editing the existing product list or adding new ones.
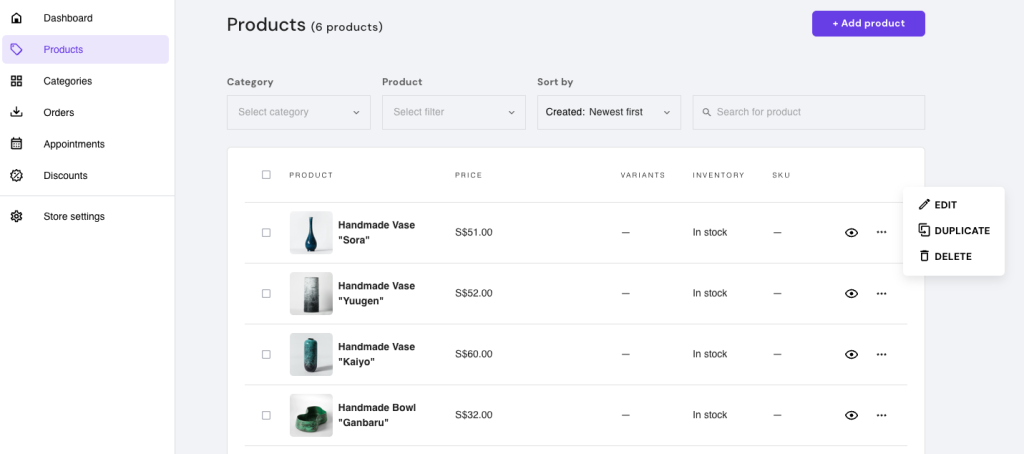
Here, you can set product description, price, SKU, and weight. You can also set the colors and categories for each product.
The Store manager also helps you track orders, schedule appointments, and set payment methods.
9. Publish your photography site
Publishing your photography website is an exciting step toward showcasing your work to the world. Here’s what to consider before and after publishing the site.
Before publishing
Before you go live, take a moment to gather feedback and test your website thoroughly. Reach out to friends, family, and fellow photographers to review your site. They can offer valuable insights on design, navigation, and content clarity.
Check all the technical aspects of your website. Ensure that links work, images load properly, and the site looks good on both desktop and mobile devices. Your site must offer a smooth and enjoyable experience to every visitor.
Publishing the website
After customizing your site, click Go live on the top right corner of the builder to publish your website. Congratulations! You’ve now officially enhanced your online presence as a freelance photographer.
After publishing
Keep your website fresh and engaging by regularly posting new photos, blog posts, or client testimonials. This not only gives visitors a reason to come back but also helps improve your search engine rankings.
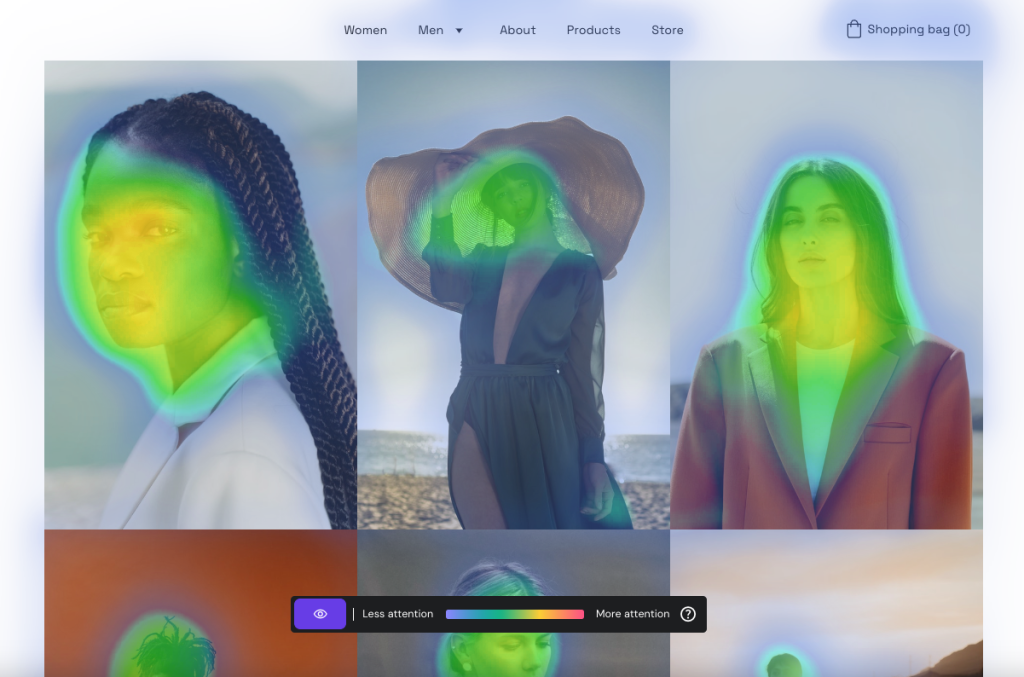
Plus, you can check your site’s heatmap with Hostinger Photography Website Builder. A heatmap tells you which pages on your website attract the most visitors’ attention. This guides you on what content to create or improve to keep your visitors engaged.
To check the heatmap, go to the AI tools page → AI Heatmap. Below is an example of what the heatmap will show you.
Conclusion
A photography site is a platform to showcase your work, attract potential clients, and generate income. This article has covered how to design a photography website in nine simple steps:
- Set goals for your photography website.
- Choose a platform for your photography website.
- Select a photography template.
- Add pictures to your website.
- Personalize your site.
- Optimize your photography website.
- Promote your pictures.
- Sell your photos and prints online.
- Publish your photography site.
Hostinger provides a professional website builder that makes it easy to create a stunning photography portfolio website. By following these steps and utilizing our AI tools, you can create a successful photography website yourself in just one afternoon. Good luck!
How to make a photography website FAQ
Read answers to the frequently asked questions on photography websites.
Can I make money from a photography website?
Absolutely! You can make money selling your photos and offering photography courses and services. Use Hostinger Photography Website Builder to create your online store and accept payments via PayPal, Stripe, and bank transfers.
What Is the best platform to create a photography website?
While there are many options out there, we recommend Hostinger Photography Website Builder. It’s user-friendly and specifically designed for creatives, making it easier than ever to build a beautiful, functional site.
What does a photography website need?
A well-rounded photography website should include a homepage, a photography portfolio page, and an About page. These pages help showcase your talent and connect with your audience.
Can I create a photography website for free?
Yes, but free platforms often assign a subdomain with the provider’s name, like yourwebsitename.providername.com, which can make your site appear less professional and hurt your branding efforts. Investing in a paid platform is worth it to build a professional photography website.


