Unseen features of WordPress: What you might be missing
Whether you’re a seasoned WordPress user or just starting out, you might be overlooking some of WordPress’s more hidden features.
What you are missing – or not understanding – may impact your ability to work effectively with WordPress. At worst, it’s causing frustration and a lot of wasted time.
In this article, I will explain some features that you might be missing in WordPress core. Hopefully, they can improve your workflow and help you get the most out of WordPress.
Download all in one WordPress cheat sheet
What you might be missing in the WordPress admin area
Let’s look at the features that might be less than obvious in the WordPress admin area. I am referring to everything you see when you log in to your site, outside of what you see when working with a page or post or in Site Editor with a block theme.
You will see these six hidden features regardless of what plugins you are running or whether you are using the Gutenberg block editor or a page builder such as Divi or Elementor.
For my examples, I am using WordPress 6.5 with the Twenty Twenty-Four theme.
1. The Dashboard
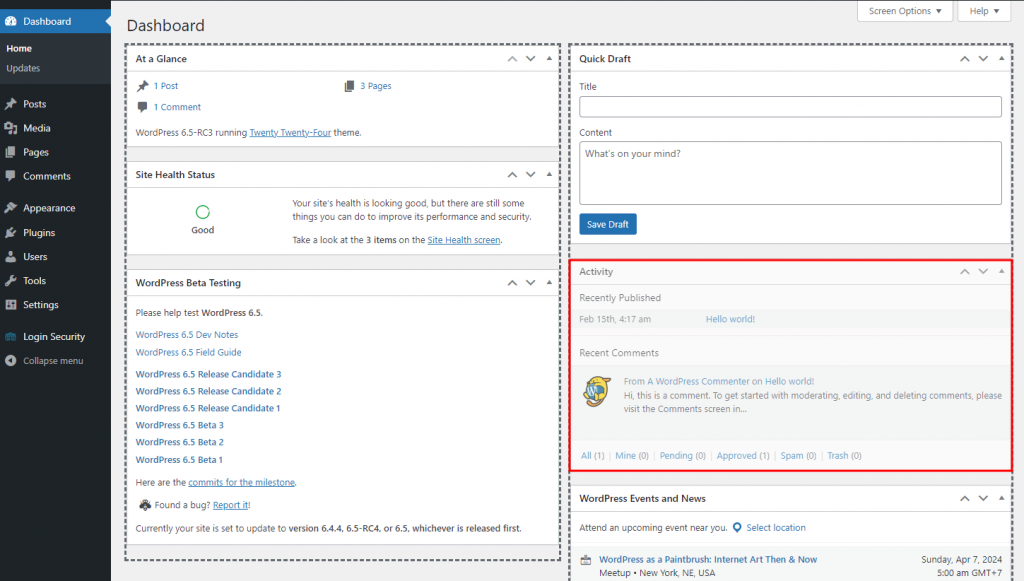
While you might not spend much time there, the first page you see after logging in supports drag-and-drop sections. Each of these sections can be hidden, moved, and organized to your liking.
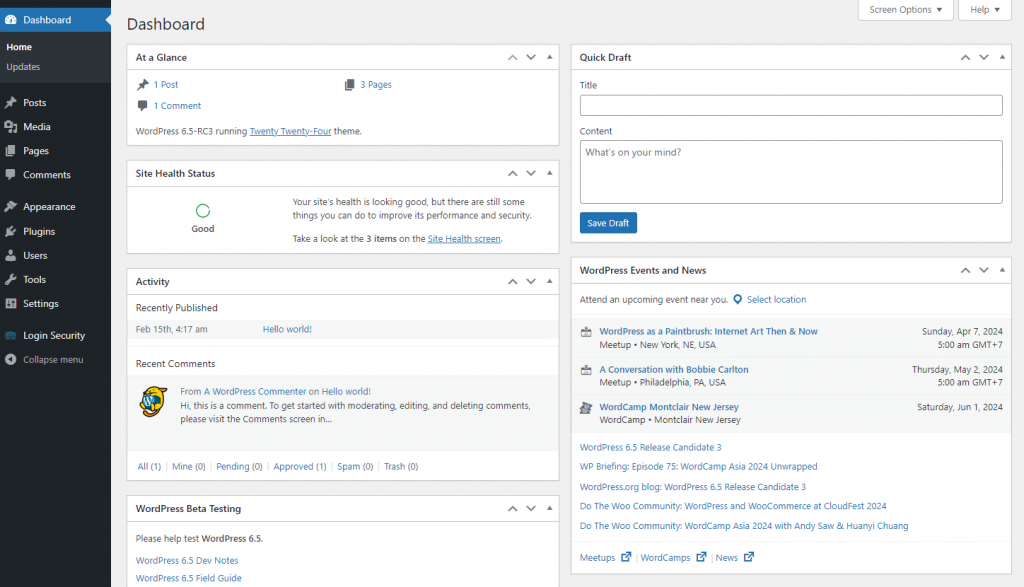
Here, I have moved the Activity section to the bottom of the right column.
By simply dragging that section, as seen above, I moved it to my desired location.
2. Screen Options
Many pages in the WordPress admin area have Screen Options that you might not be aware of.
On pages that have this feature, you will see a button near the upper right-hand corner. Once you open the Screen Options link, you will see various options you can use to customize the page. The options may vary depending on the page.

In the above example, I opened the Posts page in the WordPress admin area.

Once I selected the Screen Options button, I could see which Columns I wanted to show or hide in the list of Posts. I could also change the number of post items I wish to display instead of the default setting of 20. Additionally, I could change the View mode between Compact view and Extended view.
After making changes, don’t forget to click the Apply button and select the Screen Options button again to close it.
Here are other pages in the WordPress admin area where you will find the Screen Options button:
- Dashboard
- All Posts
- Categories
- Tags
- All Pages
- Media
- Comments
- Menus
- Plugins
- Users
3. Quick Edit
Quick Edit lets you make changes to a page or post without having to open the editor in a separate tab or window.
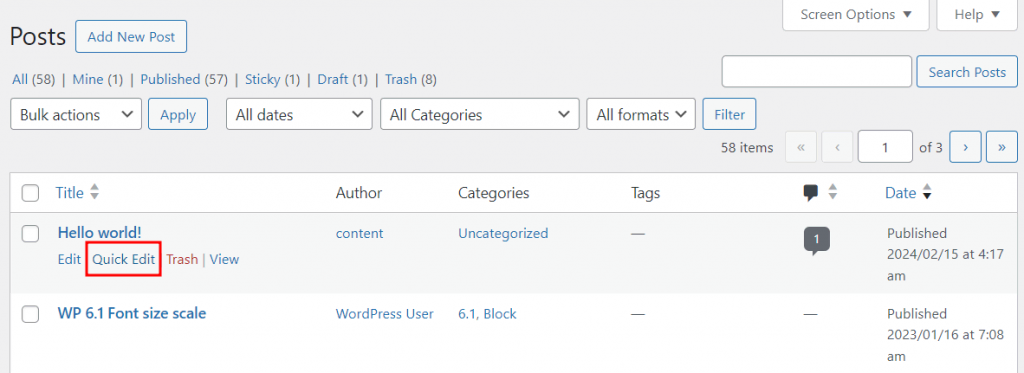
Here are some of the things you can change with Quick Edit:
- Page Title
- URL
- Date or Time of Publication
- Author
- Categories, Tags, Permission To Leave Comments (posts only)
- Status
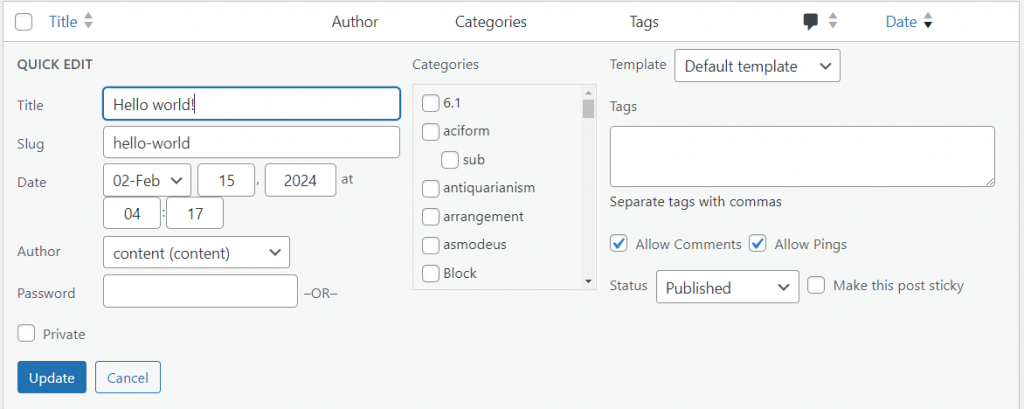
Once you are done making changes, select the Update button.
4. Bulk actions
This feature is like Quick Edit, but it is used when you want to change settings for more than one Page or Post.
For example, you want to change the author for several pages. Or, maybe you need to change the status from Published back to Draft for several posts. Rather than going into the Page or Post Editor for each page or post, use Bulk actions to edit settings for multiple pages or posts.
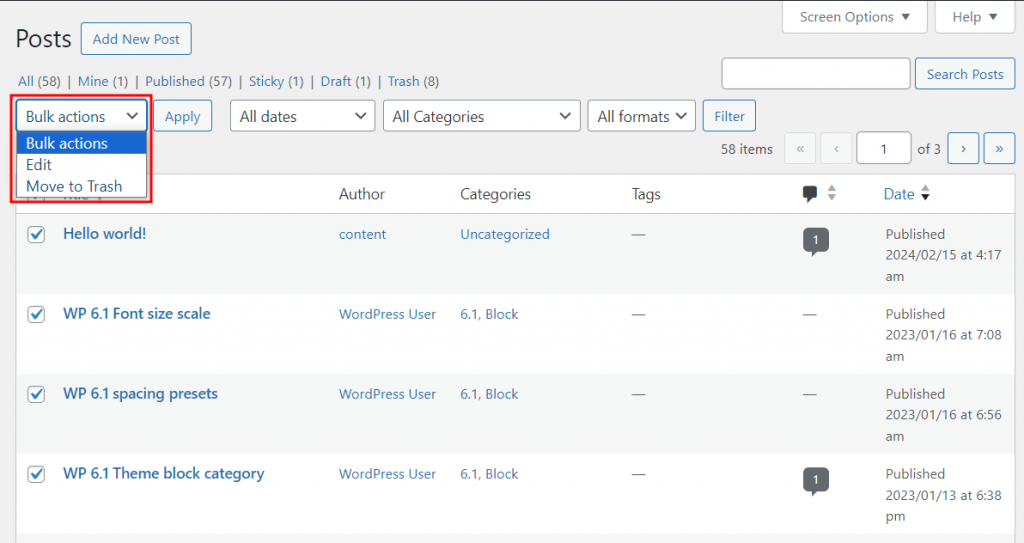
Here, I selected the Bulk actions drop-down and chose the Edit option. Then, I selected the Apply button.
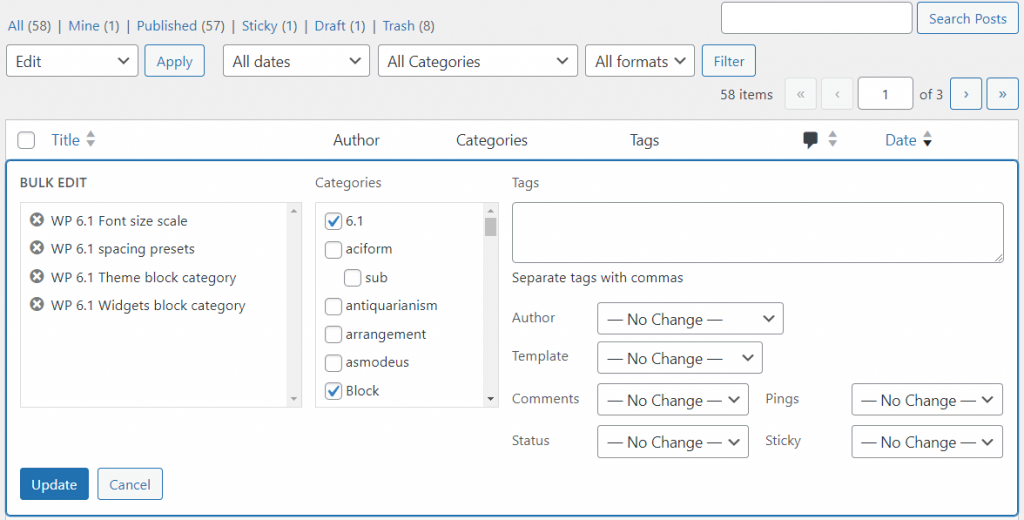
The screenshot above shows the options that were available to me. As you can see, they are very similar to those found in Quick Edit. If you want to revert changes to a selected post or page, select the X button to the left of the post or page title. Once done, select Update.
You will also see the Bulk actions feature on other pages in the WP Admin.
5. Comments
If you allow comments on your blog, you need to moderate it to prevent spam and security risks.
In the Comments section of the WordPress admin area, the options to moderate comments might not be obvious. You need to hover over the area to reveal the things you can do about the comment, as shown below.

These are the options you can choose for each comment:
- Approve/Unapprove
- Reply
- Quick Edit
- Edit
- History
- Spam
- Trash
6. Site Health
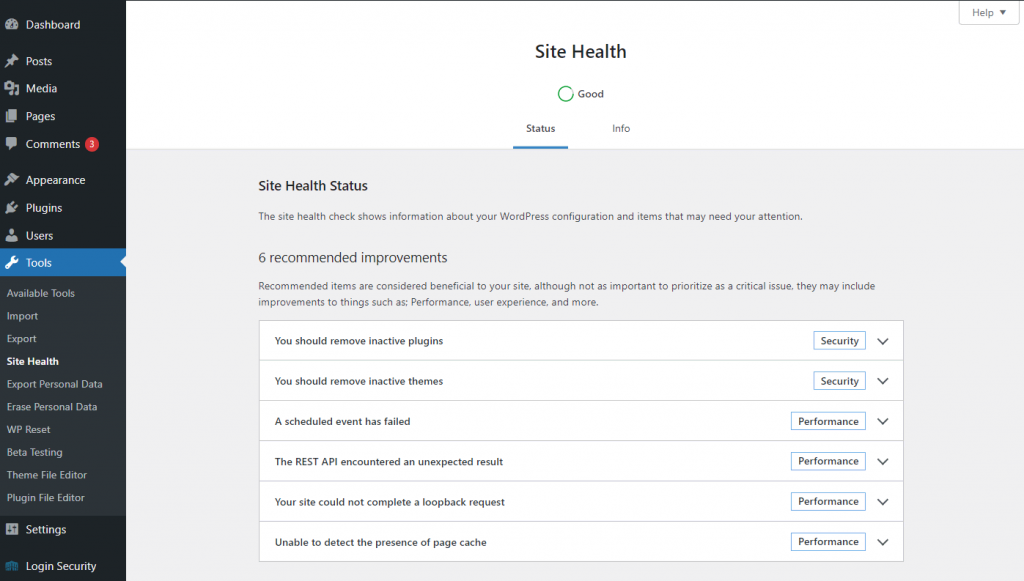
Within the Tools section of your WordPress admin area is a quick way to check on your site’s condition, which is divided into two parts.
The Status page tells you what you can do to improve your site’s security and performance. The Info page provides an overview of your site configuration, what server type is being used, and other technical details. This information is easy to export and share if necessary.
What you might be missing within the Page Editor
If you’re working with the WordPress Block Editor, aka Gutenberg, some things are less than obvious. Here are the features you will find if you are using a block theme and working in the Site Editor.
1. The slash (/) command
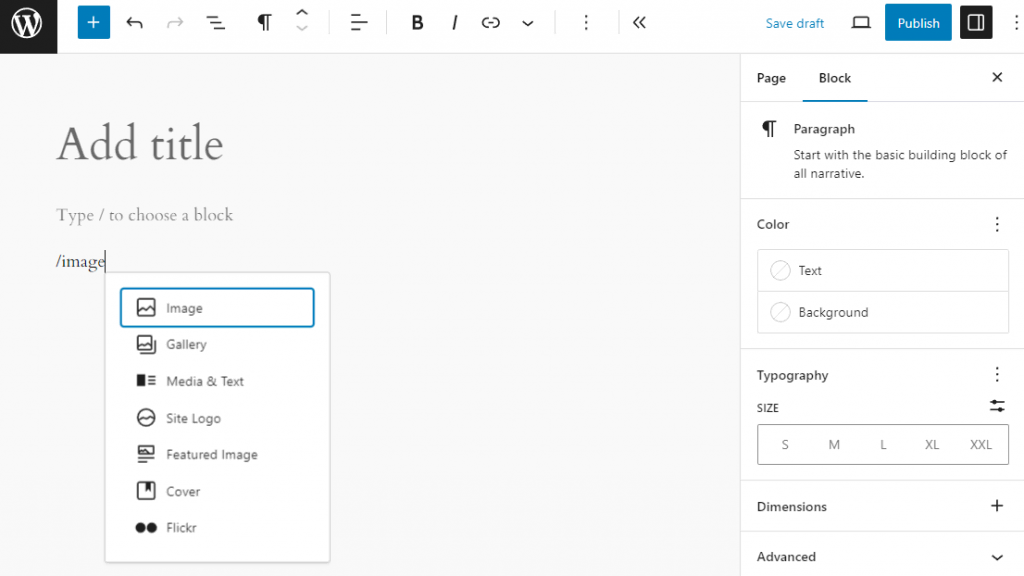
If you’ve been selecting the Inserter button each time you want to add a block, you unwittingly have been wasting time. A faster way to insert a block is by entering a slash (/).
Suppose you want to insert an image into your page. The fastest way to do this is by typing “/image”, as shown below.
2. Docked toolbar
A lot of people feel distracted by the block toolbar that floats or sits on top of content as they work. This is what I mean.
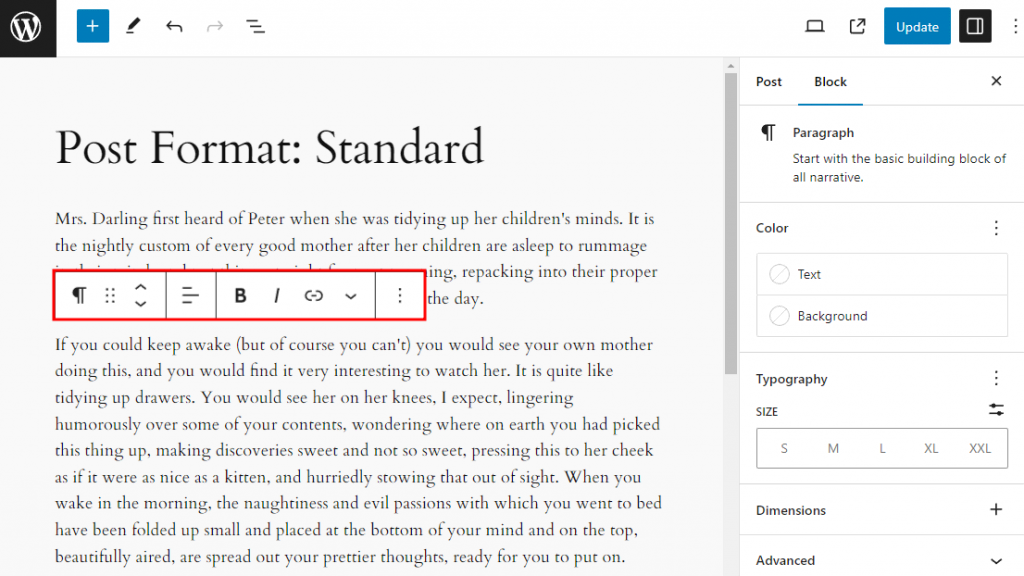
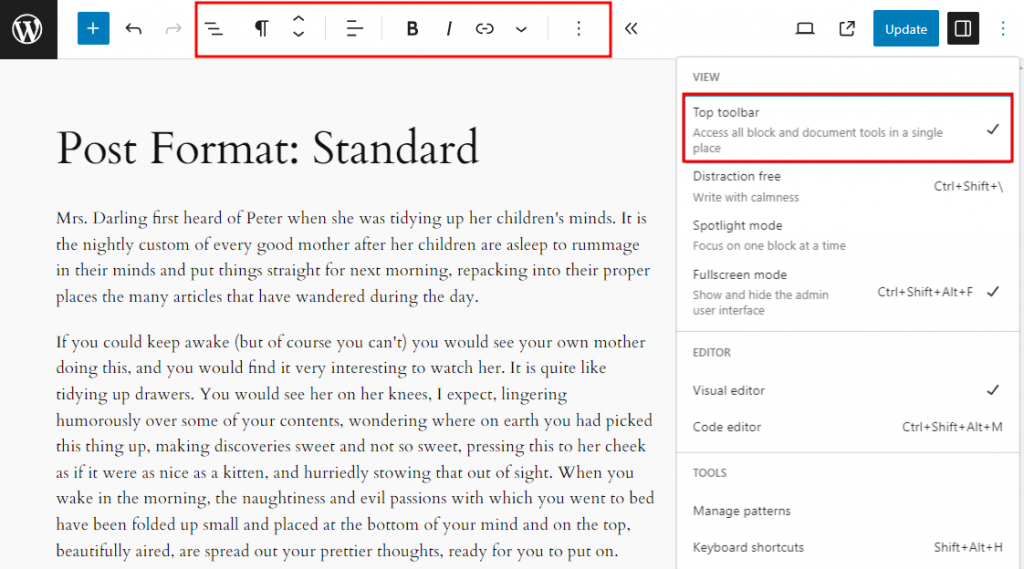
Fortunately, there’s a way to fix it. Select the three dots option at the top-right corner, and you will see several options. Then, choose the Top toolbar option to have the toolbar docked in place at the top of the page.
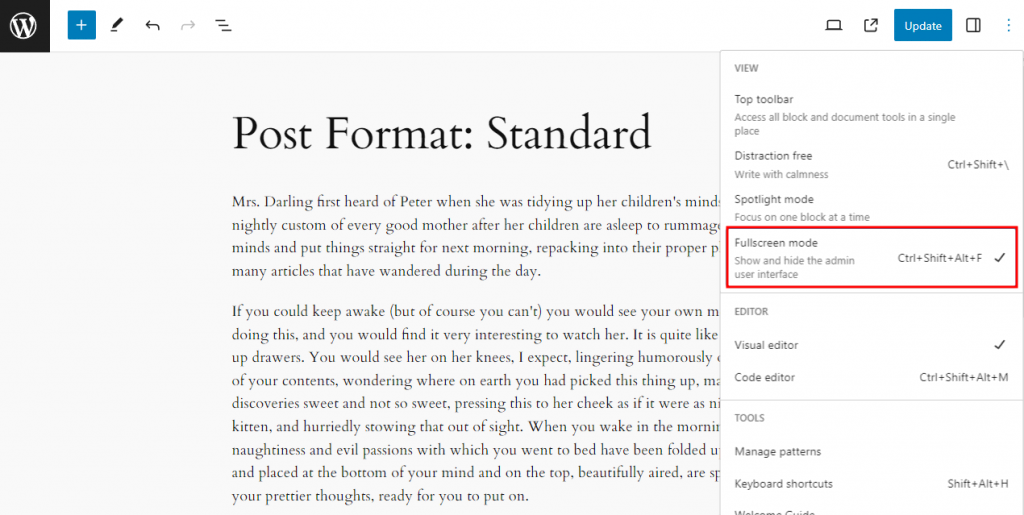
3. Fullscreen mode
You might be working with a screen that displays the left sidebar in your WordPress admin area.
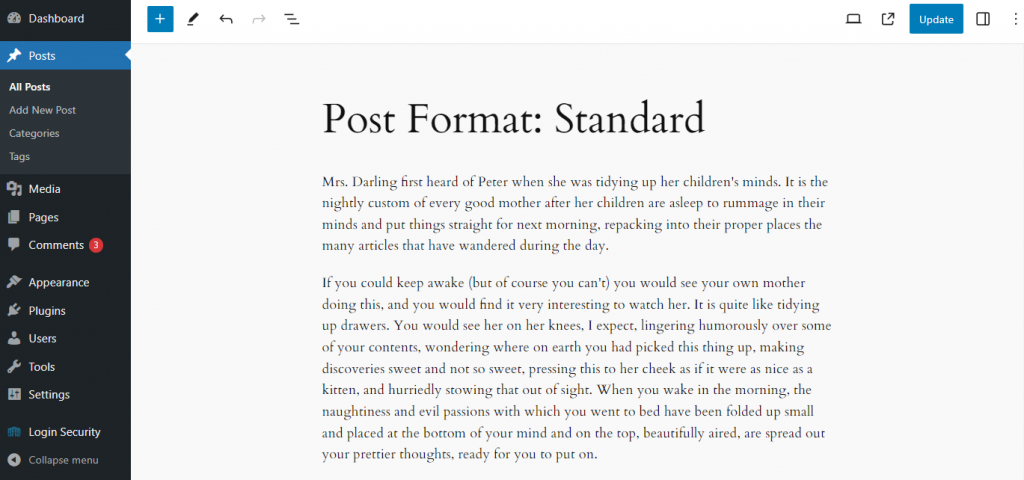
To remove the sidebar, choose the three dots option in the upper right-hand corner. Then, select the Fullscreen mode option.
4. Distraction free mode
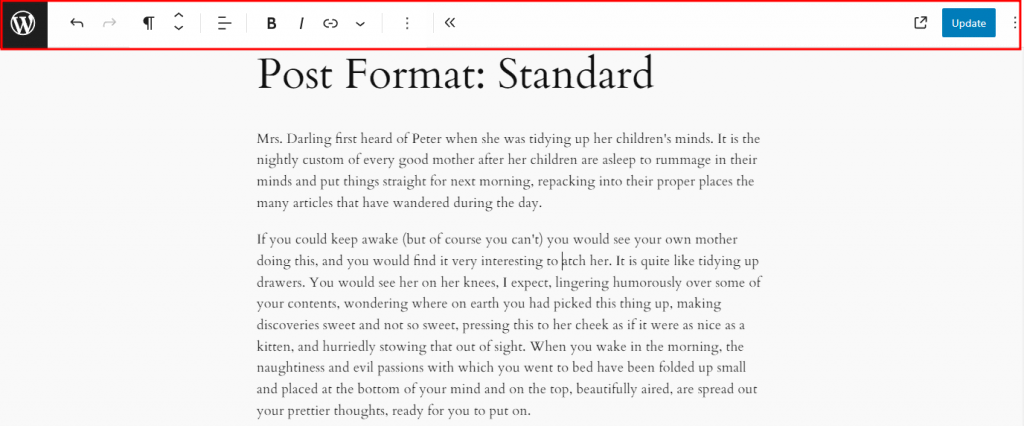
If you are bothered by all the user interface elements of the Block Editor, there is a solution for you. The Distraction free feature, another one of the options when expanding the three dots button, allows you to remove all UI elements outside of the editing area.
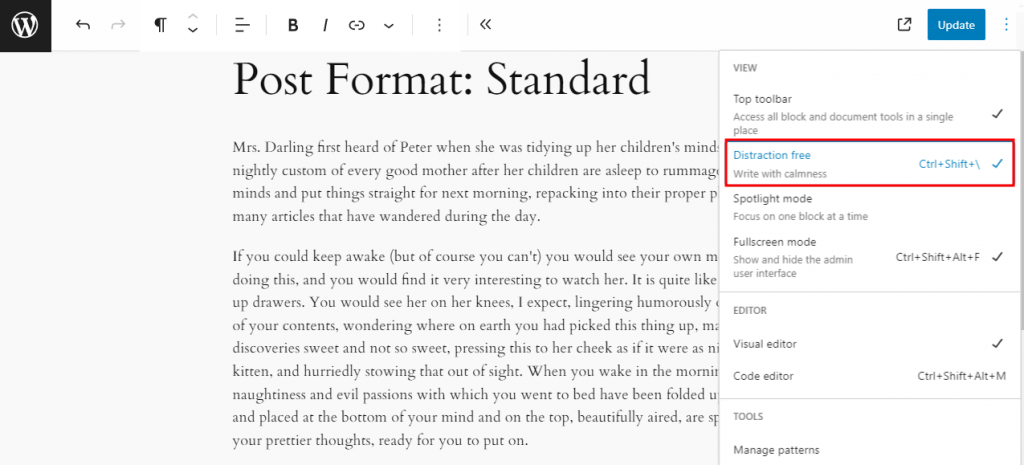
To display the block toolbar and other controls, just hover over the top of the page to show these features.
5. Spotlight mode
If you need to focus on a single block as you work, the Spotlight Mode is your best option.
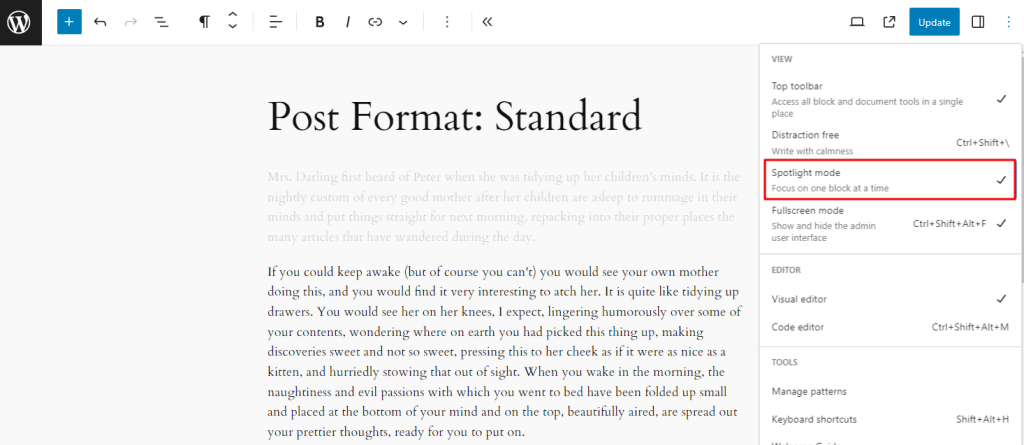
Just click on the block you wish to work with, and it will be highlighted.
6. Replacing an image via drag and drop
You might be familiar with ways to add an image to your pages or posts. But did you know that you can drag and drop an image in to replace another image?
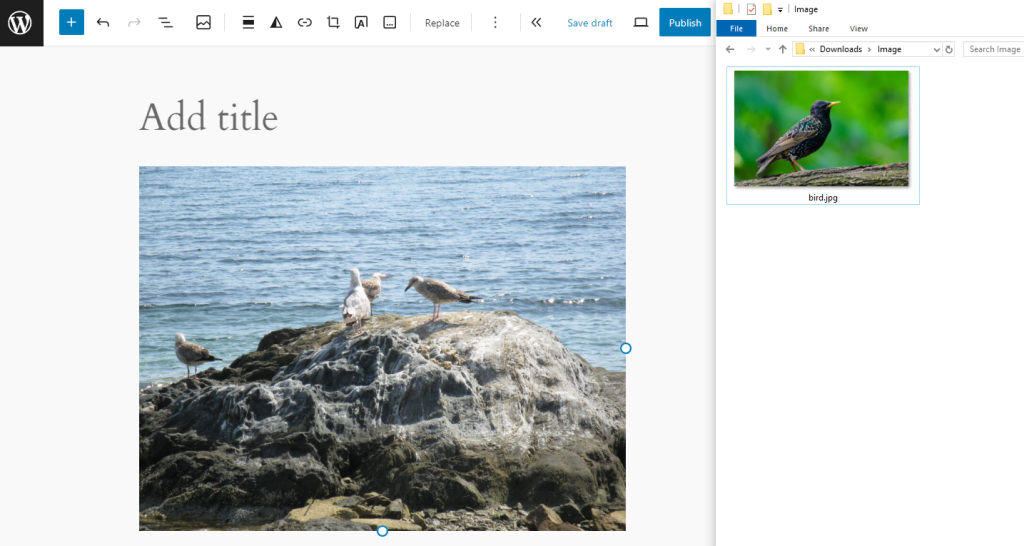
In the above screenshot, I had an image on my desktop that I would use to replace the image on my page.
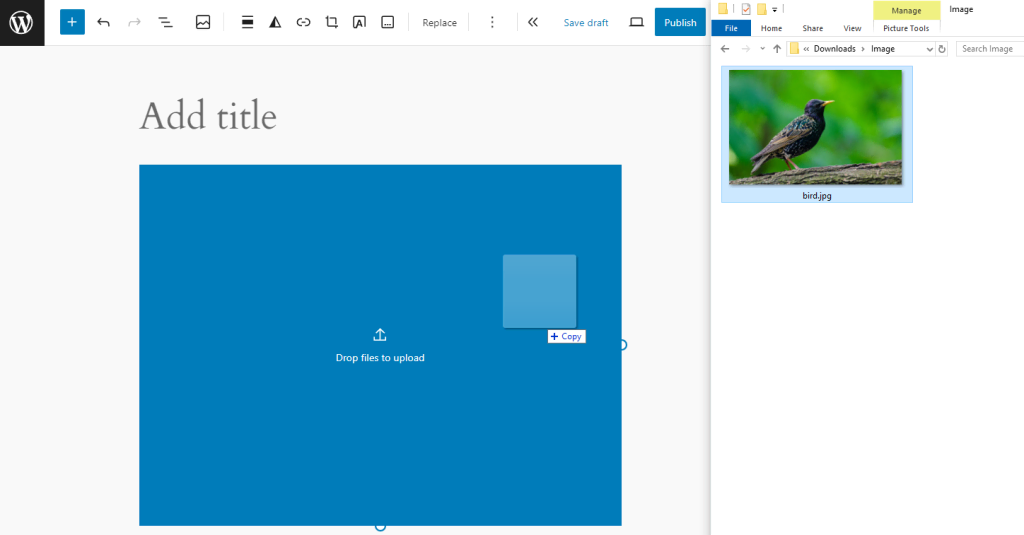
I just dragged it over and dropped it onto the image on the page.
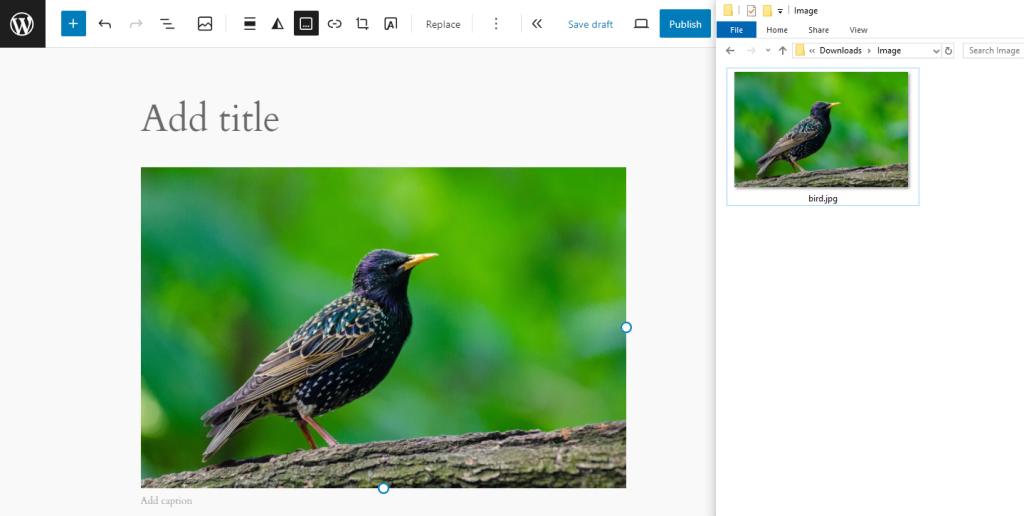
That’s all there is to it. The new image will also be automatically added to the Media Library.
7. Rearranging blocks using list view
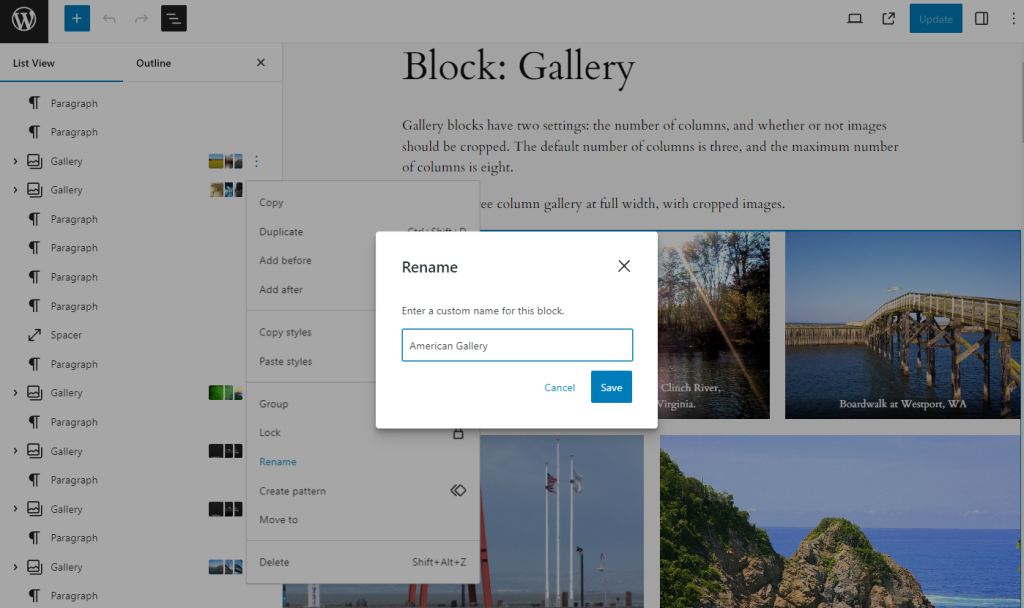
A very effective way to work with the Block Editor is by organizing your layout and blocks using the List View. And now, you can rename most blocks in List View to better represent what they are.
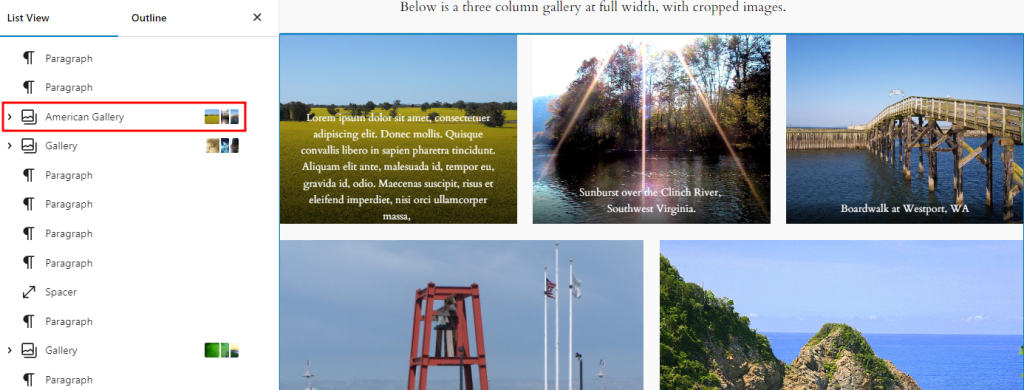
After selecting the three dots option in the Gallery Block, I selected the Rename option in the fly-out menu. Then, I renamed the Gallery Block “American Gallery.”
The renamed Gallery Block went here.
8. Grouping multiple blocks using the block toolbar
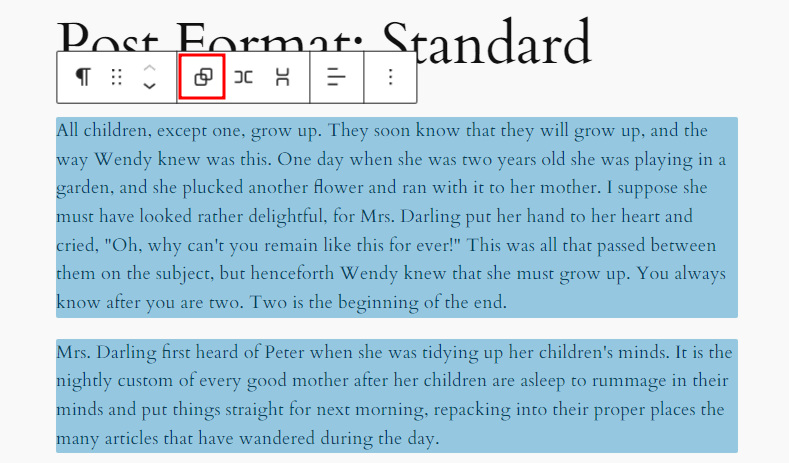
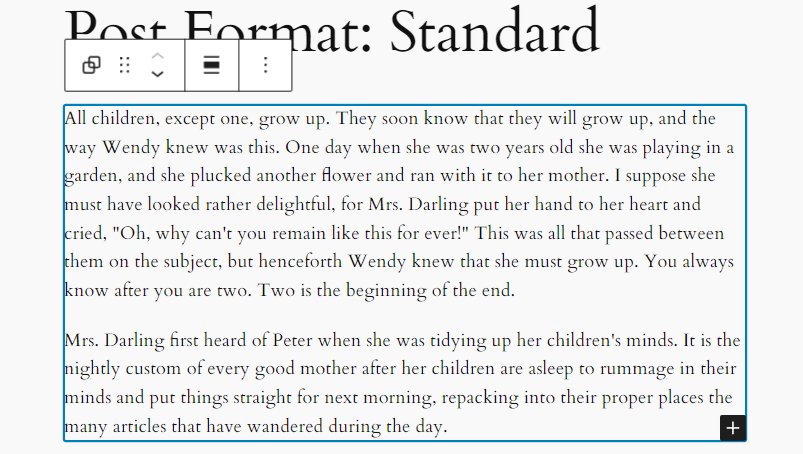
The ability to group blocks and form a specific layout can be done by selecting adjacent blocks and then using the toolbar to place those blocks into a group.
Here, I selected two paragraphs I wanted to place within a group.
Now, I have the two paragraphs within a group block.
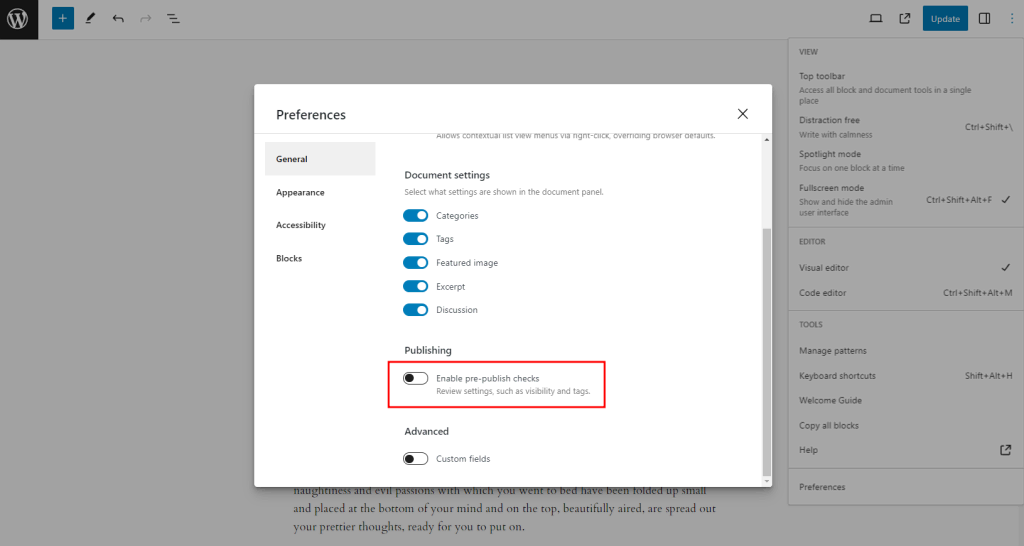
9. Turn off the two-step publishing button
If you don’t like having to select Publish twice when publishing a Page or Post, there is an easy way to change this to a one-click operation.
First, choose the three dots button. Next, choose Preferences. Finally, toggle off the Enable pre-publish checks switch.
What you might be missing within the Site Editor
To use the following features, you must be using a block theme. A block theme is a type of WordPress theme that allows you to create, edit, and manage every aspect of your site with blocks.
1. Setting image placeholder(s) in a pattern
Suppose you need to create a template or pattern that will be reused. You don’t want to insert default dummy images since they will need to be swapped out for the actual images when the template or pattern is used.
So, the best practice is to use an image placeholder. Luckily, they are simple to create and use.
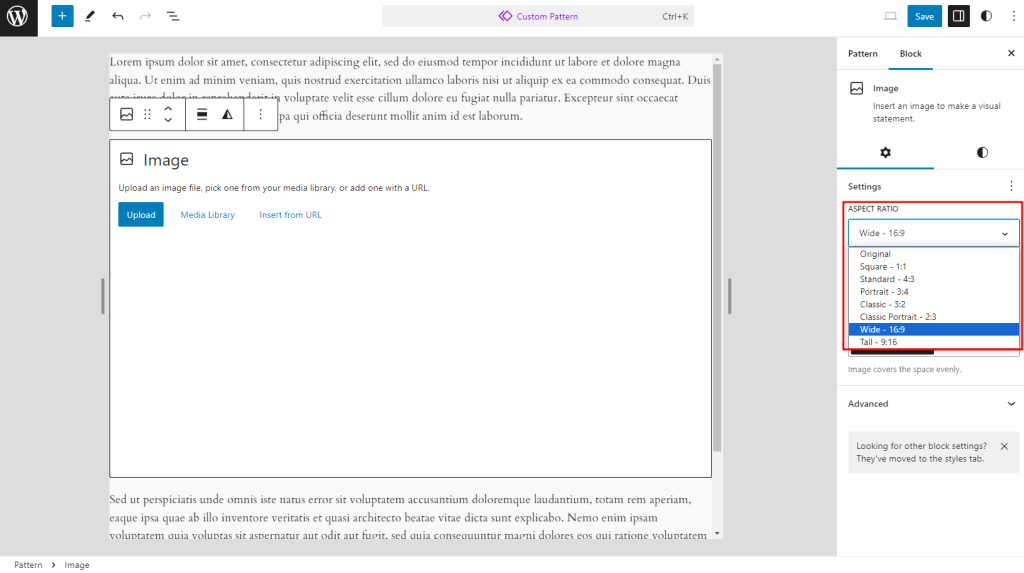
Here, I made a pattern that I could reuse anywhere on the site with an image aligned to the left of the text. Note that in the image settings, I chose to change the aspect ratio to 4:3 so that any other image I choose automatically uses that setting.
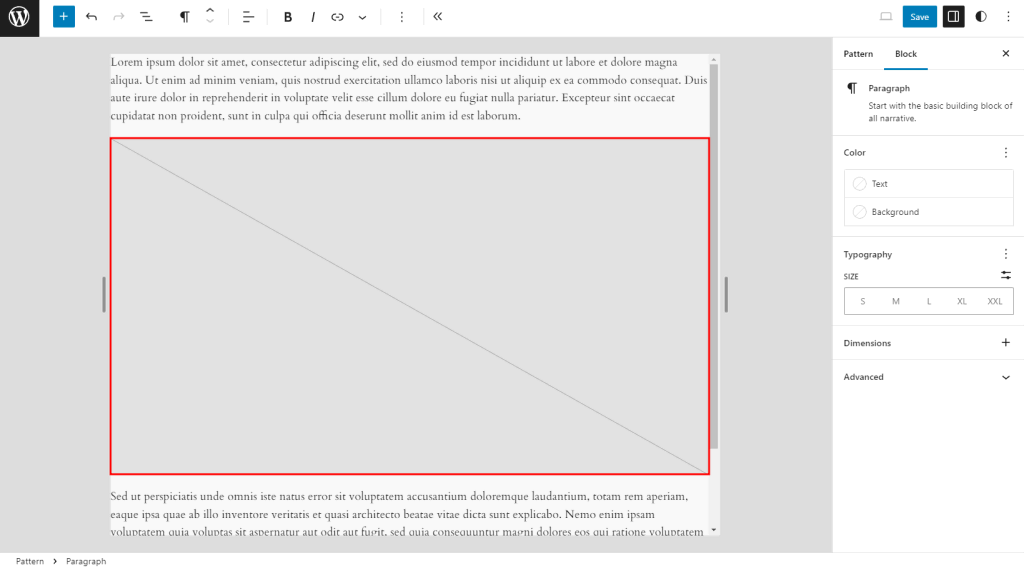
Clicking anywhere outside of the image box will render an image placeholder. You can always tell you have an image placeholder, as the box will have a diagonal line through it.
This feature is also available in the Page or Post Editor, even if you are working with a classic or non-block theme. But for optimal use, it is best to use it with a block theme – the only theme type that supports the Site Editor.
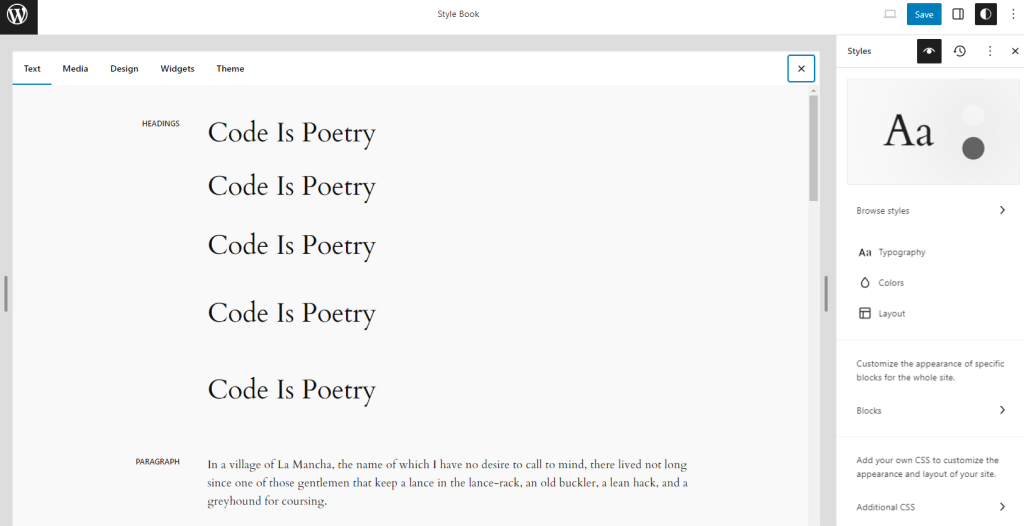
2. The style book
A feature found only with block themes is the Style Book. It allows you to set the styles: color, font face, dimensions, and more for an entire site.
Locate the Styles section within the Site Editor. Then, click on the eye icon, which will provide access to the Style Book.
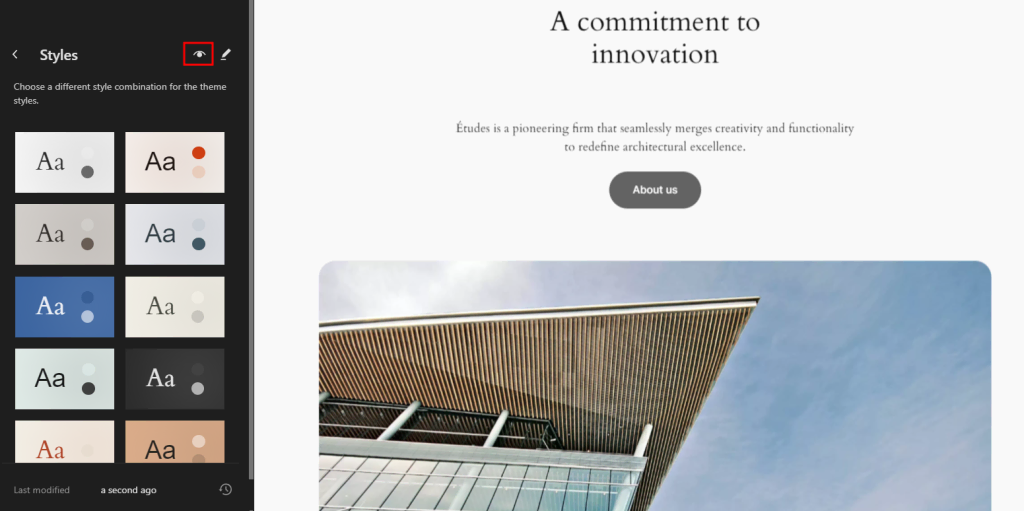
Click anywhere in the design canvas, and you will be able to edit all styles in the Style Book.
The Style Book is organized into these sections:
- Text
- Media
- Design
- Widgets
- Theme
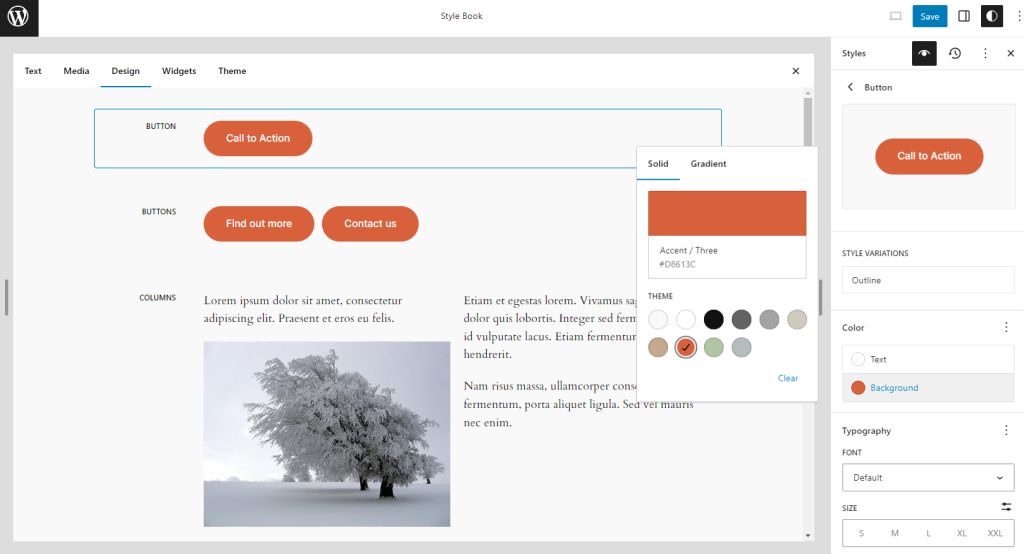
I wanted to change the background color of the buttons, so I selected the Design tab, which led me to this page.
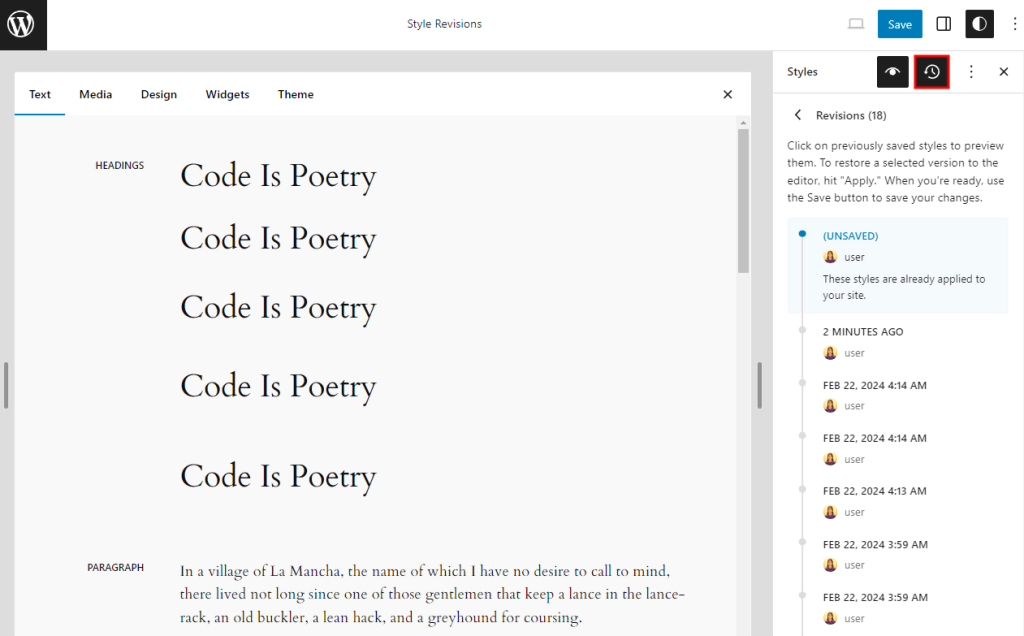
Finally, I selected the button that opens the button block settings, where I chose a new color for the background.
Any changes made in the Style Book can be overridden on a block-by-block basis when working with a single block in the Page or Post Editor.
3. Revisions
Introduced in WordPress 6.4 and expanded in WordPress 6.5 is the ability to roll back changes made in the following areas of the Site Editor:
- Style Book
- Templates
- Patterns
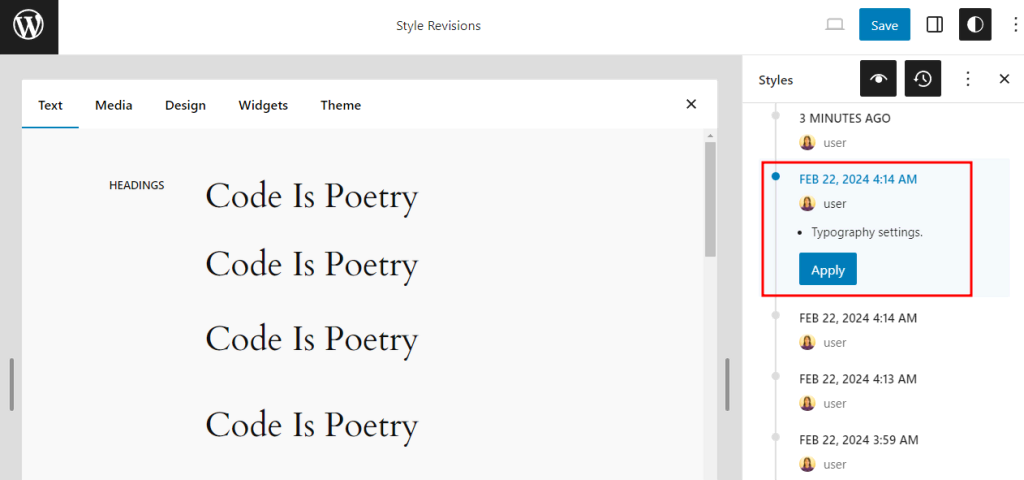
To access Revisions in the Style Book, select the clock icon in the upper right-hand corner. They are listed from the most recent versions, and each revision shows which user made the change.
Here, I chose a design I created on a given date.
Now, you can see that I changed the color style. To roll back to this style, I selected the Apply button. To accept the style, I selected the Save button.
Again, this feature is available only in a block theme that supports the Site Editor.
4. Exporting and importing a pattern
If you create a pattern you wish to use for another site or share it with others in the wordpress.org Patterns Repository, you can export it as a JSON file. Here, I am in the Patterns section of the Site Editor, where I see the five patterns I have made.
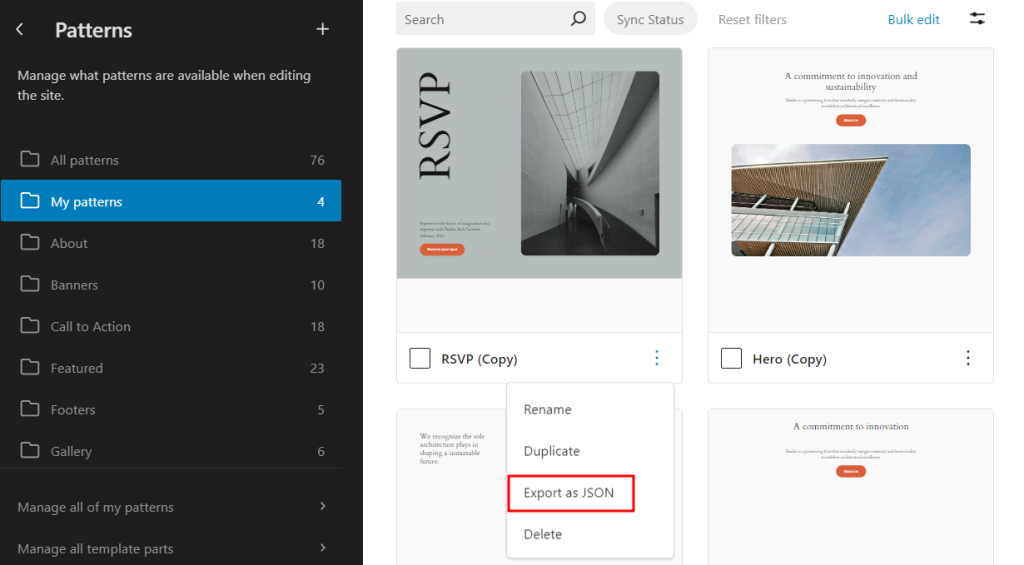
After selecting the 3 dots option, I chose to export the file.
On the new site, I went to the Patterns section again and chose the plus sign, which opened the box to import the JSON file.
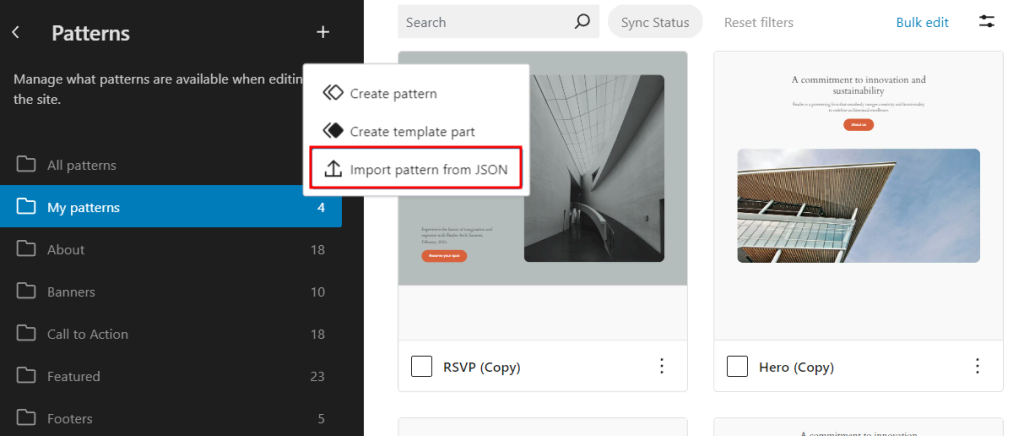
That’s all there is to it.
If you need to export a theme, be sure to check out our article on how to export a WordPress theme.
Conclusion
While WordPress prides itself on being intuitive, many features are easy to miss. This can prevent you from learning how to use it effectively.
As you can see, it does not need to be that way. In this article, we have explored the many ways you can use WordPress’s hidden features to speed up your workflows. So, next time you’re working with WordPress, don’t forget to take advantage of these tips and tricks!
