How to use the Hostinger Amazon Affiliate Connector plugin to build an affiliate website
The Hostinger Amazon Affiliate Connector plugin helps you add affiliate links in various display formats. To add products, you don’t have to switch tabs between your WordPress dashboard and Amazon, as you can simply search for them directly from the WordPress block editor.
It’s also integrated with our AI Website Builder for WordPress, so you can instantly launch an affiliate marketing website in minutes. If you’re new to affiliate marketing, this is the perfect combination to kickstart your journey.
Read on to explore the benefits of using this plugin and how to activate it on your website.
How to get the Hostinger Amazon Affiliate Connector WordPress plugin
The Hostinger Amazon Affiliate Connector plugin comes with Business and Cloud WordPress hosting plans, offering ample resources to keep your affiliate site up and running.
The Business plan is a great choice for starting your affiliate marketing business, as it can receive up to 100,000 monthly visits. Once your site grows, a cloud hosting plan becomes the next logical step to power your site.
In addition to the plugin, you’ll also receive a free custom domain name, a WordPress staging tool, and advanced WordPress optimization with LiteSpeed cache. Even better, you can install WordPress with a single click.

If this is your first time building an affiliate website, you can benefit from our AI Website Builder for WordPress to launch it quickly:
- Choose Create a website, and then pick WordPress.
- Set up the login details for your WordPress account.
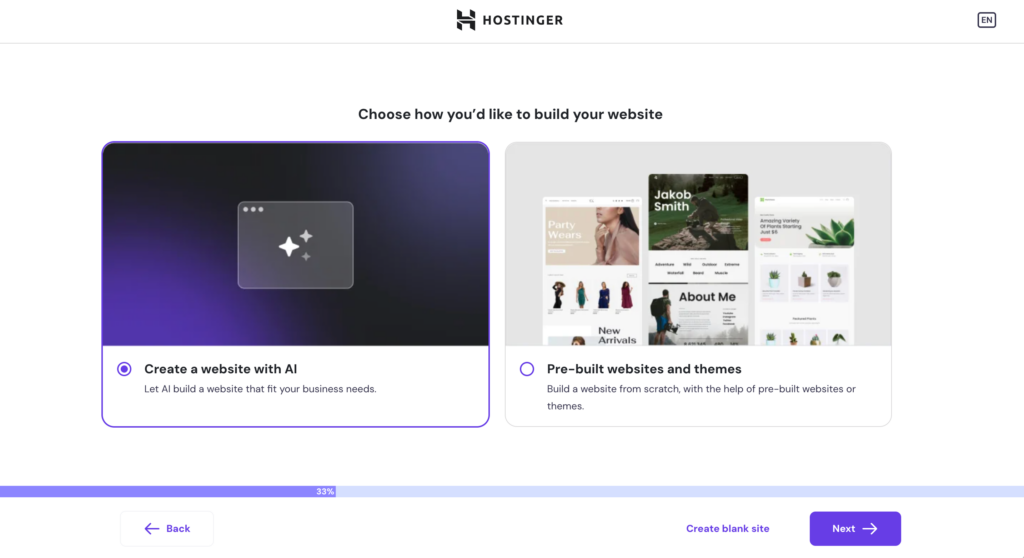
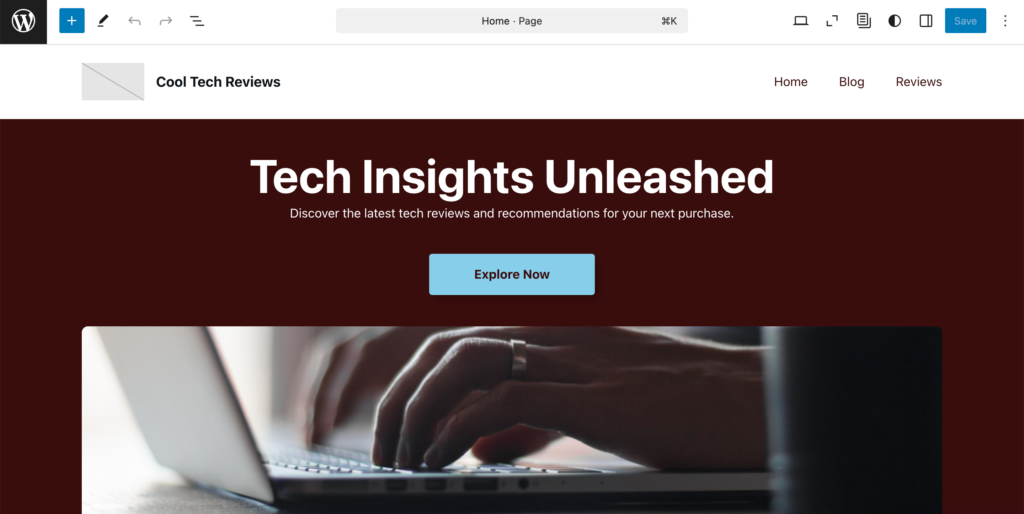
- You have the option to Create a website with AI or use Pre-built websites and themes. For this tutorial, we’ll choose Create a website with AI for a quick and simple setup.
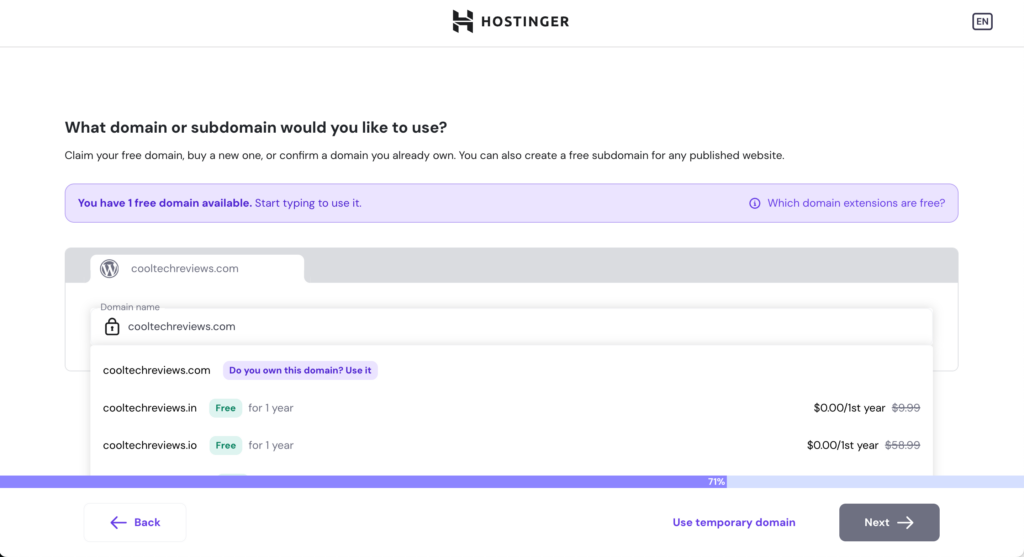
- Enter the domain name you want to use for the website. If it’s not available, consider our suggested alternatives.
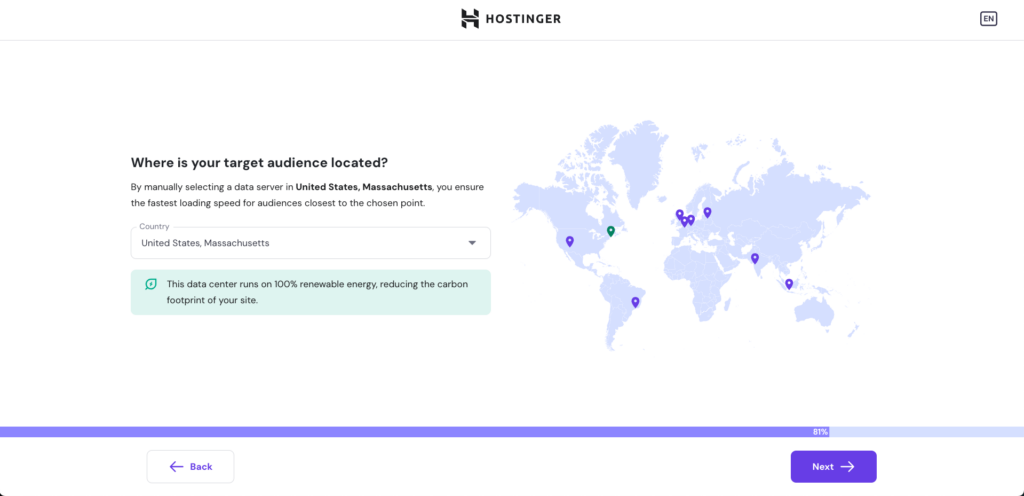
- Choose the data center nearest to your target audience to ensure fast loading speeds.
- Wait until WordPress finishes installing. This may take a few minutes.
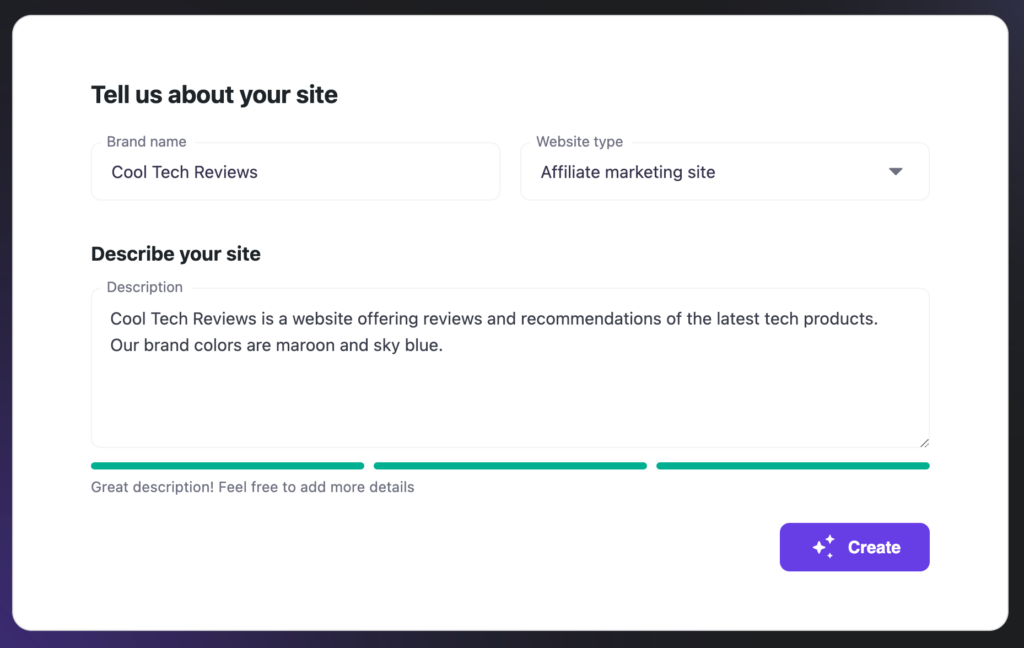
- In the AI Website Creation screen, enter your Brand name and describe your site in detail to get the best results. For the Website type drop-down menu, make sure to choose Affiliate marketing site.
- Wait until our AI Builder finishes creating your website. Once you’re happy with the result, click Confirm & edit. You will be redirected to the WordPress block editor where you can customize your new site further.
If you already have an existing website where you want to activate the plugin, you can do it via hPanel:
- Log in to your hosting account and navigate to the Websites tab.
- Click the Dashboard button beside your website domain name.
- Select WordPress overview.
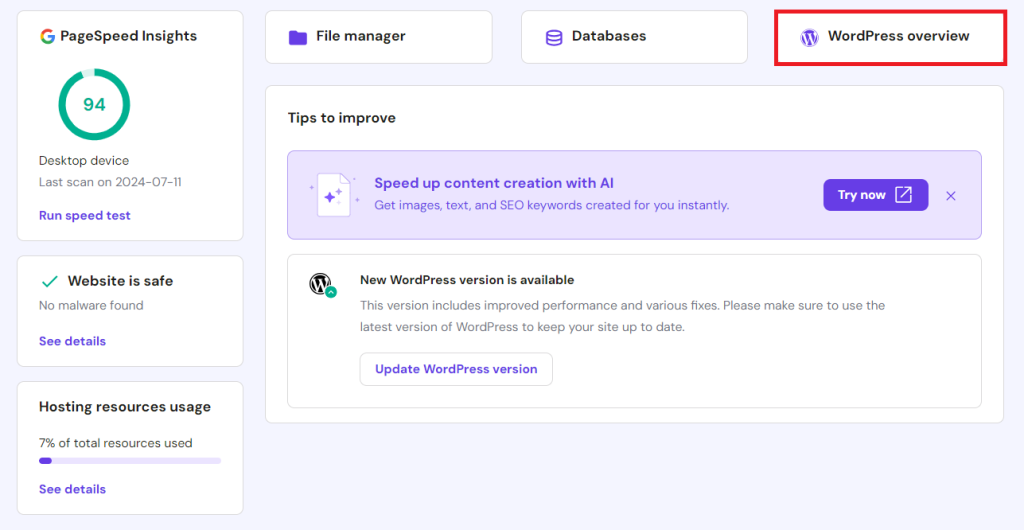
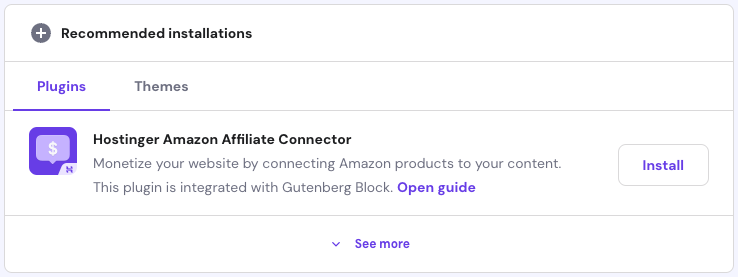
- Scroll down to the Recommended installations section to find the Hostinger Amazon Affiliate Connector plugin.
- Click Install to activate it on your site.
How to set up Hostinger Amazon Affiliate Connector WordPress plugin
First, connect your Amazon Associates account with your WordPress website:
- Go to your WordPress admin dashboard → Hostinger → Amazon Affiliate tab and click Connect.

- Choose the country where you set up your Amazon affiliate account and enter your tracking ID. Adding your API settings is optional, but they can give you more accurate search results.

- Hit Connect once you’re done. You’ll see a confirmation message if the integration is successful.
How to add product listings using the Hostinger Amazon Affiliate Connector WordPress plugin
Now that the plugin is set up, you can add Amazon affiliate links to your blog post in several clicks:
- Go to Posts → Add New Post from your WordPress dashboard.
- Write your post as usual, or use our AI Content Creator tool to prepare an article draft.
- Click the Add block button and find Link Amazon product(s).
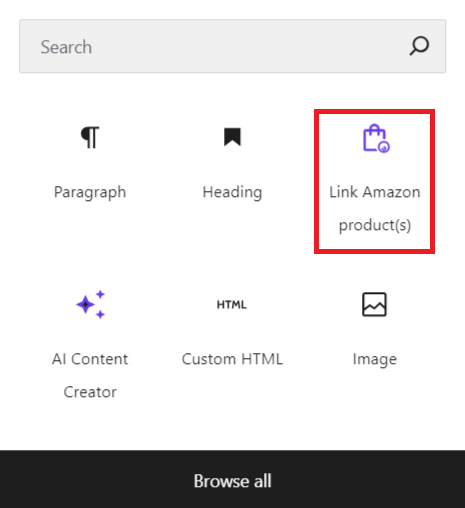
- Click the Select button to add a single product, a list of products, or a comparison table to your post.
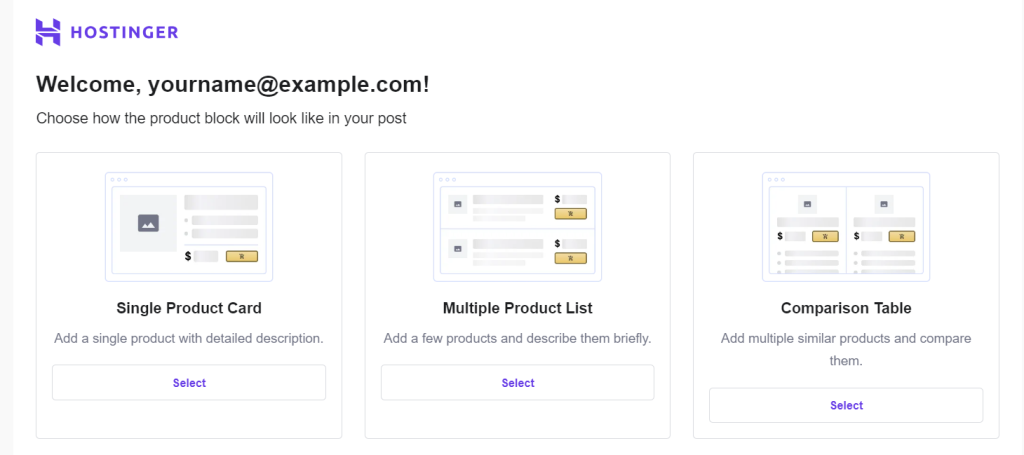
From here, the steps of adding affiliate links will be different according to your chosen product display layout:
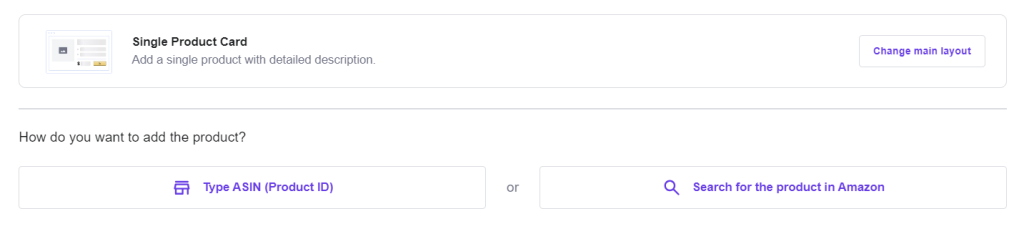
Single Product Cart
To display a single product on your WordPress site, choose to input the ASIN number or select directly from Amazon’s catalog.
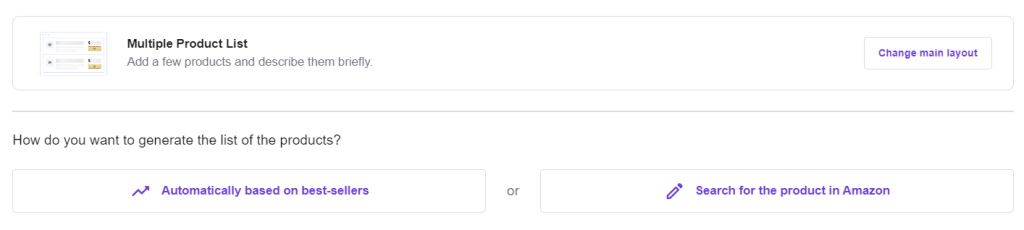
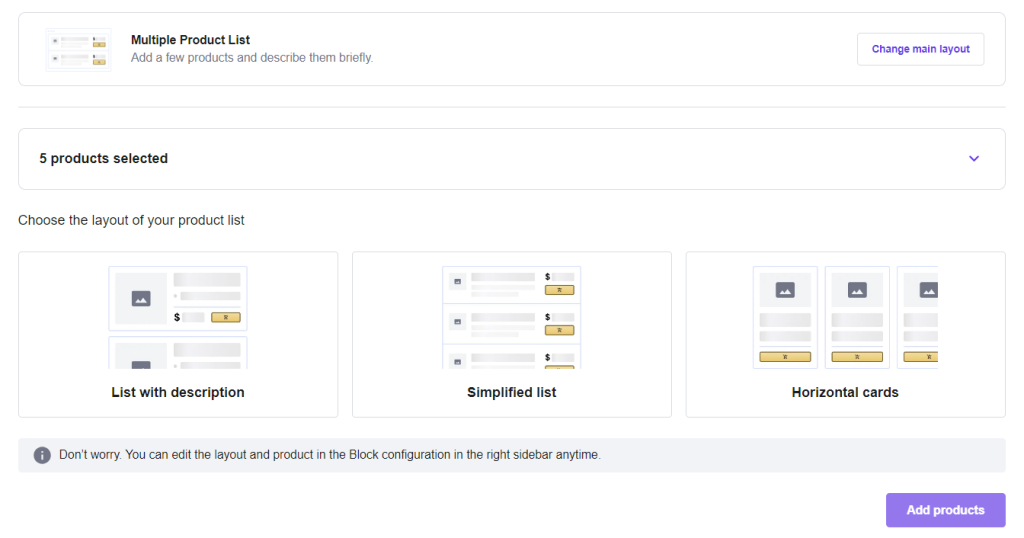
Multiple Product List
If you want to display several items, you can choose to pull best-seller product data from Amazon automatically.
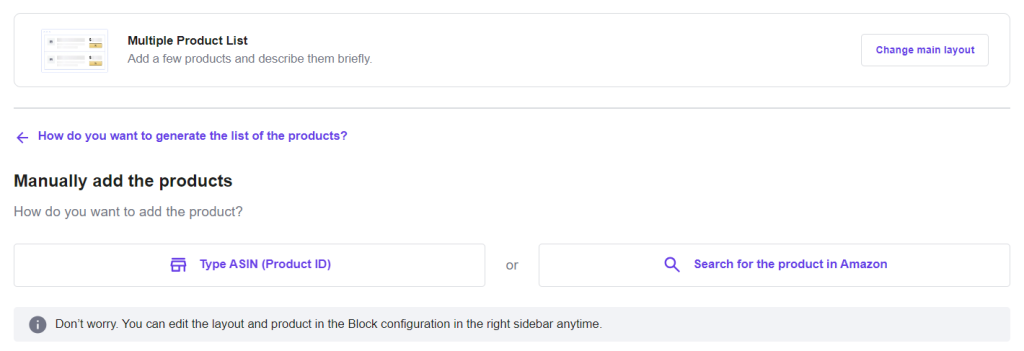
To manually add your affiliate products to the list, you can provide their ASIN numbers or look for one on Amazon.
Once you’ve added the items to the list, you can choose your preferred display layout. You can also show the products in a list with descriptions, a simplified list, or horizontal cards.
To finish, hit Add products.
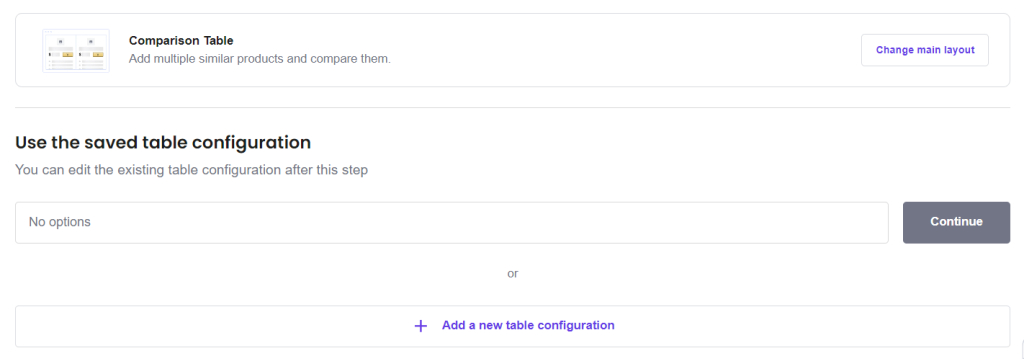
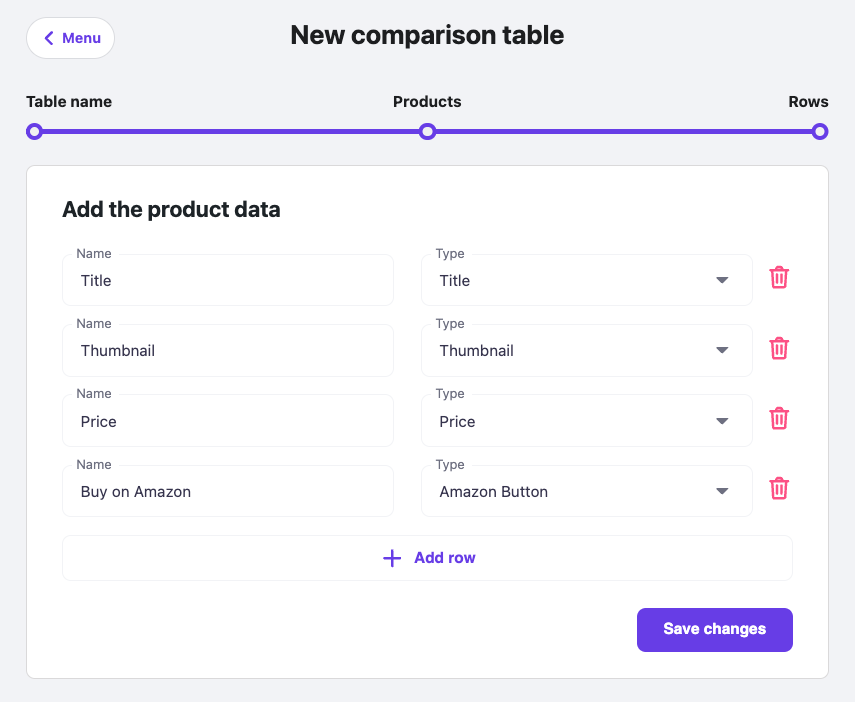
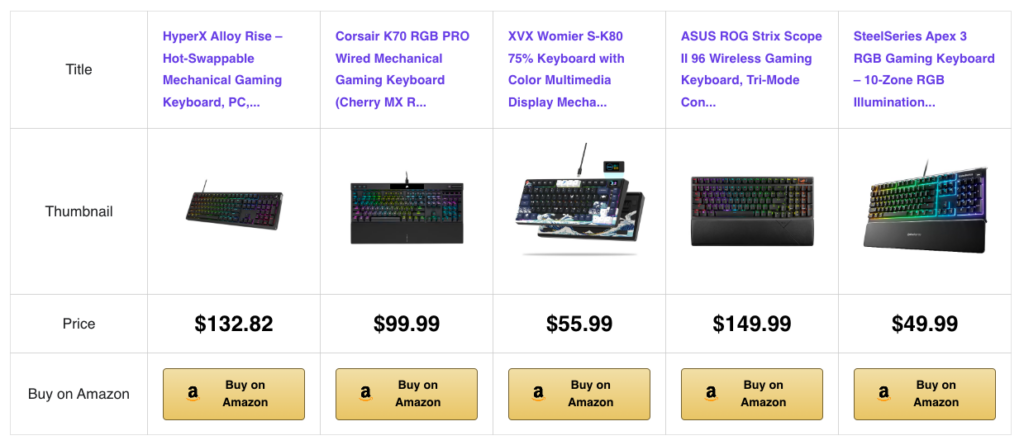
Comparison Table
To add a product comparison table using the plugin, you must configure the settings beforehand. Click Add a new table configuration to go to the Hostinger menu in your WordPress dashboard.
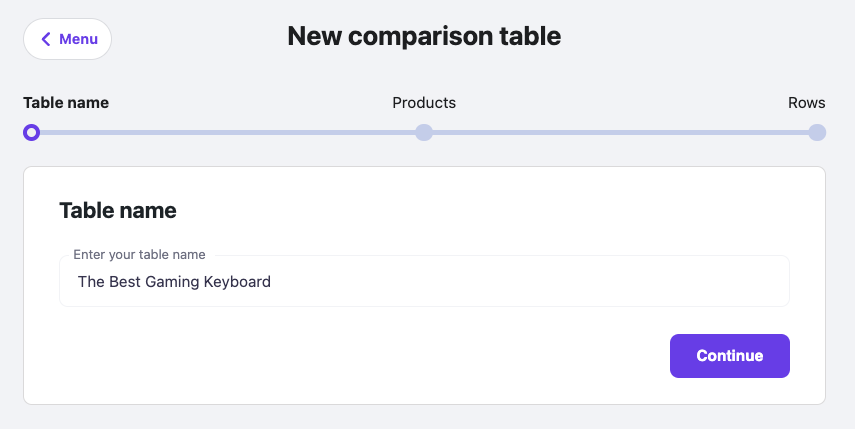
The first step in creating your comparison table is to assign it a name.
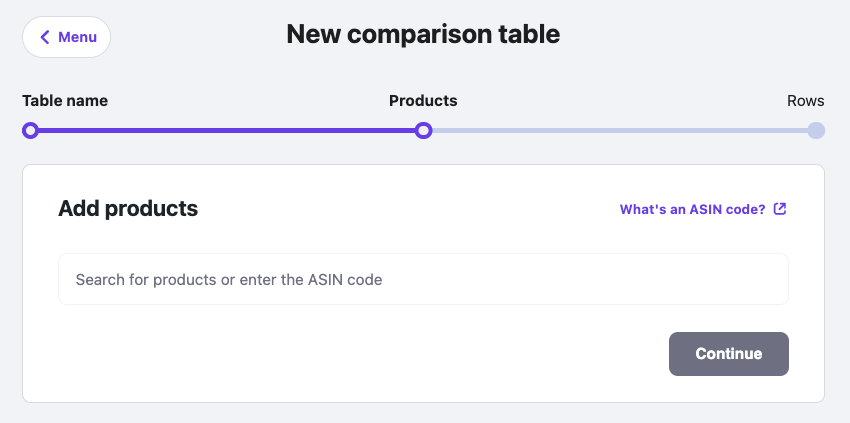
Then, add the products to include in the table. As always, you can add ASIN numbers or search for the items directly from Amazon.
Finally, set the value you want to show on the table. You can add more rows or delete existing ones by clicking the trash bin icon. Once you’re done, hit Save Changes.
Go back to the WordPress block editor. The newly created table name will be in the drop-down menu.
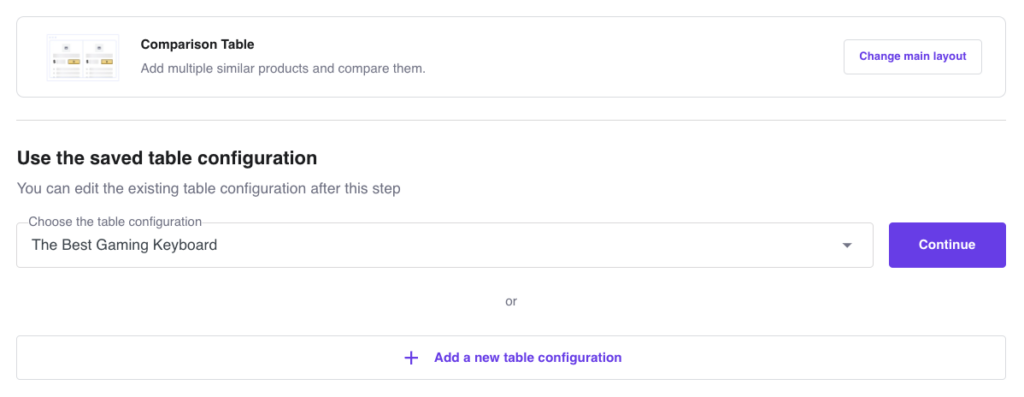
Click Continue to add a comparison table to your post.
Once the product is displayed in your post, you can tweak the content from the block settings panel.
These are the configuration menus you might see and what they’re for:
- General Settings. Change the display layout and edit the displayed product’s ASIN number.
- Lists. Opt to display the bestseller rank of each item when presenting a product list.
- Title. Set a character limit for the title displayed on the post. You can also overwrite the title, particularly for the single-product display layout.
- Table Configuration. Change, edit, or add new comparison table data.
- Templates and Styles. This setting only appears if you choose a multiple-product list. It lets you change the product display layout of the list.
- Description. Hide Amazon’s default product description or change it to your own. This setting will only appear for the “single product display” option.
- Buy button. Use your custom text for the CTA button.
- Advanced. Apply additional CSS classes to customize the block’s style.
Don’t forget to hit Publish once you’re satisfied with the content.
What are the next steps to set up an Amazon affiliate website?
Remember to check your local government’s regulations regarding affiliate marketing practices and consumer data protection policy. Ensuring your site is legally compliant helps you confidently promote your affiliate links.
The common additional information to display on affiliate websites includes:
- A Privacy Policy page lets you outline how you collect and handle visitor data.
- An affiliate marketing disclosure informs readers that you earn commissions from affiliate links. Depending on where you reside, disclosure can be legally required.
- Displaying a copyright notice page is a preventive action to protect your affiliate content from being stolen.
When building your website pages, it’s also important to make them SEO-friendly. Optimizing your website for search engines improves its visibility, potentially increasing sales conversions from your affiliate links.
Ensure that you’re applying the best SEO practices on your website. You can start by installing an SEO plugin, like AIOSEO, and submitting your sitemap to Google Search Console.
Lastly, don’t forget to customize your affiliate website’s appearance to make it appealing and trustworthy for your target audience.
To tweak the theme’s default elements and change your site logo, navigate to Appearance → Customize from your WordPress dashboard.
How to make an Amazon affiliate website using the Hostinger Amazon Affiliate Connector plugin – video tutorial
Follow the steps in this video tutorial to start building your Amazon affiliate website.
You’ll also learn how to insert affiliate links using the Hostinger Amazon Affiliate Connector plugin.

Conclusion
The Hostinger Amazon Affiliate Connector plugin helps you add affiliate links to your WordPress website. It connects with Amazon’s catalog to display products in three different layouts – a single product list, a multiple product list, and a comparison table.
You can also add the products by adding an ASIN number or browsing the Amazon catalog directly from the WordPress block editor.
We hope this article helps you understand how to use the Hostinger Amazon Affiliate Connector plugin.
If you’ve been using it for some time, feel free to share your experience in the comment section and tell us any features you’d like to see in the future.
Hostinger Amazon Affiliate Connector WordPress plugin FAQ
How much does the Hostinger Amazon Affiliate Connector plugin cost?
You can get the Hostinger Amazon Affiliate Connector plugin by purchasing Hostinger’s Business or cloud WordPress website hosting starting from only $3.99/month.
Can I use the Amazon Affiliate Connector plugin without an API key?
Yes! With the Amazon Affiliate Connector plugin, entering an API key is only optional, which simplifies the process of connecting your Amazon Associates account to WordPress.

Larassatti Dharma is a Content Writer with 3+ years of experience in the web hosting industry. She’s also a WordPress contributor who loves to share helpful content with others. When she's not writing, Laras enjoys learning foreign languages and traveling. Follow her on LinkedIn

Comments
February 11 2025
Does this plugin display Amazon product information based on the viewer's country when a product block is added to a blog page? Or does it only show information for a single country? If it’s the latter, then we wouldn't be able to sell globally.
February 12 2025
Hi! The plugin doesn’t support displaying Amazon product information based on the viewer’s country. It will show the product info for the country you’ve configured in the setup.
February 12 2025
how to use it with classic editor of post? or only just work for Elementor?
March 06 2025
You can definitely use it with the classic editor of WordPress posts! Just install and activate the plugin from your hPanel’s WordPress overview. Once set up, it will integrate with your WordPress setup :)