How to install and use Ghost CMS in Ubuntu
Ghost is a modern, open-source content management system (CMS) for creating professional websites and blogs. It has a clean, user-friendly interface and powerful tools, including a flexible editor and built-in SEO features, to help manage content and optimize its performance in search results.
Ideal for bloggers and online publishers, Ghost allows users to focus on creating content without the complexities of traditional CMS platforms.
In this article, we’ll walk you through installing Ghost on an Ubuntu virtual private server (VPS), setting up a new site, customizing it, and integrating third-party services. By the end of this guide, you’ll be ready to build and manage your Ghost-powered website.
Installing Ghost CMS
To start with Ghost CMS, you must host it at a reliable provider. Hostinger is an ideal solution that provides a powerful and user-friendly environment.
Our Ghost VPS hosting service offers several key benefits:
- Preinstalled Ghost template. Ghost and all its essential components are automatically configured. This eliminates the need for manual setup, saving time and reducing the risk of errors.
- Malware scanner. Hostinger’s Ghost VPS plans come with a malware scanner to protect your website from potential threats by keeping suspicious traffic at bay.
- Automated weekly backups. We provide automated weekly backups to securely store your data, with each backup saved at a different server location. This ensures you always have copies available in case of data loss or server failure.
- Kodee AI. Our built-in AI assistant, Kodee, helps you manage your Ghost website and server more efficiently. Simply type your query, and it will guide you through completing your tasks.
As mentioned earlier, with Hostinger’s Ghost hosting, you don’t need to set up Ghost manually. However, if you use our regular VPS plan or have recently changed your operating system, you can reinstall Ghost with the following steps:
- Log in to hPanel with your Hostinger account and navigate to VPS → Manage.
- In the VPS dashboard’s left sidebar, select OS & Panel → Operating System.
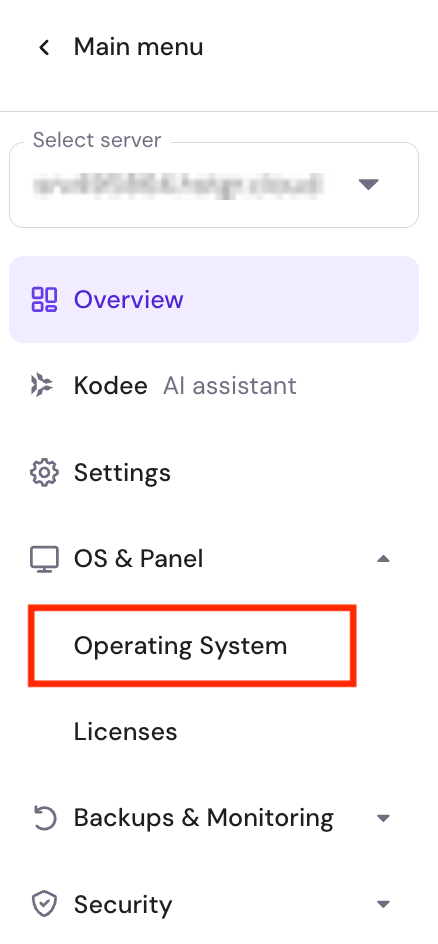
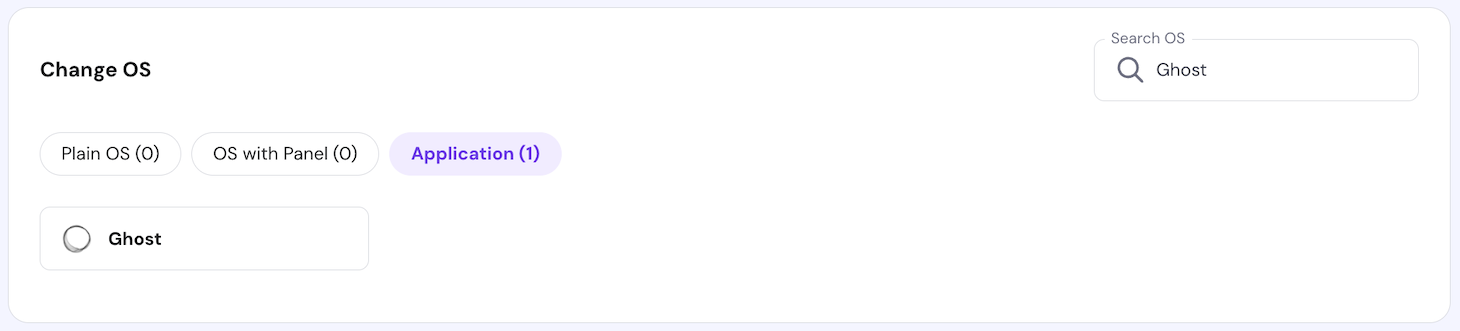
- Scroll down to the Change OS section and open the Application tab.
- Select Ghost and click Change OS.
- Follow the on-screen instructions to set a new password for your VPS. The Ghost CMS installation process will take about five minutes to complete.
Once finished, go to the VPS Overview page and click the Manage App button to open the Ghost admin panel.

During the first login, you’ll be prompted to configure your website details, such as the site title, admin name, email, and password. You’ll use the email and password to access the dashboard, but you can change them later in the settings.

Understanding the Ghost dashboard
Once Ghost is installed, the next step is to familiarize yourself with the admin interface, which is designed to help you manage your site efficiently.
The Ghost dashboard features a clean, intuitive layout that’s easy to navigate. Here, you can manage everything from monitoring membership statistics and creating new content to viewing your public site.
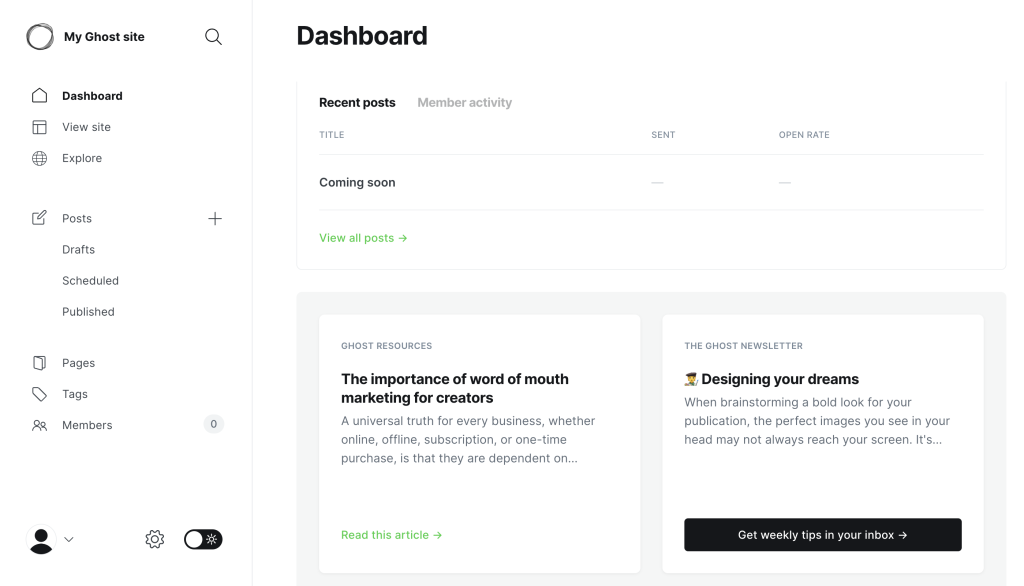
The left-hand sidebar provides quick access to sections like Posts, Pages, Tags, and Settings. This streamlined navigation simplifies switching between content creation, customization, and configuration.
In the Settings section, you can update your site’s details, such as the title, description, and social media links. You can also configure essential SEO settings, manage integrations, and adjust the design to better reflect your brand.
We’ll explore these settings in more detail in the following sections.
Setting up a new Ghost site
Ghost makes it simple to set up your first website, offering essential customization options.
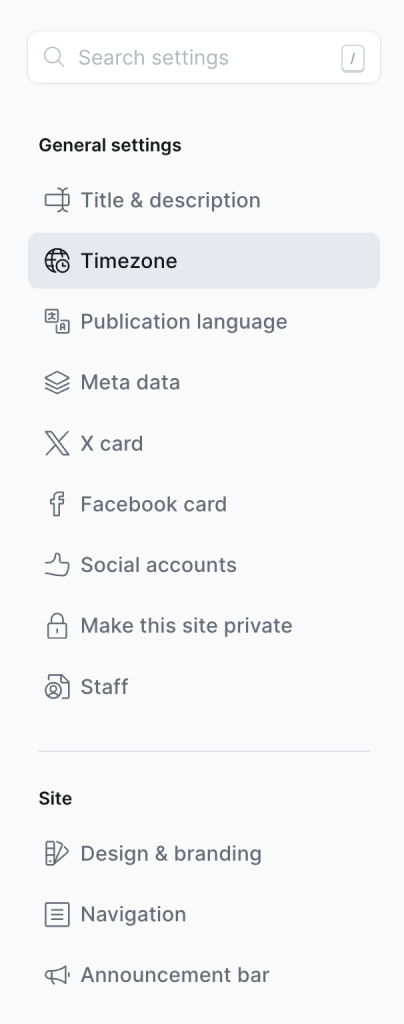
While you’ve already entered basic details during the initial site configuration, you can refine them further in the Settings section. This is where you can update your website’s title, description, language, and publication timezone.
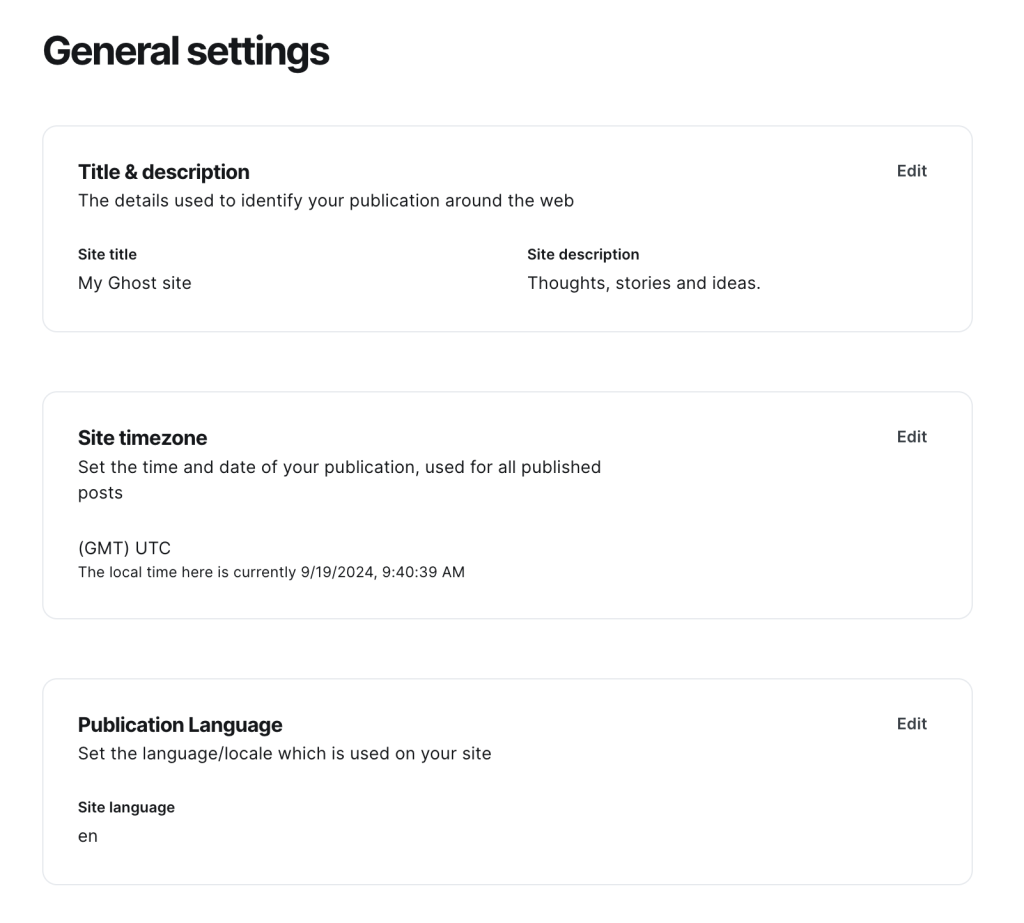
Scroll down to find options to link your social media accounts. Currently, Ghost supports only Facebook and X (formerly known as Twitter). Additionally, it allows you to make your website private by enabling password protection so only users with the correct password can access your content.
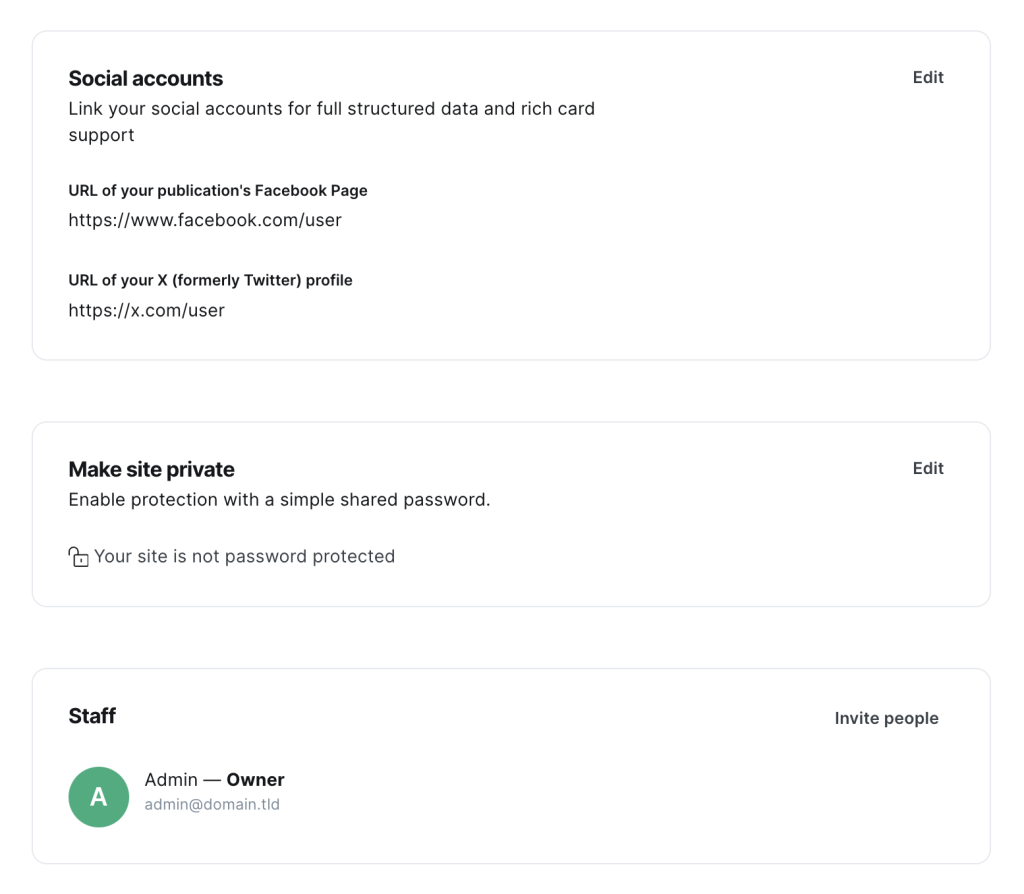
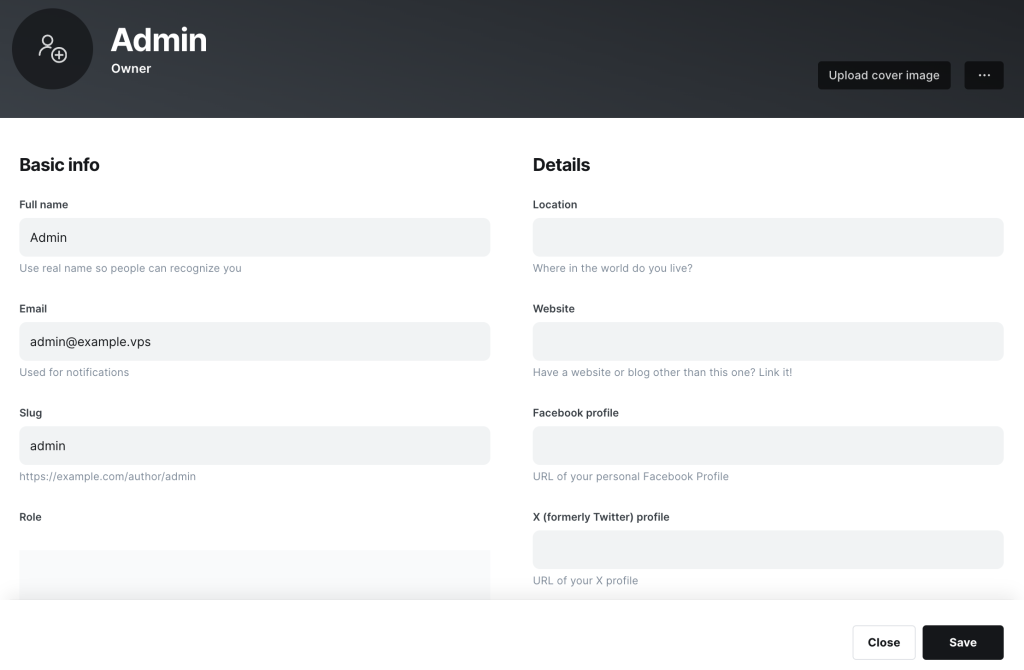
To customize your admin account, navigate to the Staff section and click View Profile. Here, you can update your email address, change your password, manage email notifications, and edit other personal details.
Customizing themes and design
By customizing your site’s theme, you can personalize its look. Ghost offers several premade themes and the flexibility to modify them, so you can create a unique design that fits your brand.
To change a theme, go to Settings → Design & branding → Customize. Then, click the Change theme menu in the bottom right corner and browse through the available preinstalled options. Once you find one that suits your needs, select it and click Install.
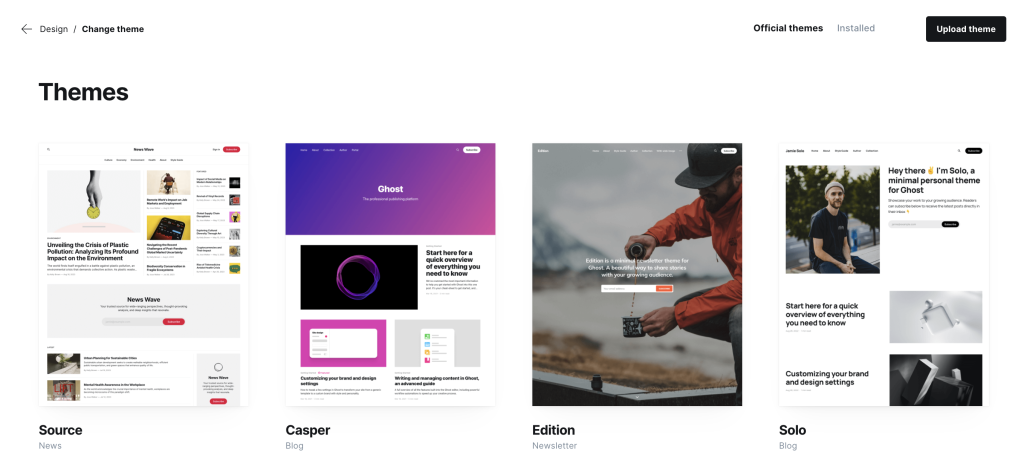
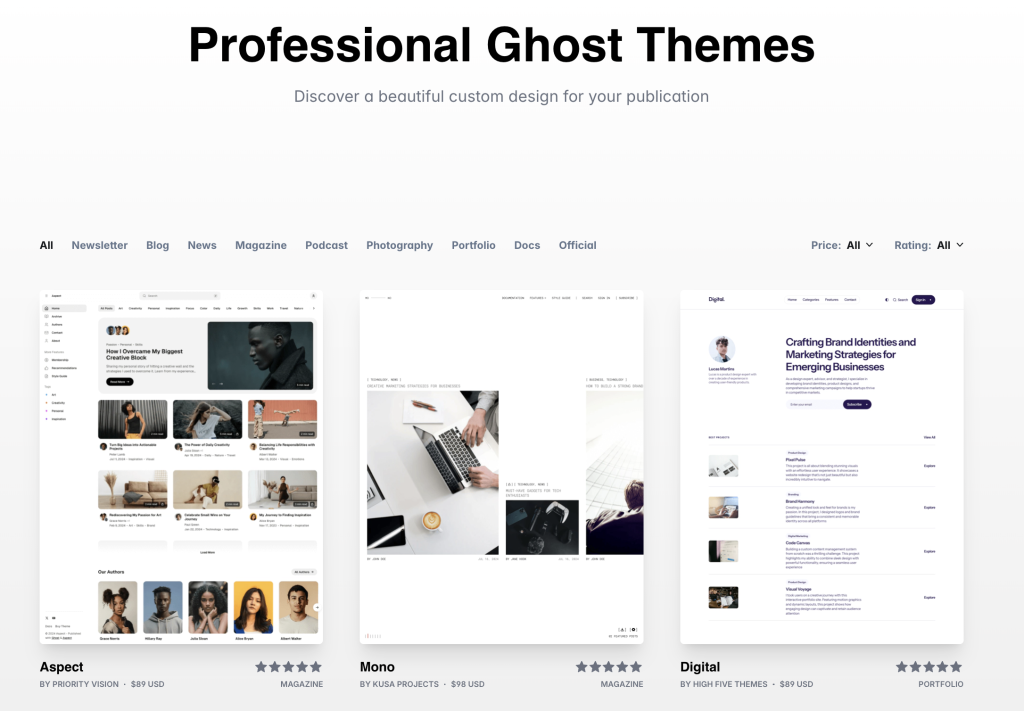
If you’re not satisfied with the default themes, you can explore the Ghost theme marketplace, which has free and paid collections. Download or purchase a theme, then upload it from the same Change theme section.
To customize your theme further, go back to Design. The interface is divided into two sections. The left panel provides a live preview of your site’s appearance on desktop and mobile.
Meanwhile, the right panel lets you adjust colors, typography, and layout without editing any code. You can switch between tabs to customize the site-wide design, homepage, or individual blog posts.
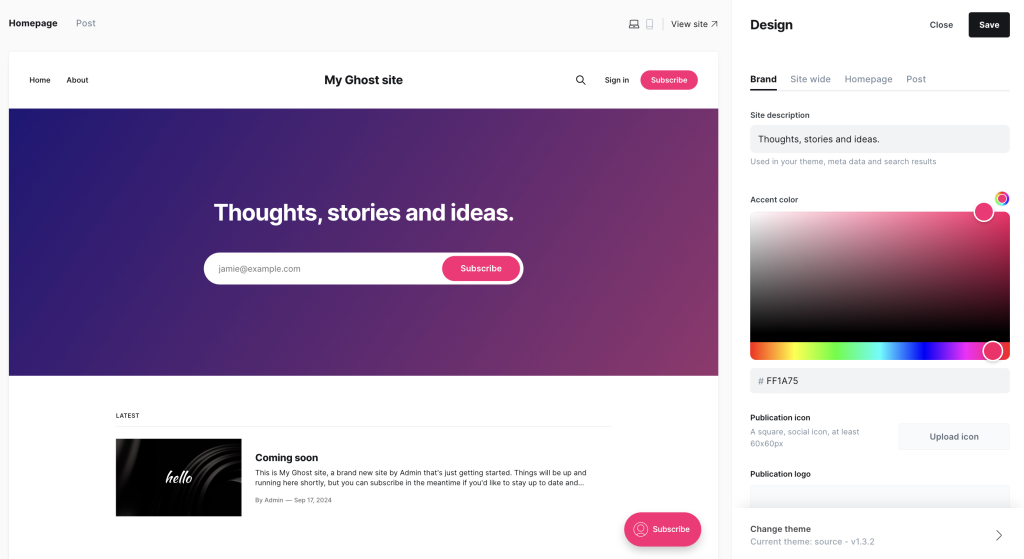
As you make changes, the preview on the left will update automatically. After finalizing the edits, click Save to apply them.
Creating and managing content
After customizing your site’s appearance, it’s time to focus on content. This open-source CMS lets you write blog posts and pages, format them to match your style, and efficiently manage your publishing schedule.
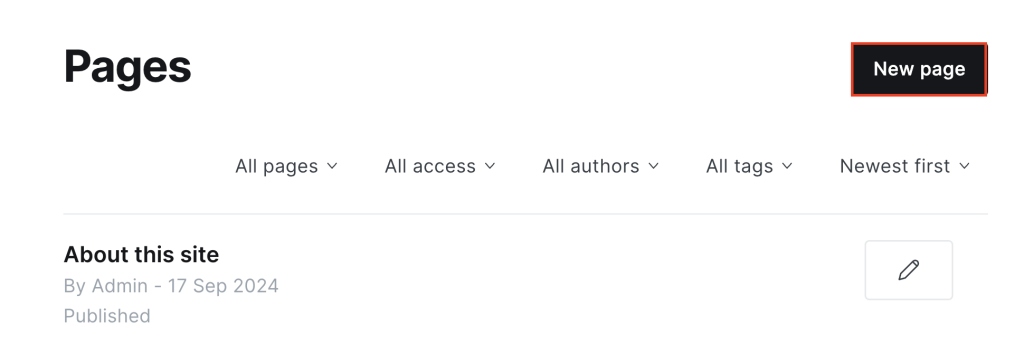
From the dashboard’s left sidebar, start a new post by clicking the + icon next to Posts. To create a page, select Pages → New Page. Both options will open the same editor interface, where you can begin writing and formatting your content.
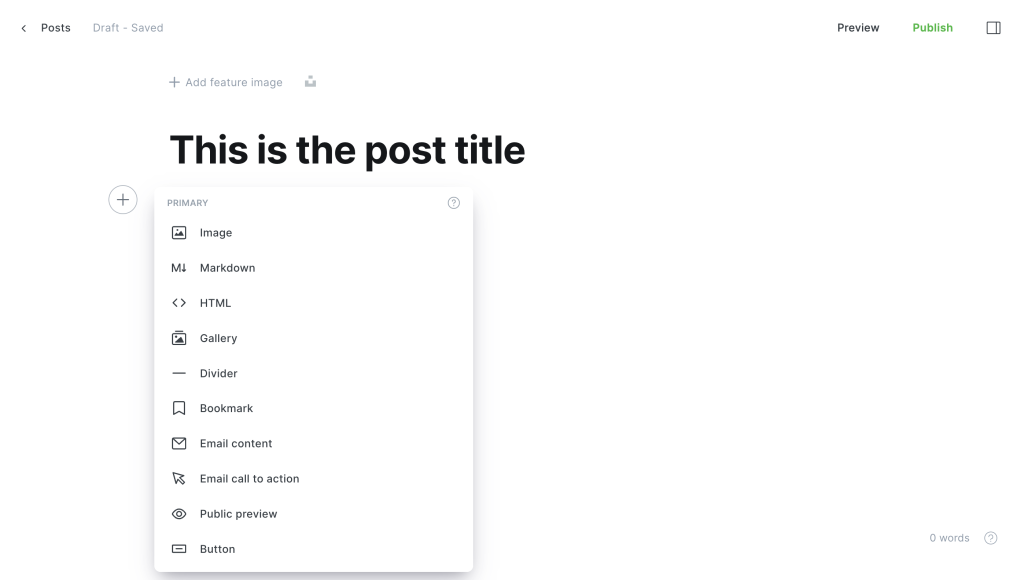
Ghost allows for rich content formatting. You can easily add images, videos, and HTML embeds to enhance your posts and pages. The editor supports headings, lists, quotes, and other text formatting options to help structure your content. It also includes an auto-save feature, which saves your drafts instantly.
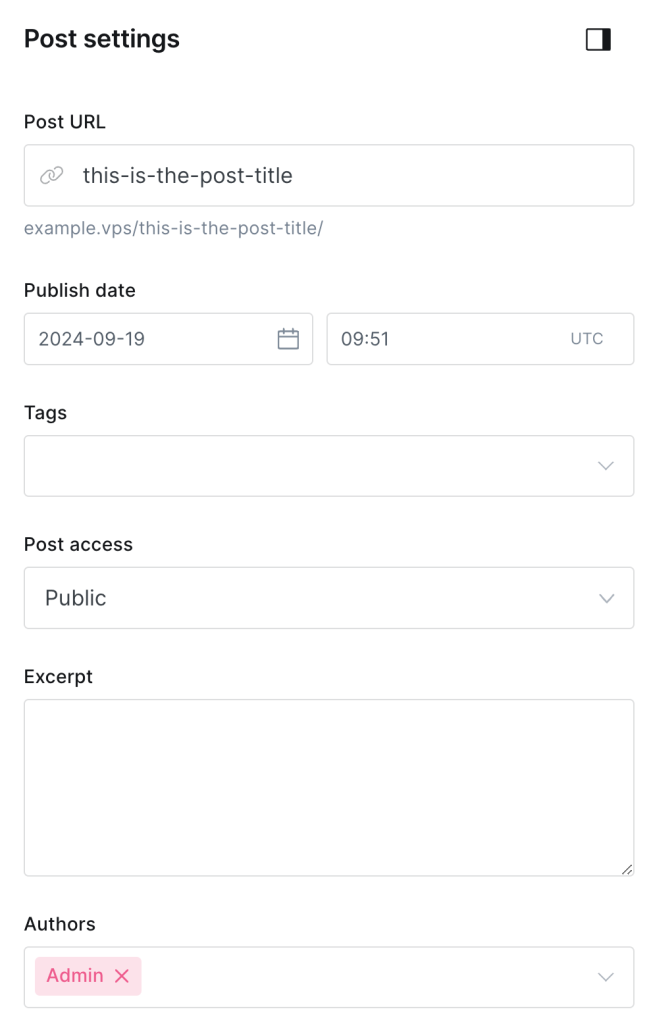
Click the Post settings icon in the top-right corner to access additional settings. Here, you can define the post or page URL, assign tags, add an excerpt, and set authors. You can even add multiple writers to a single post if they collaborate.
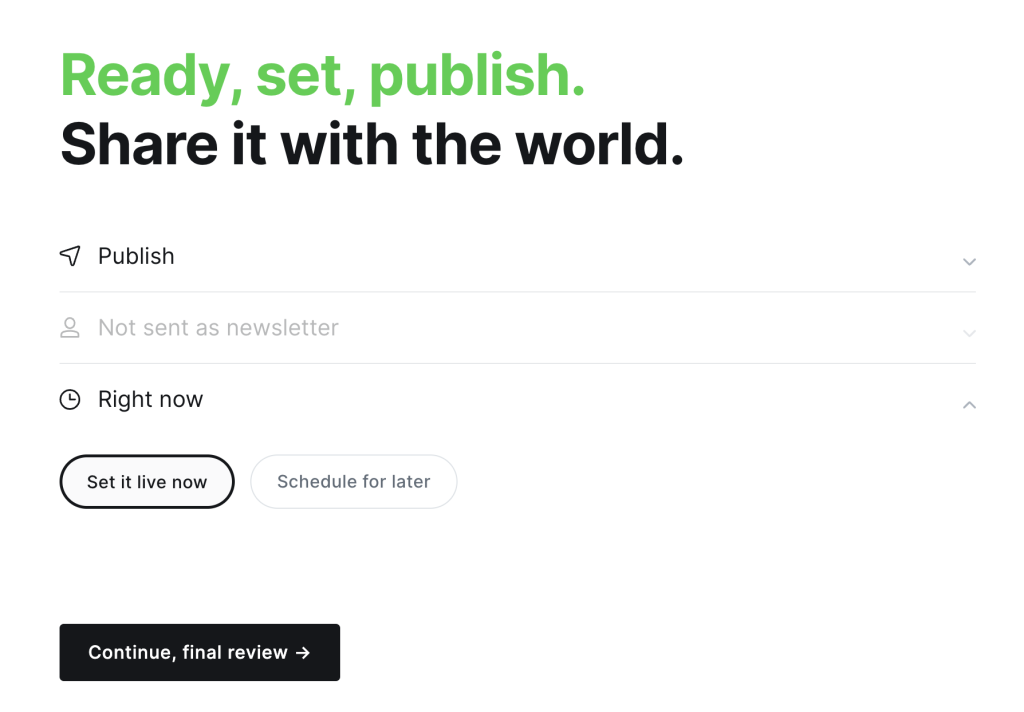
Ghost provides live previews, allowing you to see your content’s appearance when published. Once ready, hit the Publish button to make it live. The platform also offers scheduling features, enabling you to set a future date and time for your content to be automatically posted.
Additionally, you can update or unpublish content anytime, giving you full flexibility when it comes to content management.
Suggested Reading
Do you want to take your content game to another level? Learn how to generate content using n8n and publish it on Ghost.
Using tags and categories
Tags and categories are essential for organizing content, helping you and your audience find relevant posts easily. Ghost doesn’t use traditional categories, but you can effectively organize content using tags.

To set up tags, go to Tags → New tag in the admin dashboard. You can customize tag details here, including names, descriptions, slugs, and metadata. The latter two help with SEO, making your content more discoverable in search engines.
You can also add colors and cover images to tags. To create internal tags that are not visible to visitors, add a hashtag (#) before the tag name. This can help you organize posts behind the scenes for better content management.

After creating tags, you can include them when publishing a new post or editing an existing one. This allows you to highlight trending topics or categorize posts by subject matter, publication date, or format.
Managing users and permissions
As your site grows, you may need to add team members to help manage content, design, or technical aspects. Ghost provides a complete roles and permissions system to manage users and control their access effectively.
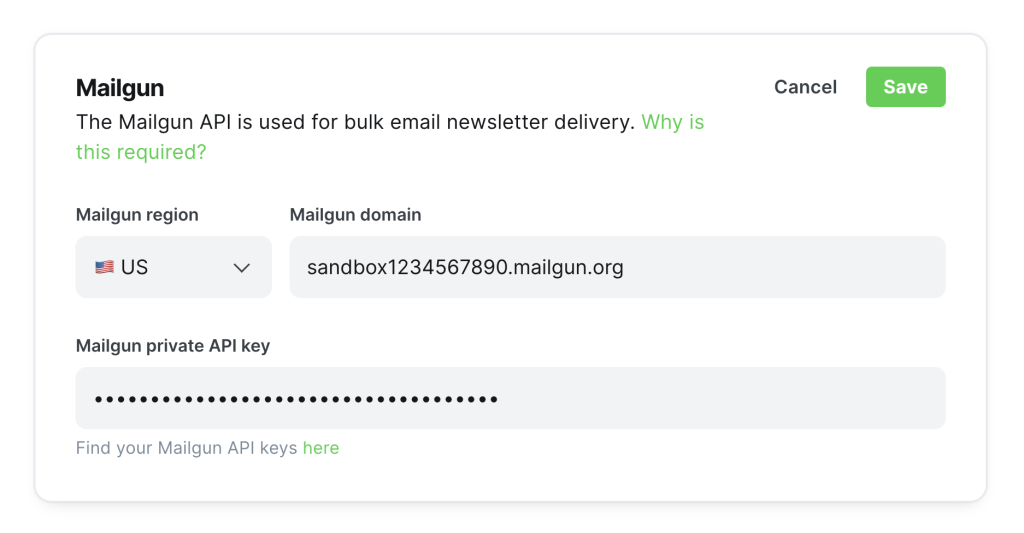
Before adding users, you’ll need to configure Mailgun to send invitations. Register for an email API account through Mailgun’s official site. Once you retrieve your credentials, go to Settings → Mailgun and enter your region, domain, and API key.
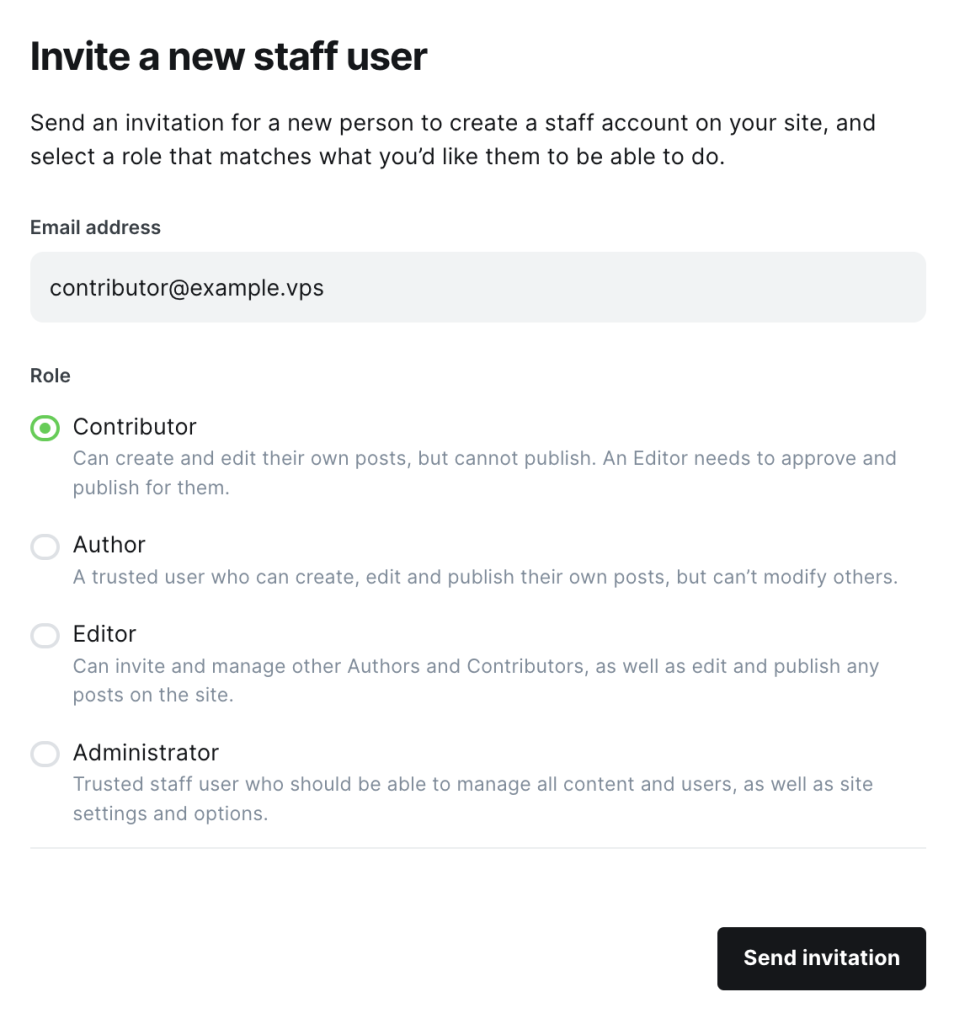
After setup, invite new team members by going to Staff → Invite people. Enter the email addresses of the users you want to invite and assign their respective roles. Ghost will then send them an invitation to join your site.
Once they accept the invitation, users can access the platform based on their assigned permissions. In the same Staff section, you can also change user roles or deactivate accounts as needed.
If you’re unsure which role to assign, here’s a quick overview:
- Contributor. Can create and submit content for review.
- Author. Can create, edit, and publish their own content.
- Editor. Can manage content, including editing and publishing posts from all users.
- Administrator. Has full access to all settings, content, and user management.
Improving search engine optimization (SEO)
Optimizing your Ghost site for search engines can increase its visibility and attract more visitors. Ghost provides several built-in options to improve your site’s ranking on search engine results pages (SERPs).
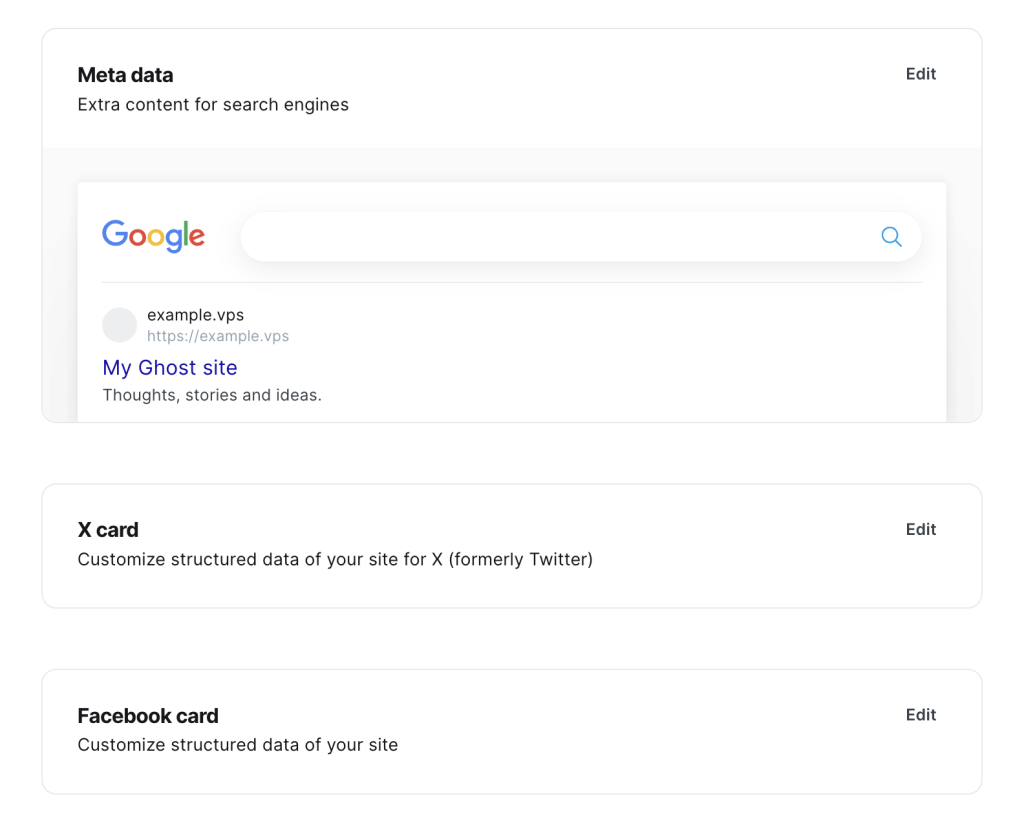
To configure these settings, go to Settings → Meta data → Edit. Enter your meta title and description. Below this, configure Facebook and X cards to upload a default image for social sharing.
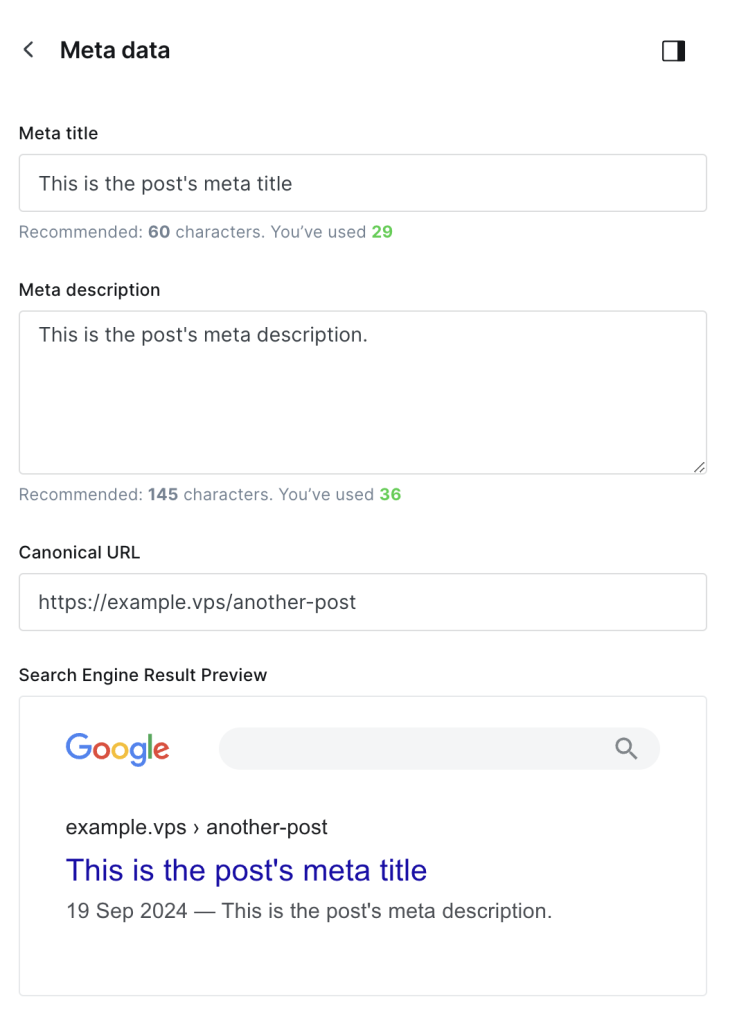
For each post and page, you can customize the meta information by going to Post settings → Meta data. Here, you can enter a meta title, description, and canonical URL. The latter helps avoid duplicate content issues by specifying the preferred version of a webpage for search engines.
While Ghost has strong SEO capabilities, you can further enhance your site’s SEO by integrating external tools like Google Search Console (GSC) to monitor keyword performance and Google Analytics (GA) to track visitor behavior.
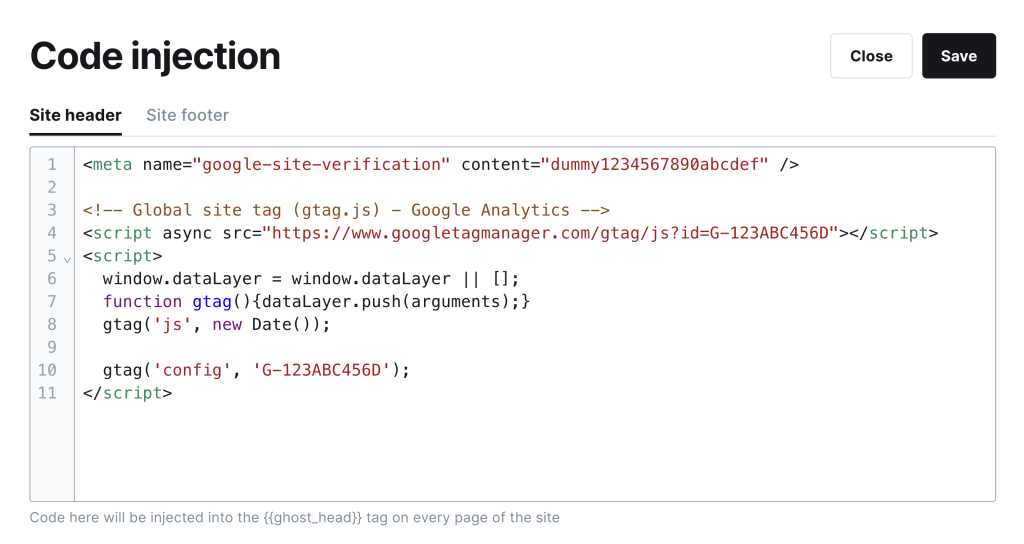
To connect Ghost with GSC, register your site, copy the HTML tag, then go to Settings → Code injection → Open and paste it into the Site header field. For GA integration, follow a similar process by setting up a property and copying the tracking code into the same field.
To ensure your content ranks well in search engines, follow these key SEO best practices:
- Optimize meta titles and descriptions. Craft compelling and relevant meta titles and descriptions for each post or page to help search engines understand your content and encourage click-throughs.
- Use clean, descriptive URLs. Keep your URLs short, relevant, and free of unnecessary characters. This makes them easier for search engines to index and for users to read.
- Add alt text for images. Use descriptive alt text for all images to improve accessibility and help search engines index visual content.
- Ensure mobile friendliness. Ghost themes are generally responsive, but always test your site’s performance on mobile devices to enhance user experience and SEO.
- Use internal linking. Include links to relevant posts or pages within your content to help visitors navigate your site and increase their time on it.
Integrating external services
You can connect your site to various third-party services to enhance its functionality. Ghost provides built-in support for several platforms and custom integrations using the Ghost API.
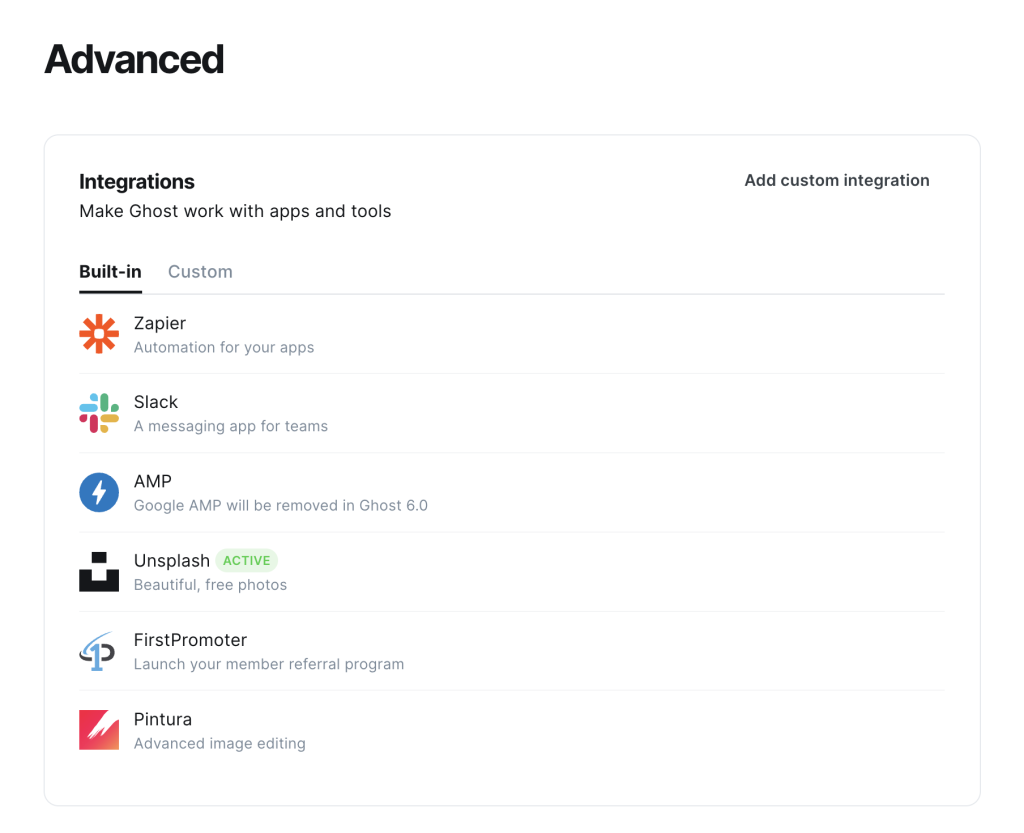
Navigate to Settings → Integrations, where you can select services like Zapier, Slack, or Unsplash and follow the instructions to connect them to your site.
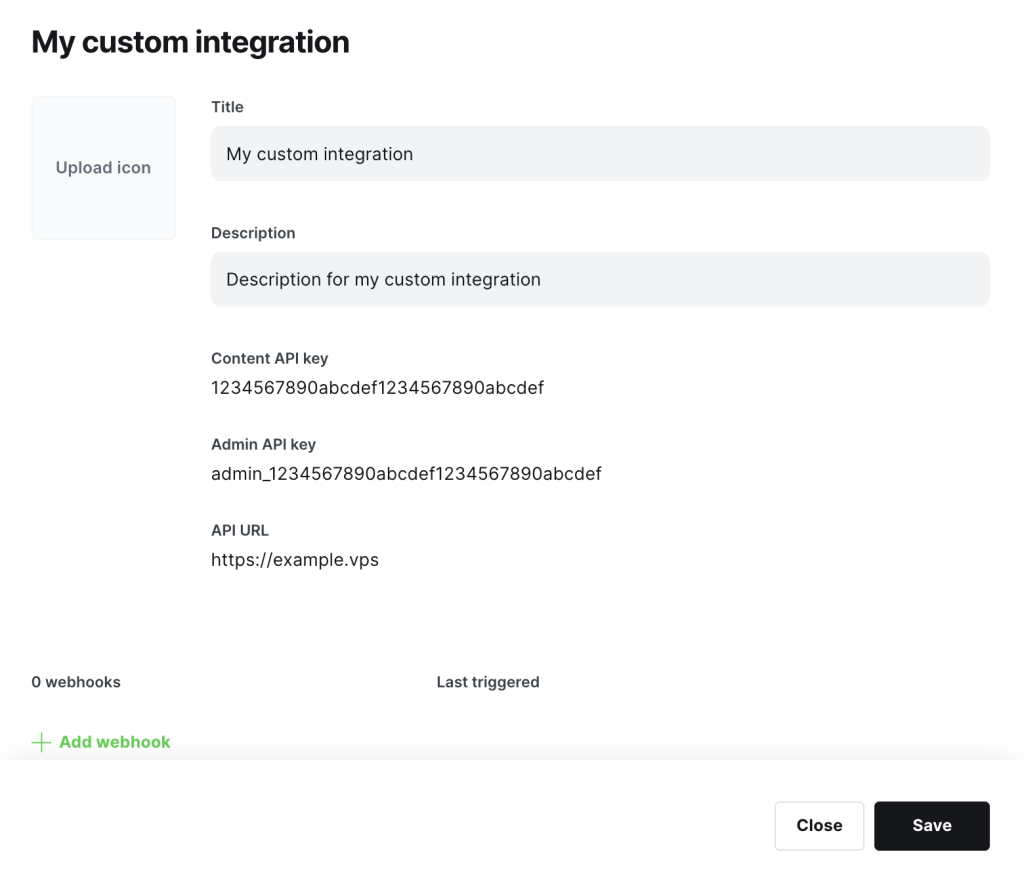
If your preferred service is unavailable, use the Ghost API to create custom integrations. This API lets you interact with your site programmatically, enabling advanced features like custom data workflows, third-party app connections, or syncing with your software.
To do so, click Add custom integration, name your integration, and copy the content and admin API keys to the appropriate service. You can also include a webhook by clicking Add webhook, which allows you to set up automated actions when certain events occur on your website, such as post updates.
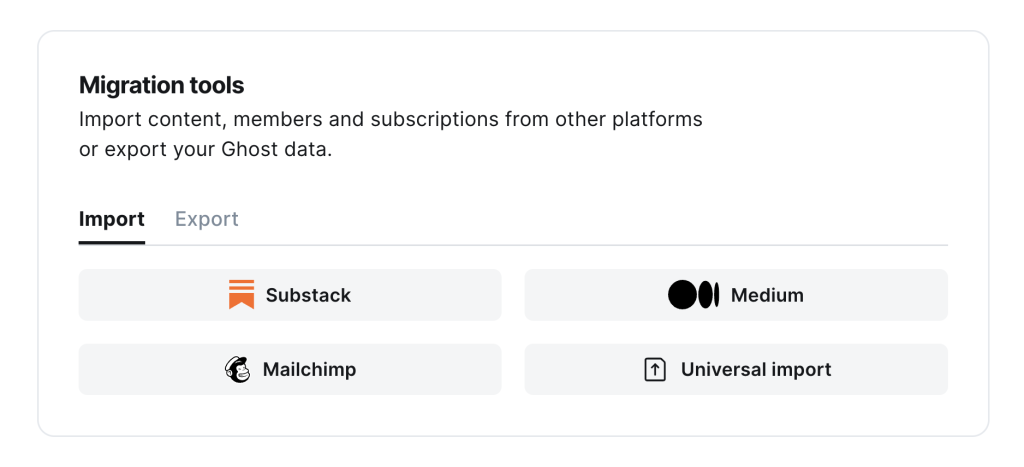
Additionally, Ghost offers migration tools to move content, members, and subscriptions between platforms. To use these tools, choose a service like Mailchimp or Medium and follow the on-screen instructions.
Troubleshooting common issues
While Ghost is a user-friendly platform, you may encounter occasional issues during installation, setup, or regular use. Here are some common problems and how to resolve them:
- Missing dependencies. When setting up Ghost manually, errors may occur due to missing software dependencies. Ensure that Node.js, MySQL, NGINX, and other required packages are installed and up to date.
- Port conflicts. If you’re running multiple services on your VPS, you might face port conflicts, particularly with Ghost’s default port (2368). To fix this, either stop the conflicting service or edit your NGINX configuration file to configure Ghost to run on a different port.
server {

listen 80;

server_name your-domain.com;

location / {

proxy_set_header X-Real-IP $remote_addr;

proxy_set_header Host $host;

proxy_pass http://127.0.0.1:2370; # Change port to 2370 or any unused port

}

# Additional configurations...

}
- Permission issues. Incorrect file permissions can cause installation failures or prevent Ghost from running correctly. Use the chown command to set the correct ownership of your Ghost directory:
sudo chown -R ghostuser:ghostuser /var/www/ghost/
- 500 Internal Server Error: This common error can occur after updating Ghost or changing your server configuration. Check your NGINX or Ghost logs for specific details. Replace your-domain with your Ghost project’s actual name.
sudo journalctl -u ghost_your-domain
sudo tail -f /var/log/nginx/error.log
- SSL certificate errors. If your site is not loading securely (HTTPS), there might be an issue with your SSL certificate. Ensure your certificate is valid and configured correctly in the NGINX configuration file. If necessary, reissue your SSL certificate with Let’s Encrypt using this command:
sudo certbot --nginx
- Out-of-memory issues. While Ghost doesn’t require many resources, it may run out of memory on smaller VPS instances during high traffic or large content imports. To avoid crashes, set up a swap file to allocate additional virtual memory using the commands below. If this doesn’t help, consider upgrading your VPS plan for more resources.
sudo fallocate -l 2G /swapfile
sudo chmod 600 /swapfile
sudo mkswap /swapfile
sudo swapon /swapfile
Conclusion
In this article, we’ve covered the essential steps for installing and using Ghost CMS on an Ubuntu VPS, including setting up a new site, customizing its design, managing users, improving SEO, and troubleshooting issues.
Ghost provides a powerful and flexible platform for creating content-driven websites. With its user-friendly interface and built-in tools, you can easily manage your site and enhance its functionality.
Now that you’re familiar with Ghost, you can start building your first website and take full advantage of its features.
Ghost Tutorial FAQ
What is Ghost CMS?
Ghost CMS is an open-source content management system for professional bloggers and publishers. It offers a clean, modern interface, built-in SEO tools, and flexible customization, all of which aim to deliver high-performance content websites.
Why do I need a VPS to run Ghost CMS?
Technically, you can run Ghost CMS on any hosting. However, a VPS is ideal because it provides more resources, better performance, and complete control compared to shared hosting. This ensures your content loads faster and can handle higher traffic levels effectively.
How do I install Ghost CMS on Ubuntu?
To install Ghost CMS on Ubuntu, ensure that Node.js, MySQL, and NGINX are installed, then run the Ghost CLI to set up your site. Alternatively, use a VPS with a preinstalled Ghost template, like Hostinger’s Ghost plans offer, for a simplified setup.

Ariffud is a Technical Content Writer with an educational background in Informatics. He has extensive expertise in Linux and VPS, authoring over 200 articles on server management and web development. Follow him on LinkedIn.