How to start a blog: A complete guide
Apr 27, 2026
/
Larassatti D. & Marco C.
/
16 min Read

Blogging is incredibly rewarding. You get to share your passion, connect with like-minded people, and even earn money along the way.
Starting a blog involves choosing a topic, using the right tools, and having a clear plan. While it may seem like a lot, breaking it into steps makes it easier and sets you up for success.
These are the seven exact steps to getting your blog online:
- Pick a niche for your blog
- Choose a platform for your blog
- Get hosting and a domain name
- Build your blog on WordPress
- Start writing and publishing blog posts
- Increase your blog traffic
- Monetize your blog
If you’d like to walk through the same steps in video form before diving into the details below, this short walkthrough covers the basics:

Ready to dive into each step? Let’s get started.
1. Pick a niche for your blog
Having a blog niche shapes your content direction, helps you attract the right readers, and keeps you motivated. While there are endless topics you can choose from, here are some tips you can try when picking a niche for your blog:
Identify your passions and areas of expertise
Try listing down 5-10 things you enjoy telling people about. Write them in order from the most to the least exciting for you. Asking yourself these questions can help:
- What am I passionate about?
- What are my past working experiences or projects?
- What am I knowledgeable about?
- What do I enjoy learning?
- Who do I want to help?
- What problems can I solve?
Your blog’s niche can be anything and doesn’t have to be super serious. You could write about your favorite movies, travel mishaps, or quirky snacks. Even the mundane everyday life that you might think is boring will be entertaining for the right audience. If you take a look at our list of 55+ blog examples, you’ll see that many bloggers share about their daily lives.
Something to keep in mind
Google has higher evaluation standards for website topics that fall under the Your Money Your Life (YMYL) category. This includes subjects potentially impacting a person’s happiness, health, finances, or safety. If you plan to produce content in that niche, featuring subject-matter experts’ insights is essential. The time it takes for Google to recognize your blog will also be longer, as you need to work on building a credible reputation on that topic.
Validate your ideas
You probably have some blog ideas by now. Great! Let’s use Google Trends to see if there is growing interest in them. Go to the Explore tab and enter your blog niche idea. If you see a stable graph, that means people consistently look up the topic online.

If you have multiple micro-niche ideas, compare their search popularity to see which one is worth exploring more. For example, I’m comparing ramen to mochi. Ramen has a much higher search volume, so it’s likely to have a bigger audience.

That doesn’t mean you can’t choose a less popular topic. If you’re passionate about a subject and can confirm there’s growing interest, go for it!
Start with a micro niche
There are tons of established bloggers out there. To make your blog stand out, start by writing content on a micro niche. This involves picking a subtopic within a broad niche to narrow down the competition.
For example, if you want to start a food blog, you could focus on a particular cuisine, such as Japanese, Mexican, or Italian.
I’ve been thinking about ramen as it’s raining a lot where I’m from, so let’s take that as an example. With Japanese food as your niche, you can start your blog by diving deep into all things ramen.
Once you establish a loyal readership, you could branch out to other Japanese cuisine staples like sushi, Japanese desserts, or tea culture. This allows your blog to evolve while maintaining its authenticity.
2. Choose a platform for your blog
When choosing a blogging platform, it’s essential to look for one that gives you complete control, allows for easy customization, and can grow with your blog over time. Why? It gives the freedom to adjust your blog as your content, audience, and goals evolve.
I’m sure you’ve heard of free blogging platforms like Blogger, WordPress.com, and Medium. They’re great for starting out and showcasing your writing skills, but these hosted platforms have limited customization and monetization options.
That’s why I much prefer creating a blog on self-hosted WordPress. This content management system (CMS) was introduced in 2003 as a blogging platform, so it has full-featured, built-in blogging tools like advanced post editing and comment management.
Starting a blog on WordPress also gives you these benefits:
- Full ownership and control. You own your blog and content completely, with the freedom to customize every aspect without platform restrictions.
- Extensive themes and plugins. Gain access to a vast collection of themes and plugins to enhance your blog’s design, functionality, SEO, security, and user experience (UX).
- Highly customizable. You can tailor your blog to your exact vision, from themes to plugins to custom code, giving you limitless creative control.
- Freedom to monetize. WordPress makes it easier to monetize your blog in various ways, including ad networks, affiliate marketing, sponsored content, and eCommerce functionality.
- Scalability. WordPress can handle anything from a simple blog to a large, multi-author publication, making it a great choice if you aspire to go big with your blog.
- Vibrant community and support. As the world’s most widely used CMS, WordPress has a large community that is generous with resources, plugins, and troubleshooting advice, making it easy to find support and stay updated on best practices.
For the above reasons, I will use WordPress for this tutorial and encourage you to do the same.
Now that you’ve chosen a platform to host your blog, establish your online identity with a domain name and get a hosting plan to launch your ideas online.
3. Get hosting and a domain name
When creating a self-hosted WordPress blog, you’ll need to choose a web host and purchase a hosting plan so that your blog can go online. Then, buy a domain name from a trusted registrar to make your website easily accessible.
Some web hosting companies, like Hostinger, also act as domain registrars. This way, you can get a web hosting plan and a domain name in one package. You can also claim a free domain name from us by choosing an annual subscription.
Our managed WordPress hosting platform makes starting a blog super easy. With its suite of WordPress-optimized features, setting up your blog and managing back-end tasks is a breeze, leaving you room to focus on writing.
Speaking of the hosting plan, I recommend going with Business, which costs $3.99/month for the 48-month bundle. This way, you can save up to $500 for web hosting and get a bunch of freebies from us, including unlimited SSL certificates and a domain name.
The hosting resources can handle up to 100,000 monthly visitors, and our in-house content delivery network (CDN) service will accelerate your blog’s loading speed.
If you decide blogging isn’t for you, there’s a 30-day money-back guarantee anyway, so there’s no harm in trying.

Web hosting, check. Let’s move on to the domain name.
If you still have no options in mind, try blog name generators to help you brainstorm. The name doesn’t have to be an exact match to your blog name, but making it similar can give your blog a more professional vibe.
Do note that domain names are unique. So, when choosing a domain name, make sure it’s not taken. Use our domain name checker to see if the one you want is still available:
Domain Name Checker
Instantly check domain name availability.
If the domain name you want is unavailable, tweak the name or the extension (the suffix that comes after it). For instance, if the .com version is taken, try going with .net instead.
Less common extensions like .blog, .me, or .online can make your blog address stand out. You can also create a catchy word combination to make a memorable domain name, for example:
- japanesefood.blog
- tasteofjapan.online
- foodiejourney.online
- ramenvibes.me
When ideas pop into your mind, jot them down immediately. They can slip away faster than you realize.
4. Build your blog on WordPress
Now that you’ve prepared the foundations for starting a blog, it’s time to bring it to life. Let’s begin by setting up WordPress.
Set up your blog
After purchasing Hostinger’s Managed WordPress hosting plan, you’ll be redirected to the onboarding page.
Select the Create a website option, and sign up for a new WordPress account.

Next, choose the Blog website type and select how you want to build it. We provide three methods:
- Using our AI Website Builder for WordPress. Instantly create a fully functional blog simply by describing how you want it to be.
- Using a pre-built website template. Choose from the available template options and customize your website from there.
- Building your website from scratch. Create your blog from a blank canvas or install a WordPress theme of your choosing.
The simplest, quickest method is to use AI Website Builder for WordPress, which I will show you in this tutorial.

After clicking Next, type your blog domain name into the box. Still not sure which domain to choose? Don’t worry – you can use a temporary domain for now.

Then, select the data center nearest to your target audience for the best loading speed.

Hit Next to install and set up WordPress automatically. You’ll then see the AI Website Builder page, where you need to describe the blog you want to make.
The more details you provide, the better results you’ll get. For example, here’s the prompt I use to create a food blog:
I want to create a Japanese food blog focusing on ramen. I will share a variety of content, including ramen recipes, tips on preparing ramen at home, reviews of popular ramen restaurants, and articles about different types of ramen and their origins. The design should be clean and visually appealing, featuring mouth-watering images of ramen and easy navigation.

Here are a few more examples for different website types.
Fitness blog
Create a fitness blog dedicated to home workouts and healthy living. The content will include workout routines for all fitness levels, nutrition tips, product reviews, and motivational stories. I want the design to be clean, with white and blue as the main colors. Add pages to display workout plans, healthy recipes, and fitness challenges.
Film-review blog
Create a film-review blog focused on both classic and contemporary movies across various genres. The content will include in-depth movie reviews, director spotlights, film analysis, opinion pieces, and curated watchlists. I want the design to be sleek and cinematic, using black and deep red as the main colors. Add pages for recent reviews, top-rated films, genre-based archives, and a “Film of the Week.”
Travel blog
Create a travel blog inspired by journeys through picturesque mountain destinations around the world. The blog will feature destination guides, personal travel stories, itineraries, and recommendations for lodging, food, and outdoor activities. Make the design warm and inviting, with earthy tones like browns, greens, and whites to reflect nature and adventure. Add sections for different regions, travel tips, gear recommendations, and a curated photo gallery. Include a newsletter signup and a blog archive organized by location and trip type.
Hit Create once you see the indicator bar turn green. Wait for a few seconds, and you’ll have your blog ready for further customization. Click Confirm & edit to enter the WordPress Site Editor area.

Design your blog pages
When I first started using WordPress, I didn’t know that WordPress pages differ from posts. While posts are blog entries that you publish and update regularly, pages are for static, timeless content you won’t edit often, like Home, About, or Contact.
In this step, I will show you how to create and edit your blog pages. Hostinger AI Website Builder for WordPress uses a block-based theme, meaning that it’s customizable with Gutenberg (the block editor).
Once in the Site Editor, here’s what you can do to customize your blog page:
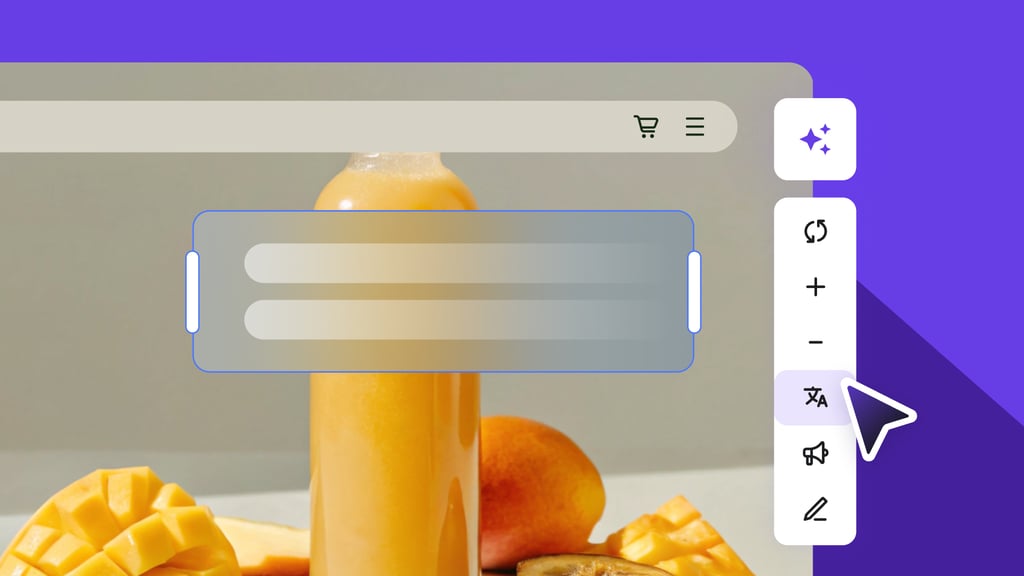
- Click on any website element (such as headings, buttons, or images) to display the toolbar settings. You’ll see multiple options to customize the content placeholders according to your needs.
- To change the colors, fonts, and page layout, click the Styles icon on the top toolbar.

- If you feel like something is missing from the current blog’s home page, add new WordPress blocks by hovering over any blank area and hitting the plus (+) button.
Hit Save to apply the changes.
Once you’ve finished editing the home page, click the Edit Pages button on the top toolbar to see other pages to customize. Hit Edit on the one you want to design first.

If you want to create new pages, exit the editor interface by clicking the WordPress logo in the left corner of the top toolbar. You will then enter the WordPress Site Editor dashboard.
Go to Pages → Add New Page, give it a name, and click Create draft.

From there, you can start designing the new website page by arranging WordPress blocks. Once you’re satisfied with it, hit Publish.
Pro tip
Document the color palette, font styles, blog logo, and other visual assets in one place. A visual design guideline helps you maintain a cohesive look for your blog. Read this web design best practices guide for more tips.
Install WordPress plugins
You can enhance your blog features effortlessly by installing WordPress plugins. It’s just like adding apps to your phone.
Access Plugins → Add New Plugin from your WordPress dashboard. You can then browse thousands of plugins from the WordPress official repository.

Although you can have as many plugins as you want, it’s best to install what you truly need. Installing too many plugins can slow down your blog and make it prone to security issues.
I recommend having these most important WordPress plugins for a blog:
- SEO plugin. This is a must-have, as optimizing your blog for SEO helps generate organic traffic, increasing your readership. Plugins like Yoast SEO, AIOSEO, or Rank Math provide features to guide you in creating SEO-friendly pages and posts.
- Analytics plugin. Integrate Google Analytics into WordPress to monitor important blog metrics (such as your readers’ demographic information and which articles bring the most traffic) right from your admin dashboard.
- Related posts plugin. Keep readers on your blog longer by adding related posts to the article they’re reading. Yet Another Related Posts Plugin (YARPP) is one of the most popular plugins for this functionality.
- Security plugin. Protect your blog from hackers, malware, and spam with a security plugin like Wordfence, Sucuri Security, or iThemes Security.
Hostinger’s Managed WordPress plans already include the LiteSpeed Cache plugin to optimize your blog’s loading speed and other Hostinger plugins that ease your website management tasks.
Want to go beyond the basic features and truly bring your dream blog to life? Check out our list of the 31 best WordPress plugins.
5. Start writing and publishing blog posts
Now that your platform is ready, it’s time to let your words shine!
After knowing what you’ll write about, figuring out who will be reading it is as important. With your ideal reader in mind, writing becomes easier. You’ll know exactly who you’re speaking to, helping you create content that truly connects.
A great way to do this is by creating a reader persona – a semi-fictional profile with details like age, job, hobbies, goals, and the type of content they’re looking for.
You can build your reader persona by:
- Checking social media accounts in your niche and reading comments for insights.
- Exploring forums like Quora or Reddit to spot common questions and discussions.
- Analyzing other blogs to see what resonates with their audience.
Then, combine these findings into a fictional profile that best represents your readers. I like to imagine I’m speaking directly to this persona when I write – it helps me choose examples and language that resonate.
I’ve detailed the whole process of writing a blog post in another article. Here’s a quick recap of the key steps:
1. Plan your blog topics. Start by brainstorming content ideas using tools like Google Search suggestions, Google Trends, forums, or social media. Jot down your ideas in a writing tool or spreadsheet, and try organizing them into categories.
Pro tip
Tools like MindMeister, Google Jamboard, or Miro are beneficial for visualizing your topic clustering plan.
2. Create an outline. Sketch the structure of your ideas before writing. This helps you review the article’s clarity and logical flow. You can use tools like Ahrefs Content Helper or on-page analysis tools to identify content gaps with other competitor articles, helping to structure your outline effectively.
3. Write the main content. Focus on delivering value and presenting unique perspectives. Organize information using headings, short paragraphs, and list formats to support readability and engagement.
4. Include visuals and multimedia. Break up text with images, videos, or infographics to improve comprehension and keep your readers’ attention.
5. Craft an engaging headline. Your blog post headline is the first thing readers notice, and it often determines whether they’ll click or scroll past. So, make sure it’s attention-grabbing and accurately reflects what the post is about.
6. Edit and proofread. Refine your copy for clarity, accuracy, grammar, and consistency. Don’t skip this step, as editing sharpens your message.
7. Optimize for search engines. Strategically place your blog post’s focus keyword in the title, headings, and body. Also, ensure on-page SEO basics are covered (like meta descriptions, alt text, and clean links).
8. Publish the post. Publish from your blogging platform or CMS. Preview your content, clean up formatting issues, verify images and links, and finalize.
6. Increase your blog traffic
The key to driving traffic to your blog is consistently creating content that resonates with your audience. Think of the last blog that inspired you. You probably passed it along to other people who’d enjoy it, right? Over time, this word-of-mouth can build a steady stream of visitors.
That said, it may not be enough. You may have to put in extra effort to draw in readers, much like opening a café and inviting people to stop by and try it. Since you’ve poured your heart into your content, be the first to spread the word!
Here are some ways to promote your blog.
Optimize your blog for search engines
One key to driving more organic traffic is making your content easy to understand for both users and search engines. That’s where WordPress SEO comes in. Implementing the best practices increases your visibility in search results, which can drive more clicks to your blog.
First things first, submit your blog to search engines to get indexed faster. You just need to prepare your blog’s sitemap, which can be automatically created using an SEO plugin. Don’t forget to submit every published blog post and update your sitemap.
Note that successful SEO requires consistency. Even after getting your blog to the top of search pages, staying there will require continuous optimization due to algorithm changes.
Promote your blog on social media
Being active on social media puts your posts in front of a larger, more diverse audience. Plus, social media algorithms prioritize engaging content, which means a well-crafted post can gain significant reach.
Think about how often someone scrolls through TikTok looking for quick recommendations – they could discover your content next!
Just remember to focus on platforms where your target audience is most active. For instance, if you’re targeting business owners and professionals, it’s better to focus on LinkedIn.
Fill your social media with content by repurposing your blog posts to fit your chosen platform. It’s okay to start on one social media platform – you can always expand to others later.
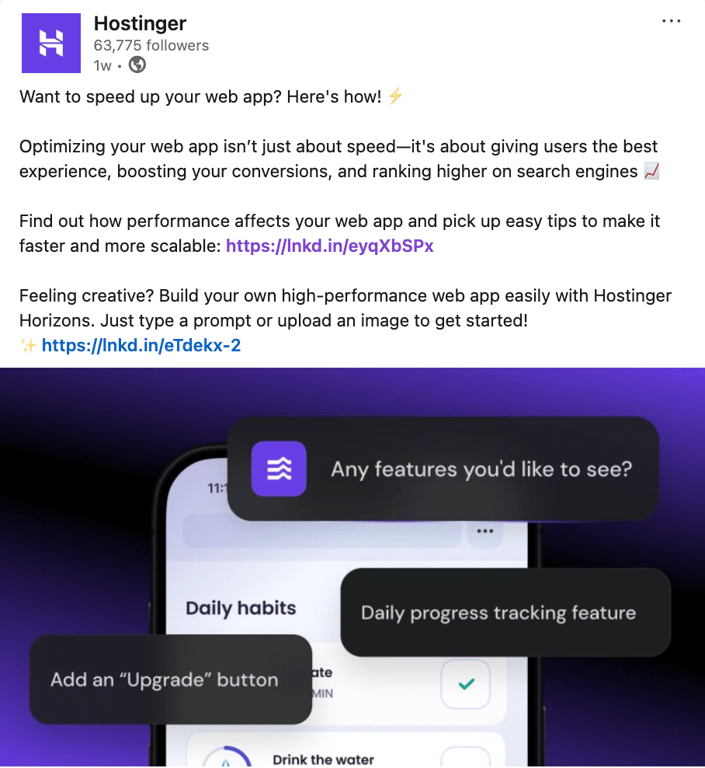
To give you an example, here’s how we promote a Hostinger Tutorials article in a LinkedIn post.
Note that gaining traction on social media also requires consistency. If you want to pursue this path, make sure to balance your blog-writing schedule with the time to be active on social media.
Add more time slots in your content calendar to arrange your social media activity, such as repurposing your blog post content and interacting with your audience. This way, you can maintain a steady flow of content and retain audience interest across platforms.
You can also participate in discussions on online communities like Reddit or Quora by positioning yourself as a knowledgeable, go-to source in your niche. Don’t forget to add your profile picture, title, and bio to add credibility to your answer.
Then, look for questions related to your blog’s topic and provide thoughtful, valuable responses. If any of your blog posts add more value to your answer, add a link to it.
Focus on being helpful and avoid being overly promotional. In time, community members may recognize you as an expert and naturally want to learn more about your blog.
Email marketing
Email marketing involves sending email blasts to invite people to read your blog. Even in the age of social media, it remains an effective way to reach an audience.
If you want to implement this strategy, create a custom email address that matches your domain (like name @ yourblogdomain.com) to establish trust and credibility with your audience. This small detail can impact how your audience views your emails, making them more likely to engage.
Lucky for you, custom emails are included in every Managed WordPress hosting plan we offer. Follow this guide to set up your Hostinger email accounts.
And if you want to take your email marketing to the next level, Hostinger Reach makes creating professional newsletters incredibly simple. Our AI-powered platform transforms your blog ideas into inbox-ready emails in minutes. Just describe what you want to share, and Reach handles the design, content, and mobile optimization automatically. It integrates seamlessly with your WordPress site, so your subscriber list grows as your blog does.
Once you get the email account sorted, here are the steps for creating an email newsletter in a nutshell:
- Choose an email marketing tool. An email marketing platform simplifies your campaign, from collecting leads to email customization. If you’re using WordPress, simply activate a newsletter plugin.
- Build an email list. Encourage new readers to sign up for your email newsletter on your homepage and other pages and posts. Offer clear benefits to convince them to subscribe, like free eBooks, templates, cheat sheets, or toolkits.
- Send high-quality emails. The more value you can offer readers, the more likely you are to brand your blog as a trusted source in your field. Top the content off with engaging subject lines and call-to-action buttons linking to your blog post.
Guest blogging
Guest blogging, or guest posting, is writing content for other blogs. The main goal is to gain exposure for your blog by getting published on bigger, more established websites. This also lets you build high-quality backlinks, encouraging search engines to recognize your blog’s authority.
To start doing this, you need to find the sites that are receiving guest posts, contact them to discuss the terms and conditions, and send the article as agreed in the deal.
Note that different sites have different rules for guest posting. Some require a fee, while others may ask for content exchanges, which involve promoting each other’s blog content without payment. Make sure you thoroughly understand the terms and conditions.
Also, when contacting other blogs, prepare a few topic ideas that align with their audience’s interests and your expertise. This will increase the chance of attracting the right audience to your blog.
Even when writing for someone else’s blog, focus on providing value to readers. If your articles perform well, you could build long-term partnerships with these websites, leading to more backlinks and exposure.
7. Monetize your blog
Once you’ve got some traffic coming in and a solid collection of posts, the next step is figuring out how to make money from your blog. Bloggers can make up to $5,450 per month on average after around five to ten years, according to Productive Blogging’s survey.
Additionally, the survey shows that older blogs with more posts generate higher income. So, don’t be discouraged if you’re just starting out. As long as you can offer valuable blog posts, there’s always a chance to make money from blogging and build passive income.
Try out different blog monetization methods to find what works best for your niche:
- Displaying advertisements. The simplest way to start earning money from blogging is by displaying ads on high-visibility spots on your website, such as the header, sidebar, or posts. To do this, simply sign up and add Google AdSense to your WordPress blog.
- Affiliate marketing. Starting an affiliate marketing business lets you make money by sharing links to products or services on your blog. Whenever someone clicks your link and makes a purchase, you’ll earn a commission – usually 5-30% of the product’s price. The exact rate depends on the program and what’s being sold.
- Selling digital and physical products. Digital items like ebooks, courses, or templates (think financial trackers or wedding planners) are great since there’s no inventory or shipping involved. Prefer physical products? That works, too, if it suits your audience. To get started, add ecommerce functionality with WooCommerce to your blog.
- Freelancing. Blogging showcases your skills in writing, communication, and often other specialized topics, making it a perfect gateway to freelancing opportunities. If you’re passionate about the niche you’re blogging about, consider offering services like writing, graphic design, social media management, or web development, to name a few. Check out the best freelancing websites to find your first clients.
- Offering consulting or coaching services. Once you’ve positioned yourself as an expert in your niche, offering consulting or coaching services can be a great income stream. Create packages, like hourly consultations or long-term coaching plans, to cater to different needs. Simplify bookings and payments with tools like Calendly, or use a WordPress calendar plugin to keep things organized.
- Creating exclusive content. Setting up a members-only area with exclusive content lets you earn recurring income and build stronger connections with loyal readers. Offer perks like early access to posts, exclusive newsletters, webinars, or a private community – whichever your audience values most! Plugins like MemberPress or Paid Membership Subscriptions make it easy to add membership functionality to your blog.
- Brand partnerships. As your blog grows, start collaborating with brands through sponsored posts, product reviews, or mentions. Create a media kit highlighting your blog’s performance, audience demographics, and rates to attract potential partnerships. Alternatively, make the pitch through platforms like Aspire or Intellifluence, where brands look for collaborators.
Can I build a blog with AI?
Absolutely! There is a growing range of AI tools to support you at every stage:
- Blog creation. You can use tools like Hostinger’s AI Website Builder for WordPress to launch your blog quickly. Just describe the kind of blog you want to build, and the AI agent will create a customizable site tailored to your needs.
- Blog post creation. You can benefit from most large language models (LLMs) to brainstorm ideas, outline your content, and speed up the entire writing process. My colleague shared a guide on using ChatGPT for blogging to demonstrate it.
- Promoting your blog. Once your blog is live, AI will also help you promote it more efficiently. Depending on what promotional strategy you want to implement, there are plenty of tools to make spreading the word about your blog easier. For example, if you’re focusing on email marketing, tools like Hostinger Reach let you create newsletters just by writing a simple AI prompt. It also includes built-in analytics and campaign management features to track performance and optimize your outreach.
- Blogging site management. By integrating model context protocol (MCP) into your WordPress blogging site, tasks like creating a new post, troubleshooting issues, or updating your website settings can be a lot simpler. If you host your WordPress site with us, you’ll get to access MCP-Powered Kodee (our AI assistant tool) right from your WordPress dashboard. It helps operate your website through a conversational interface.
So, are you ready to start a blog? Make today “day one” instead of waiting for “one day.” If you’re still feeling hesitant, drop your questions in the comments below. I’m here to help you take that first step. Remember, you don’t need to have everything figured out to start. Good luck!
All of the tutorial content on this website is subject to Hostinger's rigorous editorial standards and values.

Larassatti Dharma is a content writer with 4+ years of experience in the web hosting industry. She has populated the internet with over 100 YouTube scripts and articles around web hosting, digital marketing, and email marketing. When she's not writing, Laras enjoys solo traveling around the globe or trying new recipes in her kitchen. Follow her on LinkedIn

Marco Chiesi is the Head of WordPress at Hostinger, with over 20 years of experience as a software engineer in the web industry. He specializes in open-source technologies and the WordPress ecosystem, where he has contributed in different areas: Plugin Developer (with over 10 million downloads), WordCamp speaker and organizer, Meetup organizer, Translator, and Core Contributor. He is passionate about leading his team to create innovative solutions for Hostinger's web hosting product, which hosts over 5 million WordPress installations. Follow him on LinkedIn.