WordPress custom fields: Definition, tutorial, and use cases

WordPress custom fields let you store and display additional information like pricing, product details, or author notes – all without cluttering your main content. Even better, they can make your site feel more dynamic and personalized.
If you’re looking to learn more about WordPress custom fields and how to use them, this article will walk you through everything you need to know. We’ll also provide some examples of use cases that you can use as inspiration.
Let’s start!
What are WordPress custom fields?
WordPress custom fields are extra data fields that let you display information beyond the default.
Some examples are product prices, time to complete an action, event dates, or post ratings. This makes your website content more dynamic and tailored to your specific needs.
People often use WordPress custom fields together with custom post types and custom post templates to enhance their websites.
If you aren’t familiar with these, custom post types let you organize content according to your specific needs, freeing you from WordPress’ default blog-like post structure.
Meanwhile, custom post templates ensure unique layouts matching the type of content you want to display.
With these three elements, you can tailor your website’s content structure and design to fit your exact vision.
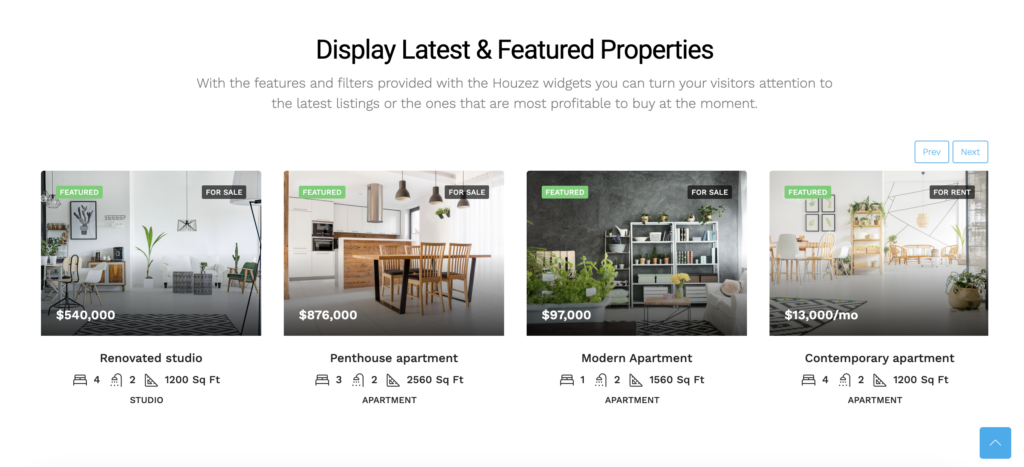
For instance, if you’re running a real estate website, you can create a custom post type to display property listings, use custom post templates to arrange the layout, and add custom fields for the property details.
How to enable custom fields in WordPress posts and pages
By default, the WordPress custom fields feature is disabled, so you’ll need to enable it first. Here’s how to do so:
- Open your WordPress post or page editor.
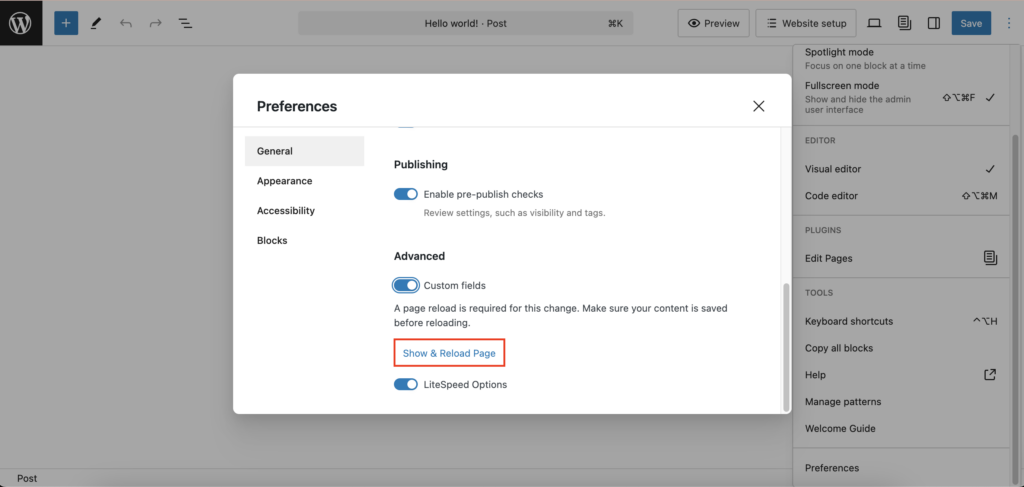
- Locate the Options menu (the three-dot button in the upper right corner).
- Select Preferences, scroll down to the Advanced section in the General menu.
- Toggle the Custom fields option.
- The Show & Reload Page button will appear. Click on it to finish.
After that, the Custom Fields panel will appear at the bottom of the content editor.
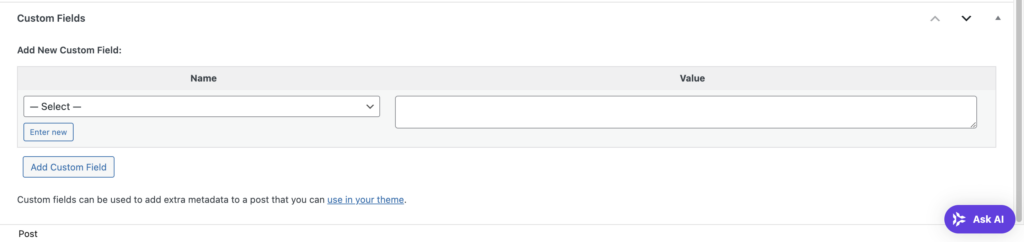
The Name and Value fields function like key/value pairs. The key is the custom field’s name, and the value is the specific information associated with it.
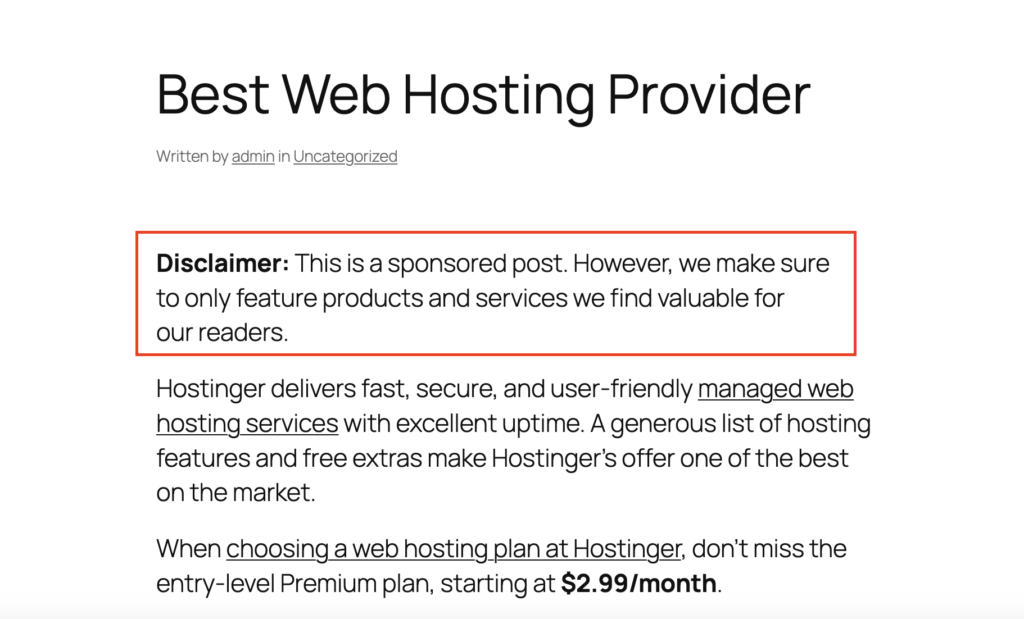
For example, we’ll create a custom field to display a sponsored post disclosure. Click the Enter new button to create custom fields.
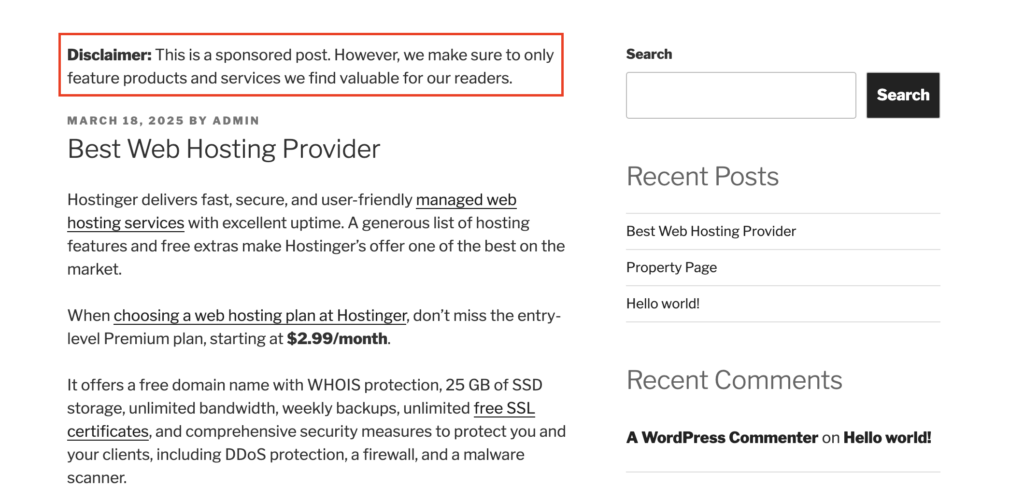
In this example, we name it sponsored_post with this text value:
This is a sponsored post. However, we make sure to only feature products and services we find valuable for our readers.
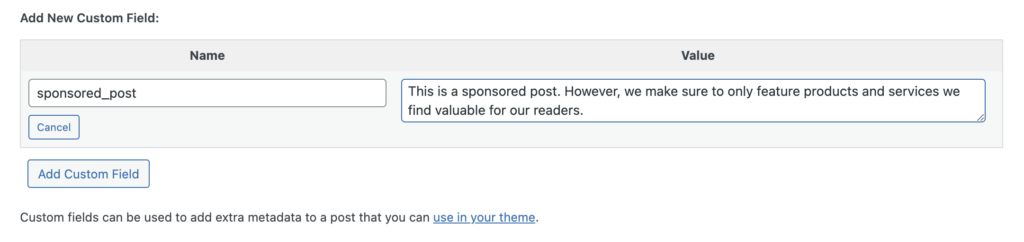
Finish by clicking the Add Custom Field button.
Note that WordPress only keeps custom field values on the back end. We’ll need to edit the theme files to display the custom field data on the front end.
How to display the custom fields
Before proceeding to the steps, we recommend creating a child theme so you can experiment freely without affecting the main theme. Doing so also ensures that your changes remain intact even when the theme version is updated.
Since the steps for displaying custom fields differ between classic and block themes, we’ll cover each separately.
Classic themes
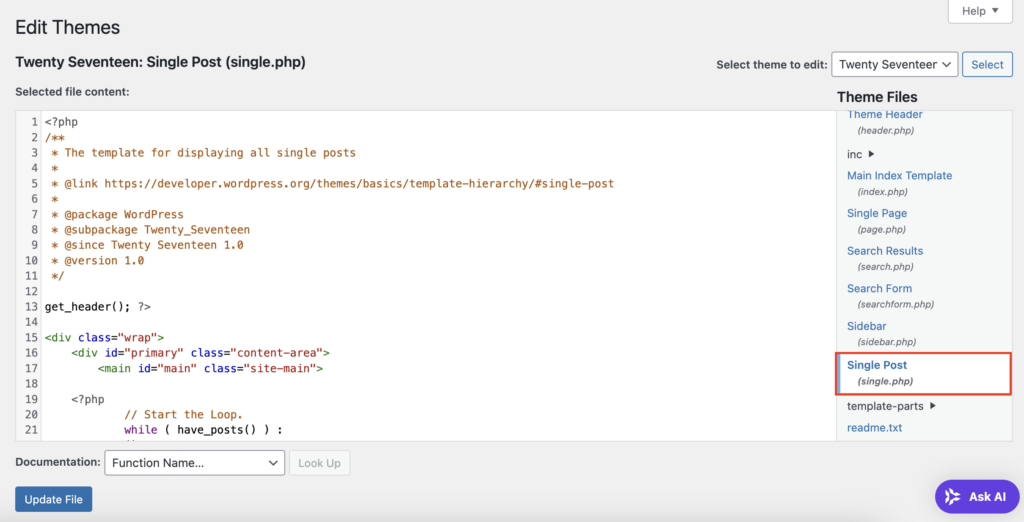
Navigate to Appearance → Theme File Editor from your WordPress admin dashboard. Then, find the Single Post (single.php) file where you’ll add the extra code lines.
Here’s an example of a common code snippet to display custom fields using the get_post_meta() function:
<?php echo get_post_meta($post->ID, 'key', true); ?>
Be sure to change the ‘key’ placeholder to match your custom field name.
Keep in mind that the example above shows a basic function of WordPress custom fields. You will need to do some extra coding to apply more complex actions.
Now, we want to add this code line to display the sponsored post custom field:
$sponsored = get_post_meta(get_the_ID(), 'sponsored_post', true);

if (!empty($sponsored)) {

    echo '<p class="sponsored-disclaimer"><strong>Disclaimer:</strong> ' . esc_html($sponsored) . '</p>';

}
To display this information at the top of a post, add the code right after the while ( have_posts() ) : the_post(); line. However, you can also place it differently to display the message in another part of the post.
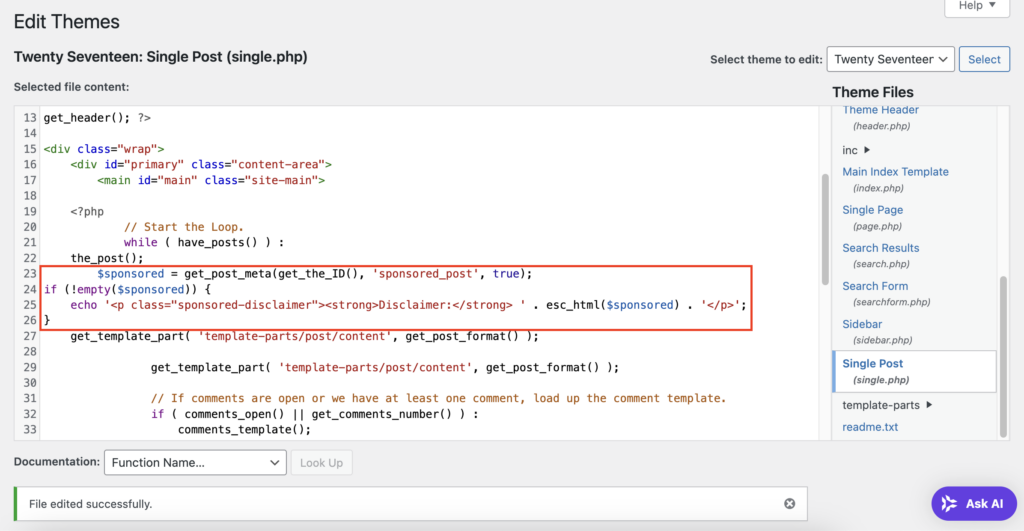
Once done, click the Update File button to save the changes.
The code we apply tells WordPress to look for posts with the sponsored_post custom field and display their value with an added Disclaimer text.
Block themes
If you’re using a WordPress block theme, you won’t have access to the single.php file. You’ll need to create a shortcode instead.
Using the same example, we will show how to display the custom field with the Twenty Twenty-Five block theme.
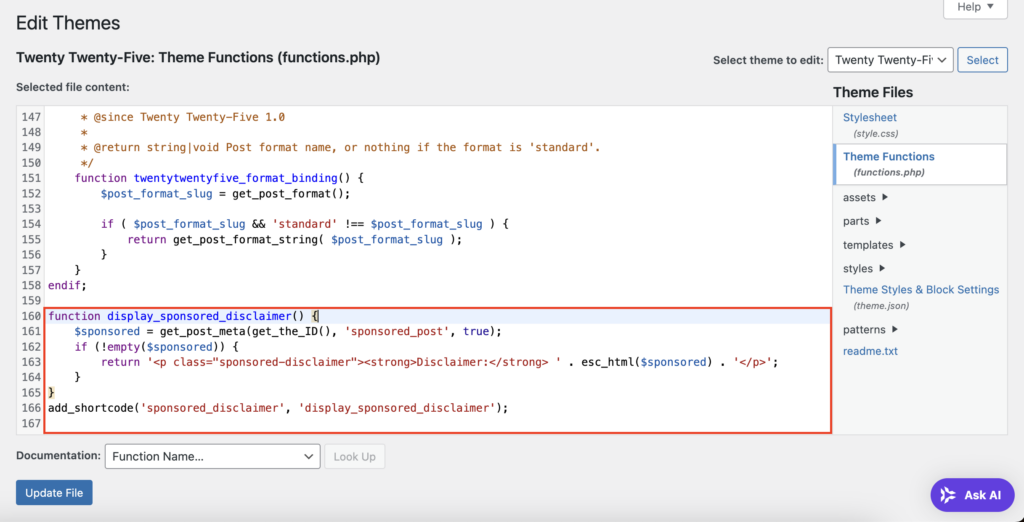
Navigate to Tools → Theme File Editor and open the Theme Functions (functions.php) file. Scroll down to the bottom and add this code snippet:
function display_sponsored_disclaimer() {

    $sponsored = get_post_meta(get_the_ID(), 'sponsored_post', true);

    if (!empty($sponsored)) {

        return '<p class="sponsored-disclaimer"><strong>Disclaimer:</strong> ' . esc_html($sponsored) . '</p>';

    }

}

add_shortcode('sponsored_disclaimer', 'display_sponsored_disclaimer');
Feel free to tweak the code if you want to change any details. Then, hit the Update File button to implement the changes.
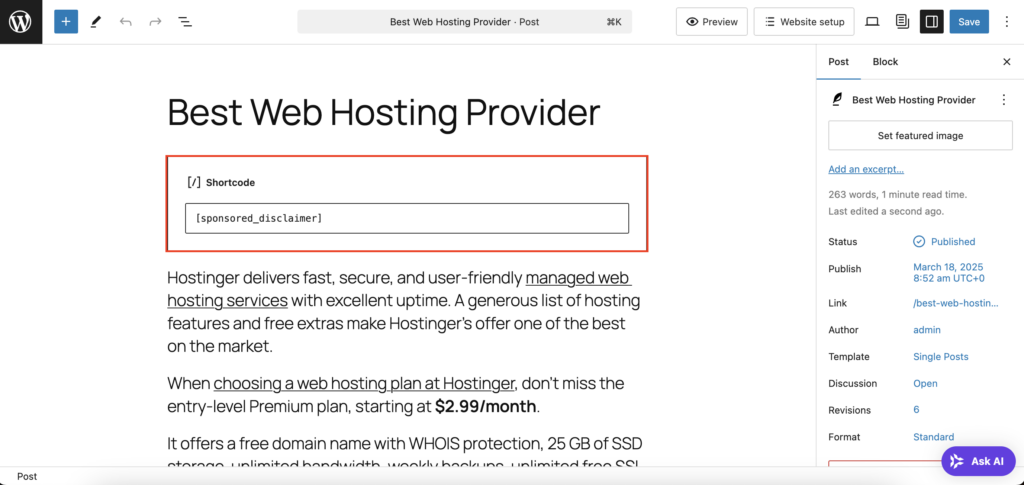
Now, open the post editor. Go to the part where you want to display the custom field, click the Add block (+) button.
Select Shortcode, and the field will appear on the post editor. Input your created shortcode there.
Type [sponsored_disclaimer] as we set it in the theme file earlier. Hit Save to apply the change.
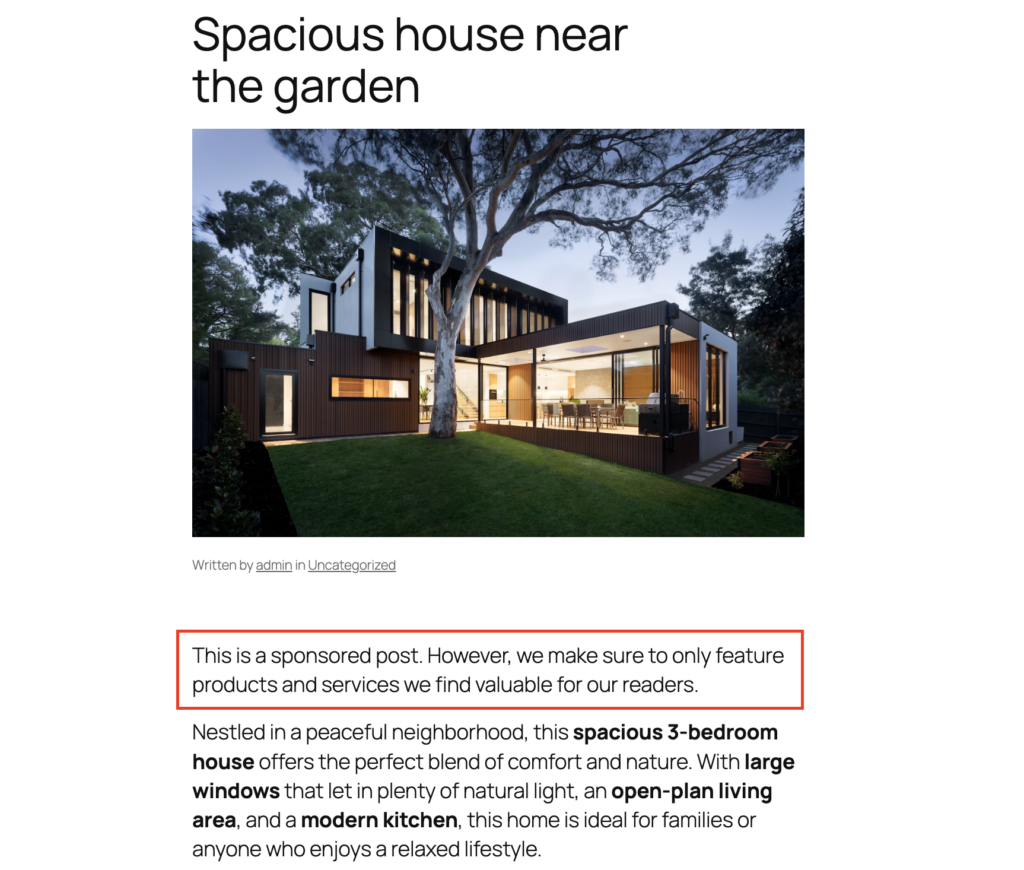
You’ll see the sponsored post disclaimer appear on the front end.
Pro tip
You can tweak the custom fields’ style by editing the WordPress CSS file.
How to use a WordPress plugin to manage custom fields
While manually adding custom fields requires editing theme files, you can simplify the process with plugins. Some of the best WordPress custom field plugins include Secure Custom Fields, Meta Field Block, Pods, Custom Field Suite, and CarbonFields.
Using the same sponsored post disclaimer example, we’ll show you how to display the custom field without coding with Secure Custom Fields and Meta Field Block plugins.
So, the first thing you need to do is to install and activate both plugins on your WordPress dashboard. Once done, follow these steps to add the custom field in WordPress:
- Navigate to the SCF menu from your WordPress dashboard.
- Click the Add Field button in the field group editor interface.
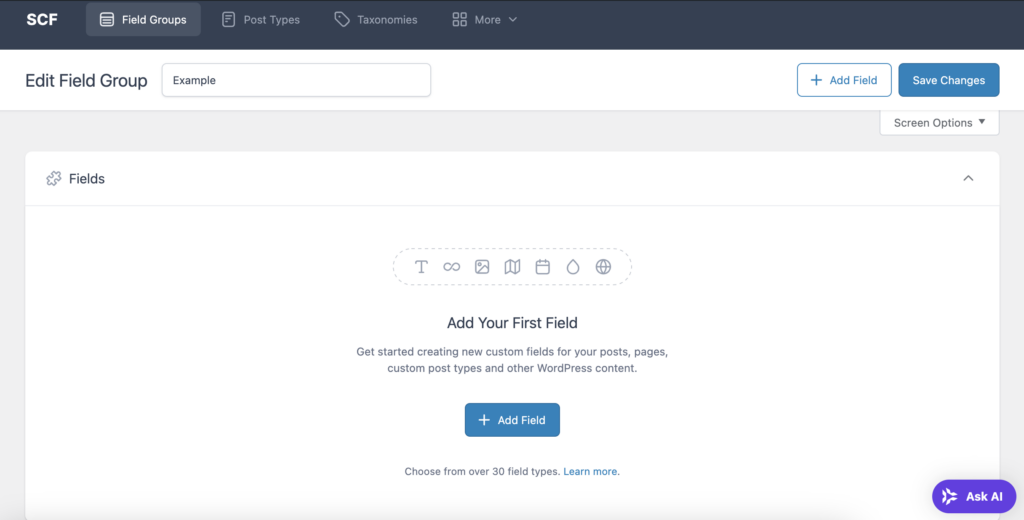
- Give the Field Group a name. It can be something that reflects its purpose.
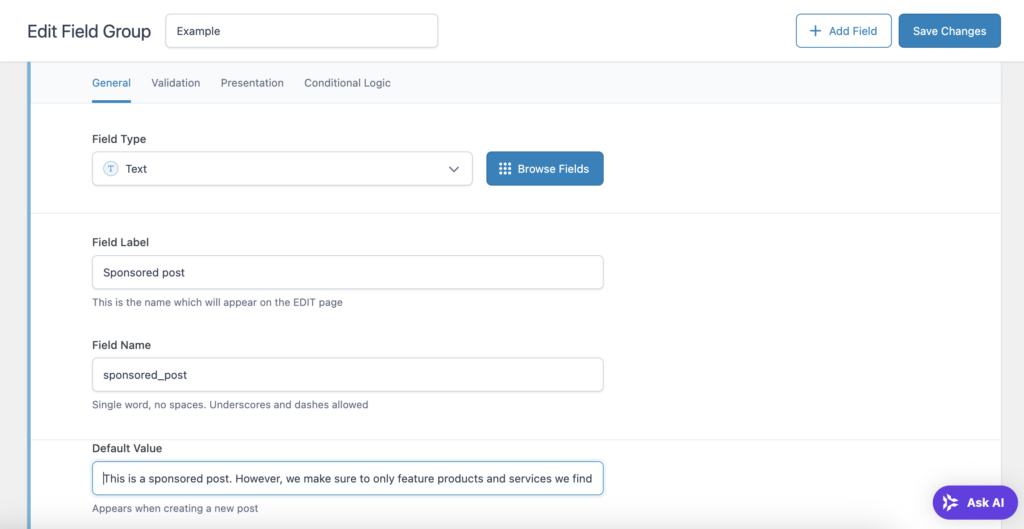
- Choose Text as the Field Type, as we want to display simple text this time.
- Fill the Field Label box to give an idea of the custom field.
- The Field Name box auto-fills based on the field label, but you can edit it if needed.
- Type in the Default Value to appear in the custom field. You can also leave it blank if you want different data values for each post.
- Scroll down to the Settings box to change the custom field’s configurations.
- This time, we’ll only set the Location Rules, which will determine where the custom field will appear. In this example, we want it to appear on every post.
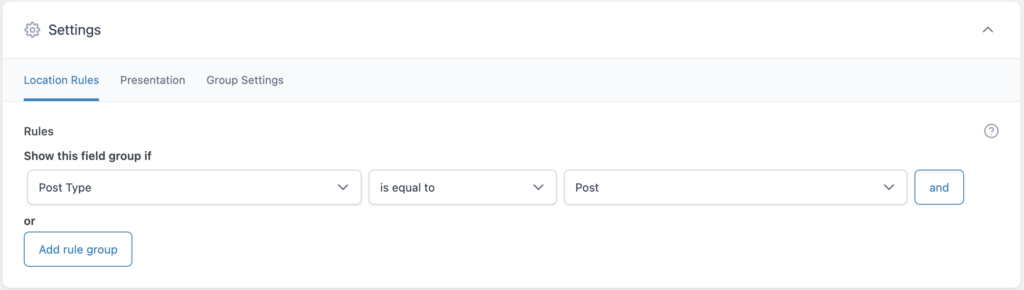
- Hit the Save Changes button in the upper right corner.
With these settings, the custom field section will appear in every WordPress post editor interface.
Do note that your custom field configurations will determine how the section looks. For example, the text box will be blank if you don’t set a default value.
At this point, the field and its value will only appear on your dashboard. Normally, you’ll need to tweak the code in your theme file to show the metadata on the front end.
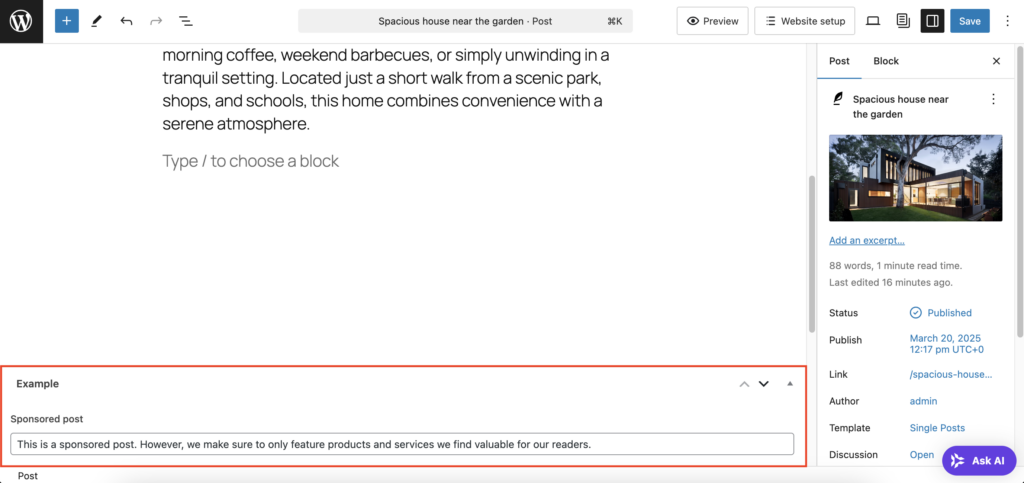
Using the Meta Field Block plugin, you can simplify the process with these steps:
- Open the post or page editor where you want to show the custom field.
- Choose any area to display the custom field and click the Add block button.
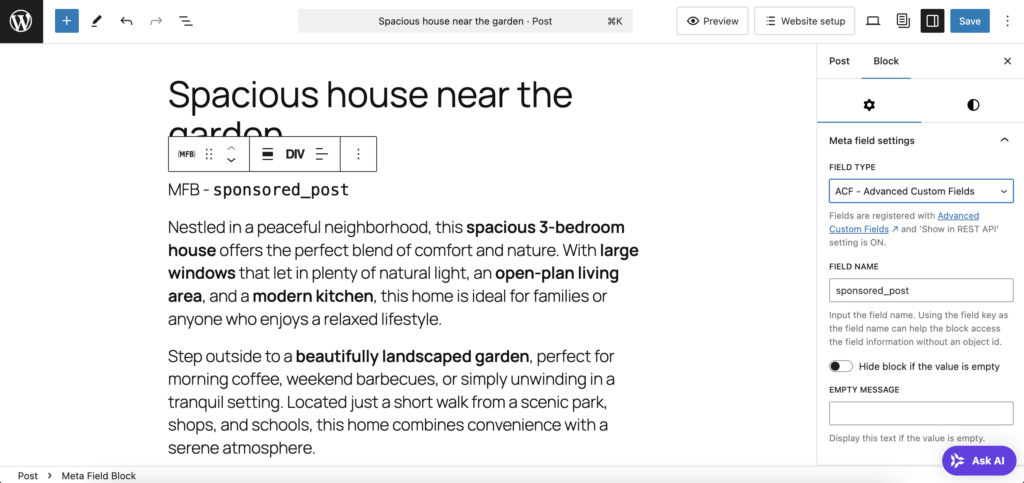
- Select Meta Field Block. You’ll see the Meta field settings section on the block settings panel.
- Choose ACF – Advanced Custom Fields from the FIELD TYPE drop-down menu.
- Enter the field name you set. For this example, we’ll input sponsored_post according to what we’ve set earlier.
- Save the post to implement the change.
As a result, the text will now appear in the actual post.
Pro tip
This example shows a basic use case of WordPress custom fields. You can modify them to fit your website goals by taking advantage of other WordPress features like custom post types, templates, and query loop.
Benefits of WordPress custom fields
The primary purpose of WordPress custom fields is to store and display additional data that isn’t included in the default content editor. So, they can help with:
- Improving content organization – custom fields provide better data structuring by allowing users to add specific details related to a post.
- Enhancing website customization – custom fields let you go beyond WordPress’s default metadata, giving you more flexibility to customize your site exactly as you want.
- Adding custom data without plugins – while many WordPress plugins provide extra fields, using native custom fields keeps websites lightweight.
- Streamlining data management for dynamic content – websites with structured content, such as directories, portfolios, or ecommerce stores, can efficiently store and retrieve product specifications, customer testimonials, or booking details.
- Enhancing SEO and user experience – custom fields can hold structured data (schema markup) for improving visibility in search engine result pages. They also enhance user experience by making your website content easier to scan and interact with.
Popular use cases of WordPress custom fields
There are many ways you can improve your WordPress site with custom fields. Here are some real-life examples:
Real estate listings
Use custom fields to store property details such as price, location, square footage, number of bedrooms/bathrooms, and availability status. This allows for structured and filterable listings, improving user experience on real estate websites.
Ecommerce products
If you run an online store, custom fields can be beneficial to add extensive product details like SKU numbers, discount percentages, stock status, manufacturer details, and product dimensions.
Event listings
Event websites can include custom content for the event date, time, venue location, ticket prices, performer lineups, and RSVP links. Displaying such information improves the user experience by letting visitors find all relevant event details in one place.

Recipe websites
Take advantage of custom fields to add structured recipe details such as preparation time, cooking time, number of servings, ingredient lists, calorie count, and dietary restrictions. This improves readability and helps users follow recipes easily.

Book reviews
A book review website can display extra information like author name, book genre, publication year, number of pages, average reader rating, and personal review scores. This provides readers with a quick summary before diving into a full review.

Portfolio websites
If you’re a freelancer or are running an agency, consider showcasing your work by adding custom fields for client names, project descriptions, technologies used, project completion dates, and links to live projects.

Conclusion
WordPress custom fields let you add extra information to your content, making your site feel more dynamic and personalized.
In this guide, we’ve covered the steps of creating and using custom fields in WordPress manually and by using plugins. We also provided some examples of how you can utilize them best for your needs.
We hope this guide helps you apply and display custom fields on your WordPress site. Start experimenting and let us know how it goes.

WordPress custom fields FAQ
What is the difference between WordPress custom fields and custom post types?
WordPress custom fields let users add details like product specifications, ratings, or completion time. Meanwhile, custom post types define content structures beyond the default posts and pages.
How do I hide empty custom fields?
To hide empty custom fields, use a conditional check in your theme template. Wrap the get_post_meta() function in an if statement to ensure it only displays when the field has a value.
Why can’t I see my custom fields?
If your custom fields aren’t visible, check if they’re enabled in the WordPress editor by clicking the Options button and then going to Preferences → General → Advanced. Make sure the Custom fields option is toggled. Alternatively, check if theme files include the get_post_meta() function to display the data.

Larassatti Dharma is a Content Writer with 3+ years of experience in the web hosting industry. She’s also a WordPress contributor who loves to share helpful content with others. When she's not writing, Laras enjoys learning foreign languages and traveling. Follow her on LinkedIn


Comments
May 04 2020
Hi, And thanks. I've been working at my WP website for weeks because I used to write my own site but decided to migrate all to WP to join the rest of the world. I'm' disappointed a bit though, precisely because there is little option to create custom posts and fields that does not require a major effort to stitch together different different plugins and php to make it happen. I don't want to use a template of someone else's idea of attractive. I want to make something uniquely mine--with my signature, so thanks for this helpful post. It is the first I've seen that steps through each part of the custom field process. Helpful. My one question to you is what plugin do you recommend to produce shortcodes of custom fields? I just want a shortcode for each of my custom fields and then place that anywhere using my editor of choice. Thx, rickymay
May 04 2020
Hey Ricky, glad that the tutorial helped! If you want to build shortcodes for your custom fields you can use the "Get Custom Field Values" plugin.