Website launch checklist 2024: 20+ essential pre- and post-launch tasks
Launching a website is pivotal for any business or individual looking to establish an online presence. Whether you are building a new site from scratch or revamping an existing one, the process involves careful planning and execution.
Our comprehensive website launch checklist will walk you through essential pre- and post-launch tasks to help you cover all bases. We share tips on optimizing performance, enhancing user experience, ensuring legal compliance, and implementing effective promotion strategies post-launch.
This checklist will help you confidently handle a website launch, avoid common mistakes, and make the most of your site’s potential.
Website pre-launch checklist
Before you launch your website, it’s essential to lay a solid foundation through careful planning and preparation.
Our pre-launch checklist covers the crucial steps you need to take before launching the final version of your website.
These tasks will help you ensure that every element is well-executed, from initial research and goal-setting to optimizing design and content, setting your site up for success.
1. Research competitors and industry trends
Category: Plan and research
Researching your competitors and staying on top of industry trends provides valuable insights to guide your strategy.
Understanding what your competitors do well lets you identify best practices to emulate and areas where you can stand out. Keeping up with industry trends ensures that your site remains relevant and competitive.
How to do it:
- Identify key competitors. Start by listing your top competitors. Use search engines, social media, and industry directories to find similar websites and businesses.
- Analyze competitor websites. Visit your competitors’ websites and evaluate their strengths and weaknesses. Note their design, content, products/services, and user engagement strategies.
- Use tools for deeper insights. Tools like Semrush or Ahrefs can provide insights into competitors’ search engine optimization (SEO) strategies, including their top-performing keywords and backlinks.
- Stay updated on industry trends. Follow industry blogs, subscribe to newsletters, and participate in forums or groups relevant to your field. This helps you learn about new technologies, consumer preferences, and market shifts.
Example: If you’re launching an online fashion store, identify the top fashion retailers and note how they use social media, present their collections, and handle customer service. You might find that incorporating user-generated content, like customer photos, is a trend that increases engagement and trust.
2. Define goals and objectives
Category: Plan and research
Defining clear goals and objectives gives you a roadmap to guide your website’s development and measure its success. Goals help focus your efforts on what’s important and ensure that every aspect of your website aligns with your broader business objectives.
How to do it:
- Set SMART goals. Ensure your goals are Specific, Measurable, Achievable, Relevant, and Time-bound. For example, specify what you want to achieve instead of setting a vague goal like increasing traffic. For instance, to increase website traffic by 25% over the next six months.
- Break down goals into tasks. Divide your larger goals into smaller, manageable tasks. This makes it easier to track progress and stay motivated.
- Align with business objectives. Ensure your website goals support your overall business objectives. For example, if your business goal is to grow your email list, your website should have multiple touchpoints for email capture.
- Use tools to track progress. Utilize project management tools like Trello or Asana to organize tasks and deadlines.
Example: For a new eCommerce website, a SMART goal might be to achieve $10,000 in sales in the first quarter. To reach this, you could plan specific tasks like setting up online advertising campaigns, optimizing product descriptions for search engines, and creating a monthly promotional calendar.
3. Select a suitable website builder and host
Category: Design and development
Choosing the right website builder and hosting provider is crucial for your website’s performance, scalability, and ease of management. A user-friendly website builder with robust hosting ensures your website can handle traffic efficiently and remain secure, providing a smooth experience for visitors.
Build your website with Hostinger Website Builder
Hostinger Website Builder is an excellent choice for beginners setting up their first website. Its intuitive drag-and-drop interface eliminates the need for coding knowledge, making it easy for anyone to create a professional-looking website for just $$2.95/month.
The builder’s plans cover everything you need, including hosting. Annual plans even include a free domain name, allowing you to budget your website costs with a fixed monthly fee.
How to get started:
- Choose a suitable website builder plan. We recommend the Business Website Builder plan to ensure you have sufficient resources for your site.
- Pick a domain name. Select a memorable and relevant domain name that reflects your brand. If you need help, check out our guide on how to choose the right domain name.
- Set up your account. After purchasing, follow the on-screen instructions and access hPanel to use the website builder.

4. Decide on website layout and design elements
Category: Design and development
A well-thought-out layout and design can significantly enhance user experience by making navigation intuitive and engaging. Good design communicates your brand message effectively and can influence visitors’ perception of your business.
How to do it:
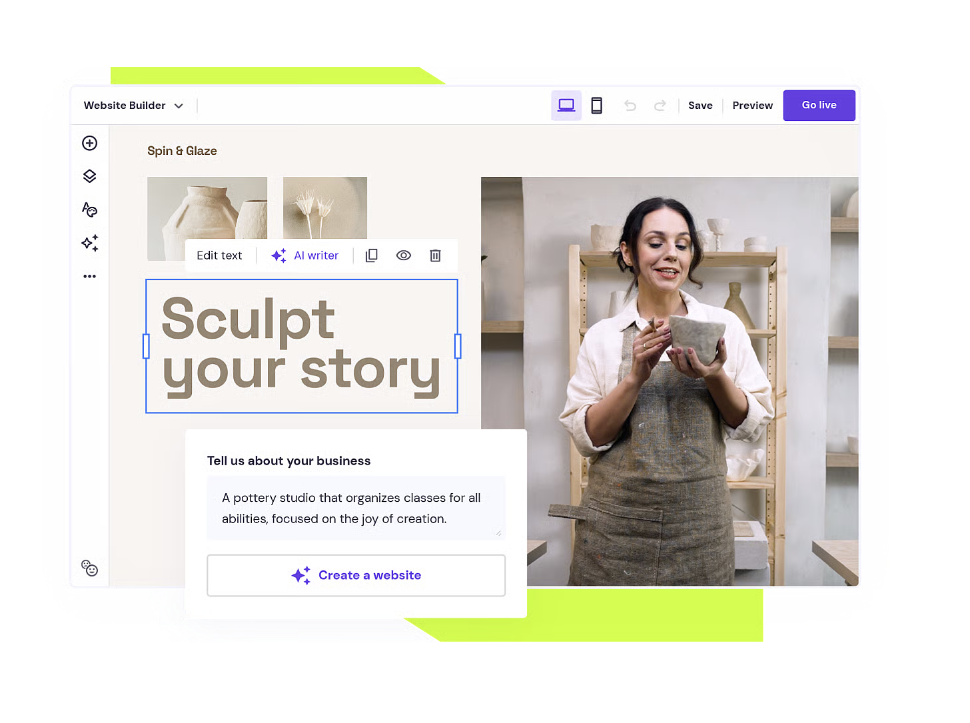
- Use the AI Website Builder. Start by describing your site and answering a few questions about your business. The AI Website Builder will generate suggested layouts and designs tailored to your needs, helping you create a visually appealing and cohesive site effortlessly.
- Create a sitemap. Plan your website structure by mapping out the pages and their hierarchy. A clear sitemap helps organize your content and guide navigation.
- Design wireframes. Sketch or use a tool like Balsamiq to create wireframes that show the layout of each page. Focus on the placement of key elements like headers, images, and CTAs.
- Choose a color scheme and fonts. Select colors that reflect your brand’s personality and ensure text readability. Use font pairings that are consistent and legible across all devices.
- Incorporate visuals. Use high-quality images and videos that are relevant and engaging. Ensure they load quickly to enhance performance.
Example: For a tech blog, use a clean, minimalist layout with blue and gray tones for a professional look. Use large headings for post titles and include plenty of white space to improve readability.
5. Set up essential website pages
Category: Design and development
Essential pages like the homepage, about page, and contact page provide visitors with essential information and guide them through your site. These pages establish your site’s purpose and build trust with your audience:
- Homepage. Clearly state what your website is about and provide links to important sections. Use a strong headline and a prominent call to action.
- About page. Share your story and mission to connect with your visitors. Explain who you are, what you do, and why it matters. Include images of yourself or your team to add a personal touch.
- Contact page. Make it easy for visitors to get in touch by providing a contact form, email address, phone number, and social media links. Ensure the form is simple and asks only for necessary information.
- Services or products page. Detail the services or products you offer. Use compelling descriptions and high-quality images to engage visitors.
- Blog. Share insights, updates, and helpful information about your niche to keep visitors engaged and returning.
Add pages to your website with Hostinger Website Builder like this:
- Access your Hostinger account and open the website builder through the hPanel.
- Select your website and open the site editor.
- Click on the Pages and navigation menu located on the left side of the editor.
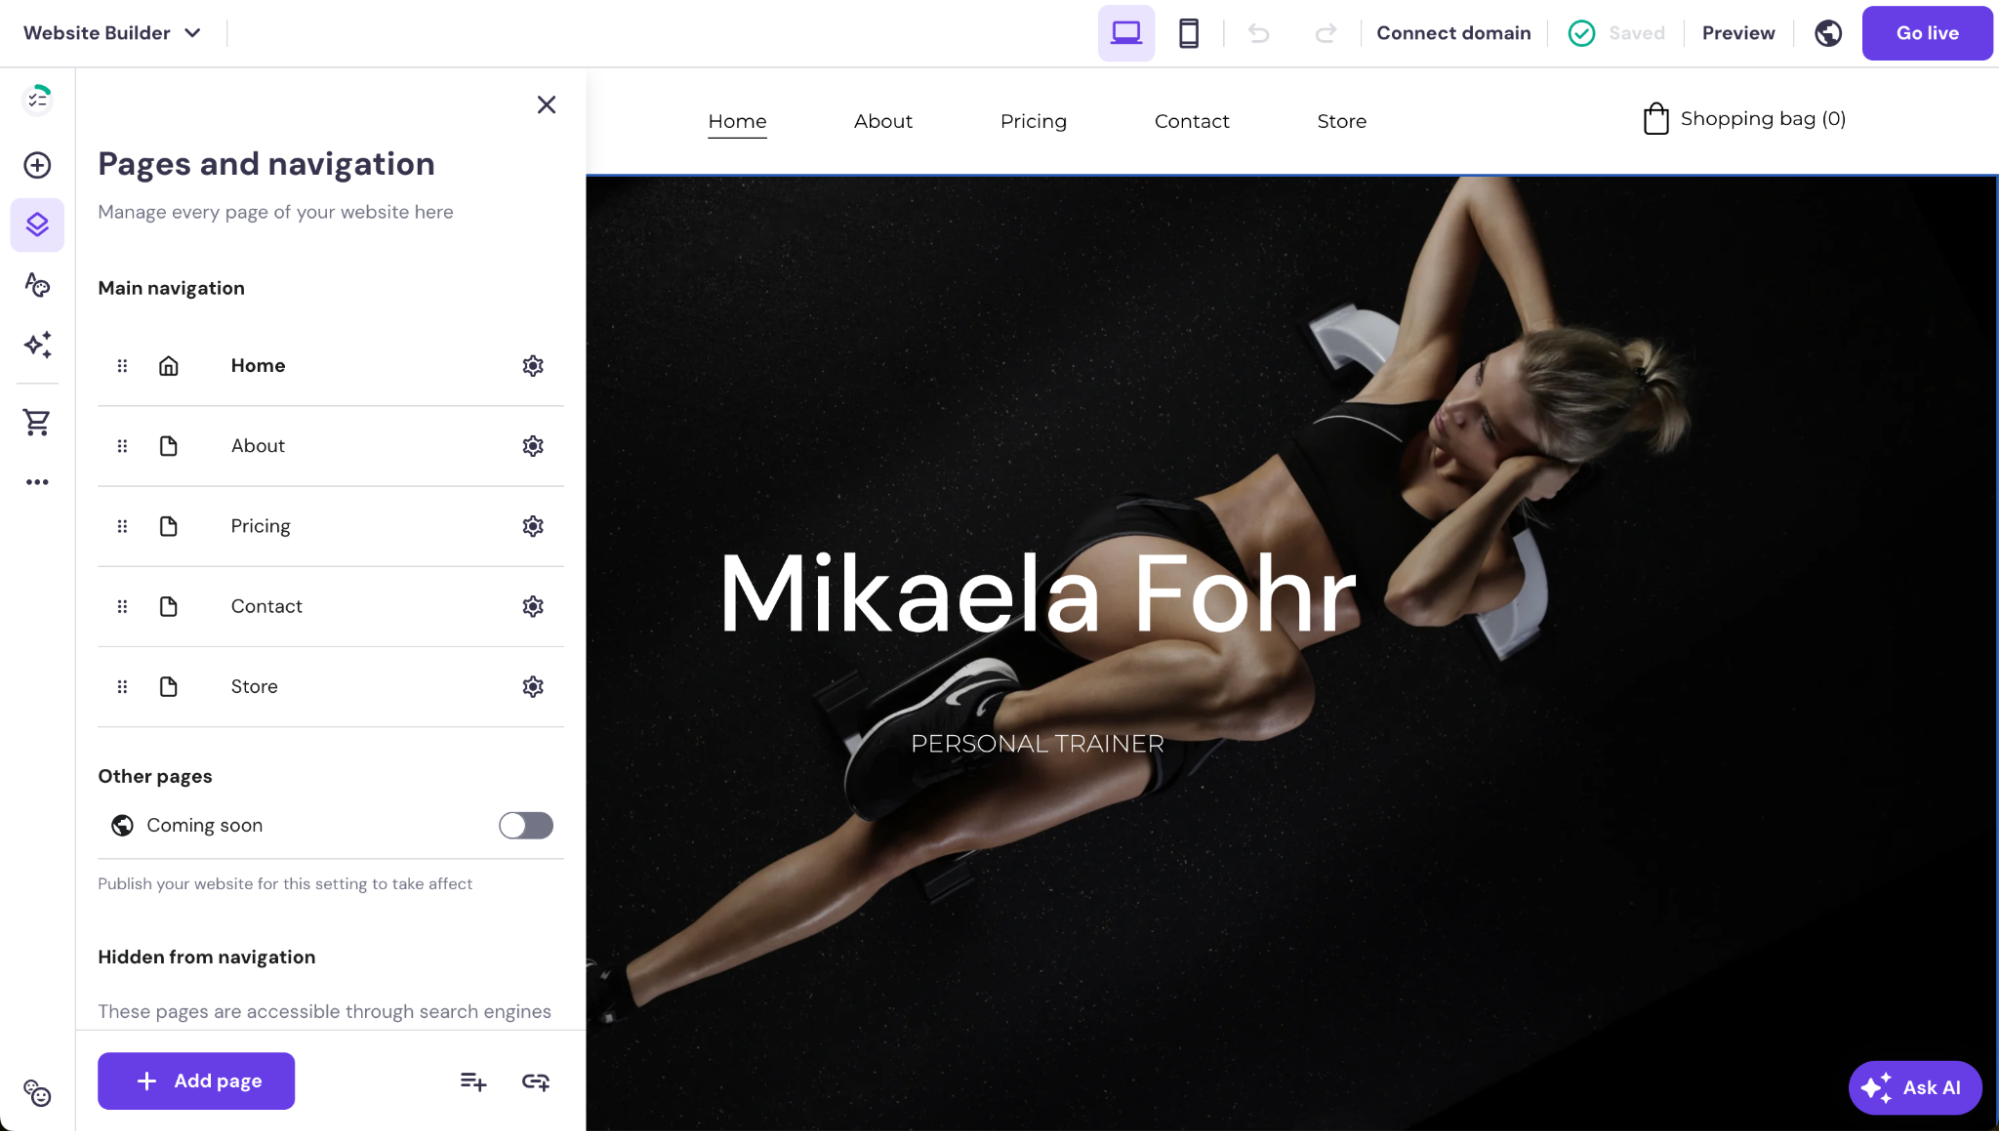
- Select Add Page to create a new page.
- Choose from a selection of pre-designed templates or opt to create a custom page instead.
- Edit the layout and content to suit your brand. Use the drag-and-drop interface to add elements such as text, images, and forms.
- Modify settings such as page title, URL, and SEO settings to optimize visibility.
- Follow the same steps to add and customize additional pages as needed.
- Once you have set up all the pages, click Publish to make your website live with the new content.
Example: Your consulting business website homepage might include an overview of your services, client testimonials, and a CTA to book a consultation. The About page could highlight your experience and expertise, while the Contact page offers multiple ways for potential clients to reach out.
6. Replace placeholder content
Category: Design and development
When using templates to build your website, you often start with placeholder content like dummy text and images. Removing and replacing these elements is crucial to ensure your site is professional, authentic, and accurately reflects your brand.
How to do it:
- Review each page. Go through every page on your website to ensure all placeholder content is removed. Replace dummy text with your unique content.
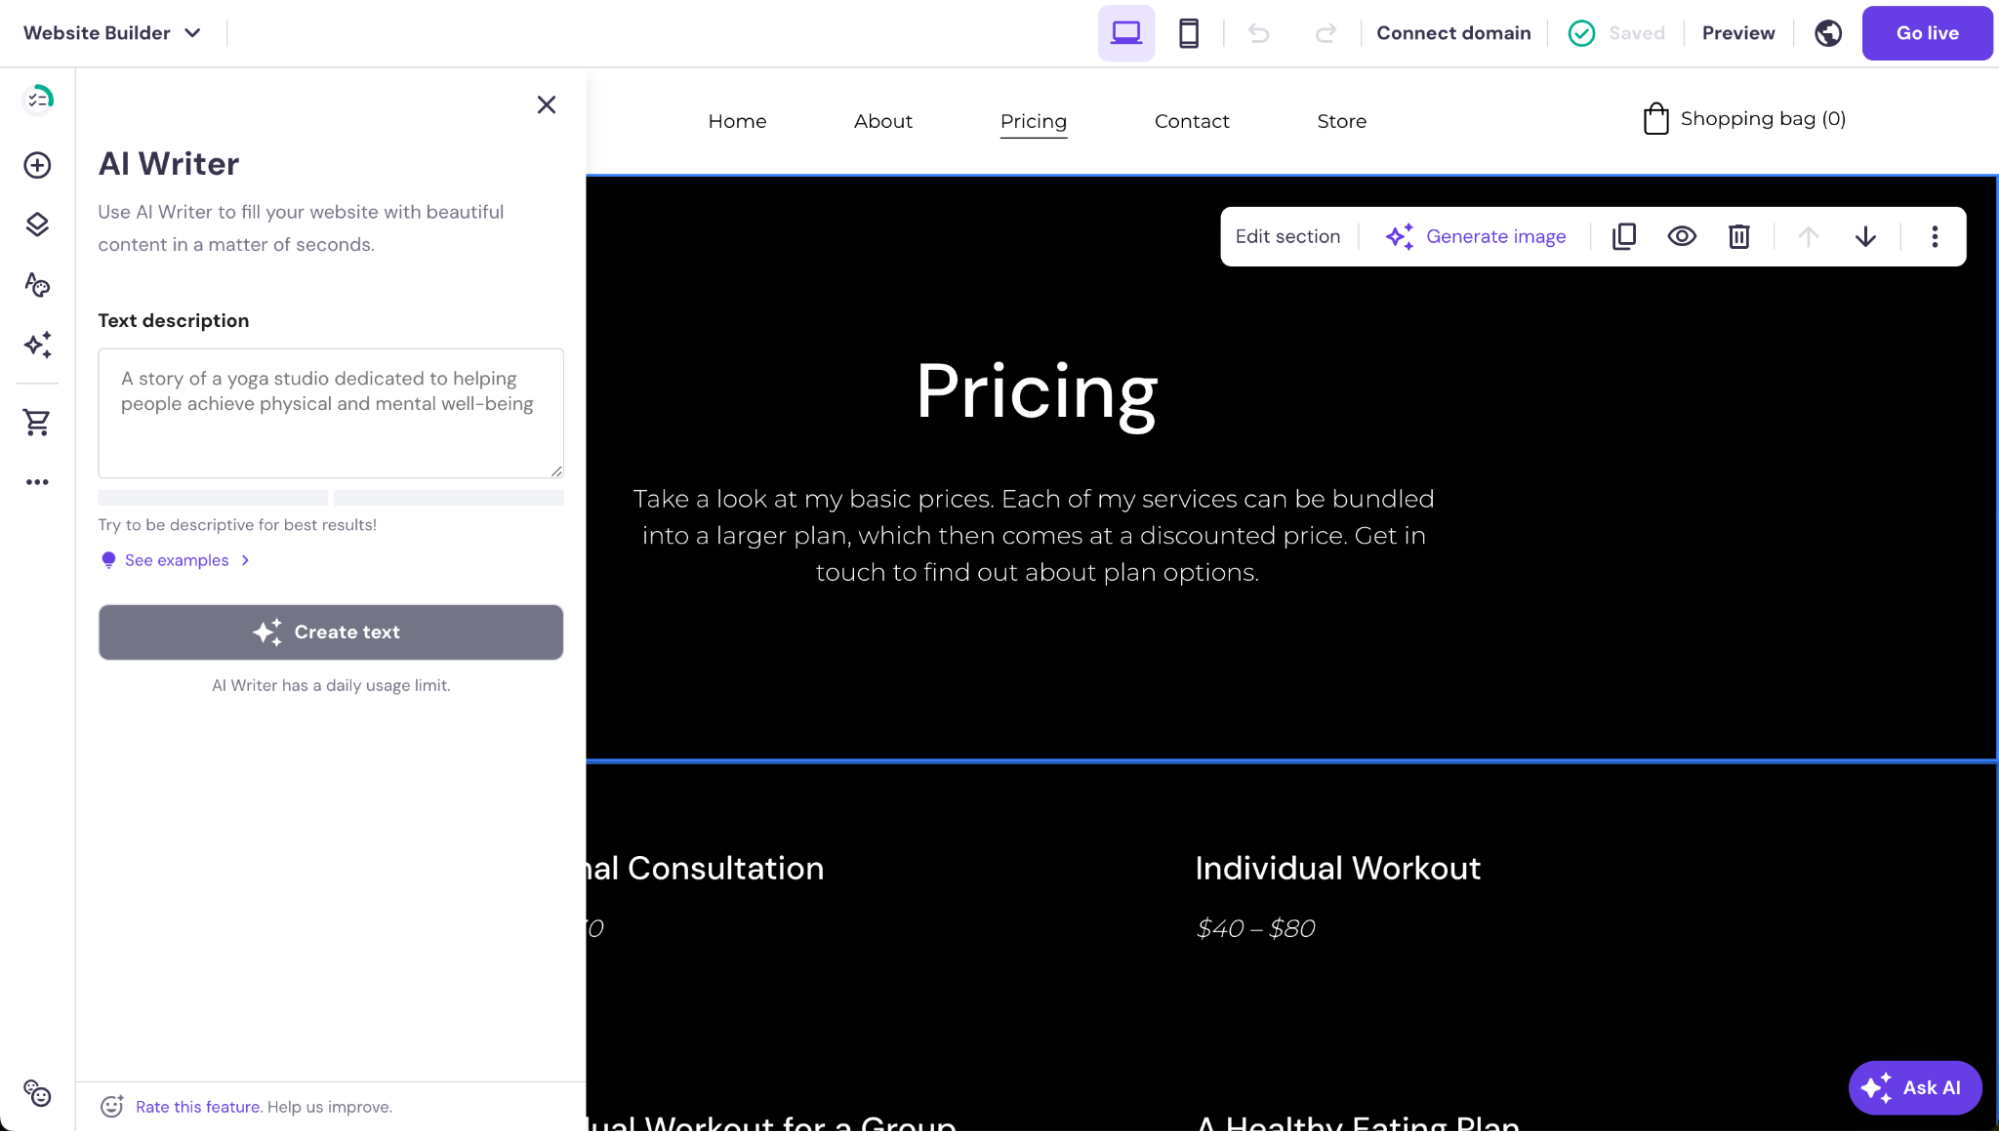
- Use the AI Writer. Hostinger’s AI Writer can help you generate engaging and tailored content for your website. Whether you need to craft compelling headlines, detailed product descriptions, or captivating copy for your About page, the AI Writer ensures your content is aligned with your brand’s voice and objectives.
- Customize images and text. Use authentic images and photographs that represent your brand and message. Tailor the text to match your brand voice and objectives.
- Update headers and footers. Ensure your site’s header and footer contain your information, such as your logo, contact details, and links to essential pages.
Example: If you’re launching a restaurant website, replace generic food images with photos of your dishes and replace the placeholder text with a description of your menu and dining experience.
7. Optimize images and content for performance
Category: Content optimization
Optimizing your website’s images and text helps reduce loading times and enhances user experience. Properly optimized content also improves your search engine rankings, making your site more accessible to potential visitors.
How to do it:
- Compress images. Use tools like TinyPNG or ImageOptim to reduce the file size of your images without sacrificing quality. This helps your pages load faster.
- Use descriptive alt text. Add alt text to images to describe their content. This aids in accessibility for visually impaired users and helps search engines understand the context of your images.
- Structure text for readability. Break up large blocks of text with headings, bullet points, and short paragraphs to make your content more readable and engaging.
Example: For a travel blog, use compressed images of destinations to enhance page speed and include alt text like “sunset over Santorini” to describe the image contextually.
8. Integrate analytics and SEO tools
Category: Content optimization
Analytics tools help you understand how visitors interact with your site, while SEO tools optimize your site for search engines. Together, they provide data-driven insights that help you improve your site’s performance and visibility.
How to do it:
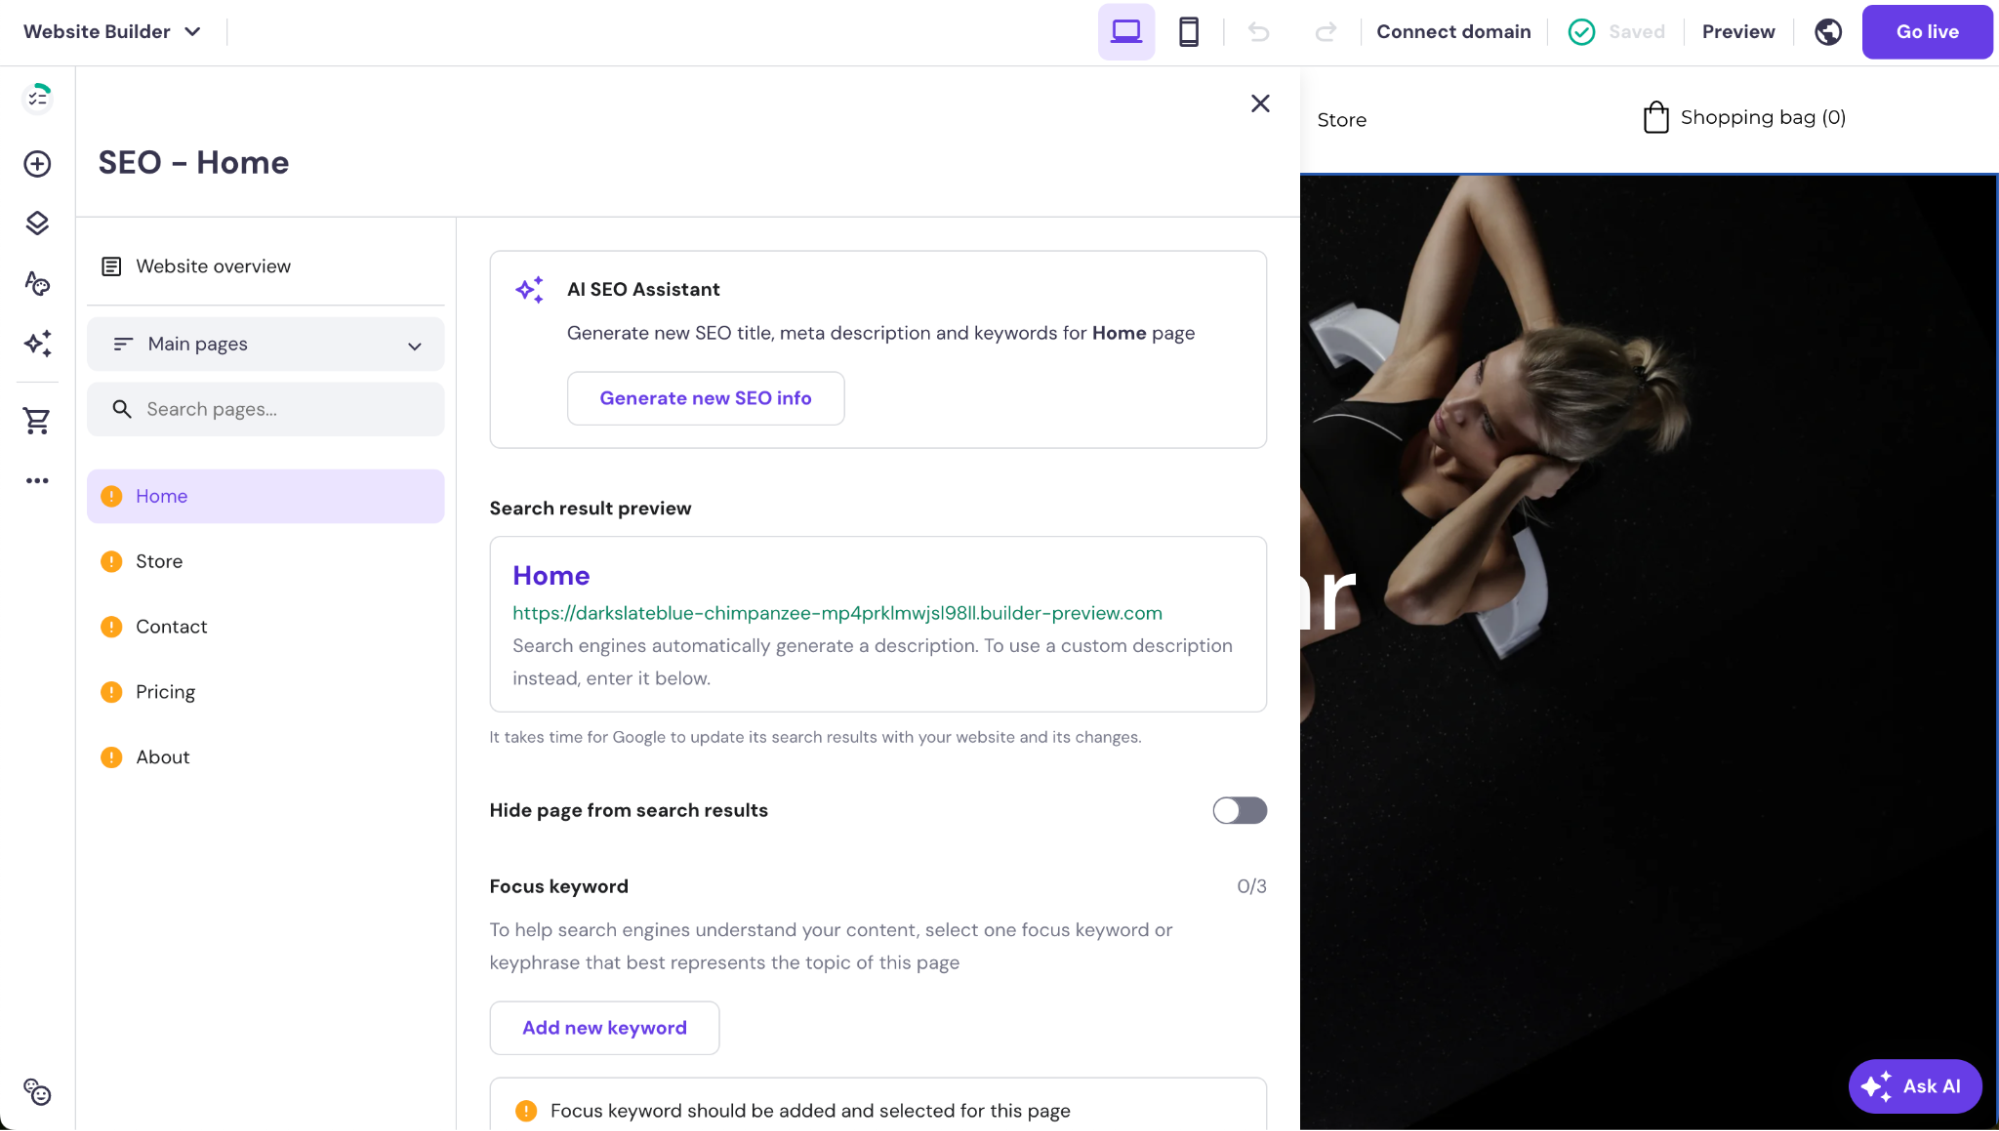
- Use Hostinger Website Builder’s SEO tools. Hostinger Website Builder comes with built-in SEO tools. Access the SEO settings from the side menu to edit metadata, such as title tags and meta descriptions, and customize URLs for better search engine visibility.
- Optimize page layouts with Hostinger’s AI Heatmap. Hostinger Website Builder features an AI-powered heatmap that helps you visualize user interactions on your site. This tool identifies which areas of your pages receive the most attention, helping you optimize the placement of important elements like calls to action, buttons, and forms.
- Configure and connect Google Search Console. Use Google Search Console to submit your sitemap, monitor search queries, and identify any indexing issues that might affect your site’s visibility. This helps ensure your site is indexed correctly and performs well in search results.
Example: For an online store, use Hostinger’s SEO tools to optimize product descriptions with relevant keywords and adjust meta tags to improve search engine rankings. The AI Heatmap helps you determine the most engaging sections of your product pages and strategically place promotional content or CTAs to enhance user engagement and conversions.
9. Obtain user feedback and conduct usability testing
Category: Testing and compliance
User feedback and usability testing help you identify and fix issues that could frustrate visitors or hinder their experience. By understanding how real users interact with your site, you can make informed improvements to enhance usability and satisfaction.
How to do it:
- Ask for feedback. Share your website with friends, family, and potential users and ask for their honest feedback. Inquire about their overall experience, what they found confusing, and any suggestions they might have.
- Conduct usability tests. Use platforms like UserTesting or Lookback to watch users navigate your site and complete tasks. This provides insights into any usability issues or bottlenecks.
- Implement changes. Use the feedback and testing insights to make necessary changes. Focus on improving navigation, fixing broken links, and enhancing content clarity.
Example: If testers report difficulty finding your contact information, consider placing a contact button in the navigation menu or adding a footer link on each page.
10. Test forms and interactive elements
Category: Testing and compliance
Forms and interactive elements like buttons and menus are essential for user engagement. Ensuring they work correctly prevents user frustration and potential loss of leads or sales.
How to do it:
- Test all forms. Go through each form on your website, such as contact forms or signup forms, to ensure they are submitted correctly and send confirmation messages.
- Check for responsiveness. Test interactive elements like buttons and dropdown menus across various devices and screen sizes to ensure they work seamlessly.
- Use error messages. Ensure that forms provide clear and helpful error messages when required fields are missing or information is entered incorrectly.
Example: For a newsletter signup form, submit a test entry to confirm it adds the email to your list and sends a welcome message.
11. Check mobile compatibility
Category: Testing and compliance
With much of web traffic coming from mobile devices, making your site mobile-friendly is essential for reaching and engaging your audience. A responsive design adapts to different devices, providing a seamless experience for all users.
How to do it:
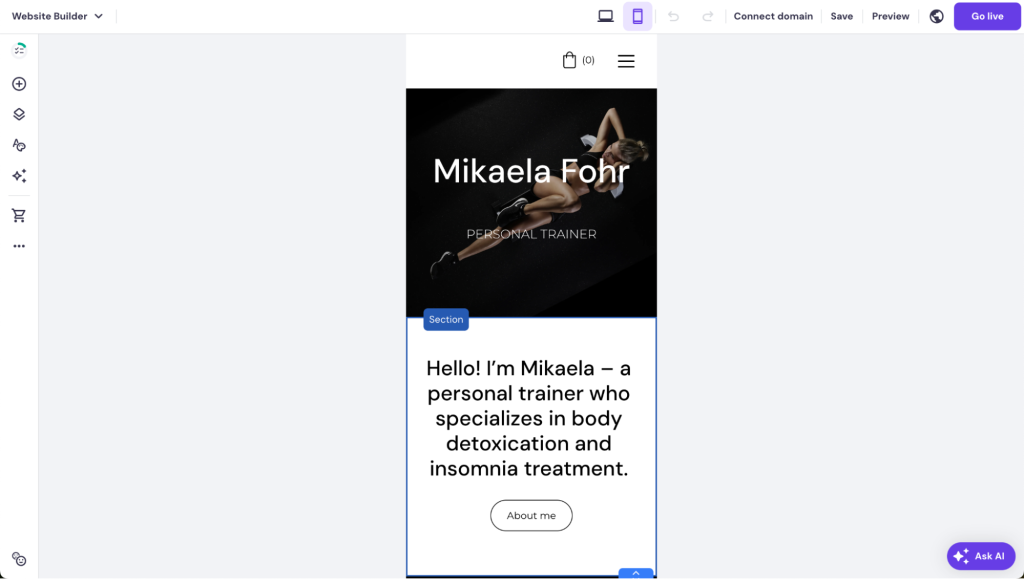
- Use Hostinger Website Builder’s mobile editor. Hostinger Website Builder includes a mobile editor that lets you customize and optimize your website for mobile devices. The editor allows you to adjust layouts, fonts, and images, ensuring they display correctly on smaller screens.
- Leverage the preview functionality. Utilize the built-in preview feature to see how your website will appear on different devices, including smartphones and tablets. This lets you make real-time adjustments and ensure your site looks great across all platforms.
- Test on multiple devices. Access your site on various devices and web browsers to ensure consistency and usability. Tools like BrowserStack help you simulate different environments and check for any display issues.
- Optimize for touch. Ensure buttons and links are large enough for easy tapping, and avoid pop-ups that can be difficult to close on small screens. Design with user interaction in mind, making navigation intuitive and straightforward.
Example: For an eCommerce website, test the checkout process on a smartphone to ensure the payment form is easy to complete and all steps are visible without horizontal scrolling.
12. Set up a permalink structure
Category: SEO and structure
A well-organized permalink structure enhances user experience by making URLs easy to read and understand. It also benefits SEO by helping search engines better index and categorize your site’s content, improving your website’s visibility in search results.
How to do it:
- Choose a URL format. Use a clear and consistent URL structure that includes relevant keywords and reflects the page’s content. For example, yourwebsite.com/about-us is better than yourwebsite.com/page-id123.
- Use descriptive slugs. The URL slug – the part after the domain – should be short, descriptive, and contain keywords. Avoid using random numbers or symbols.
- Set it up in your CMS. If you’re using a content management system like WordPress, you can set the permalink structure in the settings. Choose a format that fits your site, such as the post name for blog posts.
Example: For a blog post titled “10 Tips for Healthy Eating”, the URL might be yourwebsite.com/tips-for-healthy-eating, making it clear and easy to understand.
13. Create a robots.txt file
Category: SEO and structure
A robots.txt file instructs search engine crawlers which pages of your website to index and which to ignore. Proper configuration helps manage search engine visibility and prevent overloading servers with unnecessary requests.
How to do it:
- Create the file. Use a text editor to create a robots.txt file and place it in your website’s root directory, such as yourwebsite.com/robots.txt.
- Specify crawl instructions. Use User-agent to specify the crawler and Disallow to block certain pages. For example, Disallow: /admin prevents crawlers from accessing the admin section.
- Test with Google Search Console. Use the robots.txt tester tool in Google Search Console to ensure your file is correctly configured and doesn’t block essential pages from being indexed.
Example: To allow all search engines to index your entire site except for the login page, your robots.txt might include:
User-agent: *

Disallow: /login
14. Ensure legal compliance
Category: Testing and compliance
Legal compliance protects your website from potential lawsuits and builds trust with users by safeguarding their privacy and ensuring accessibility. Adhering to legal standards is crucial for avoiding penalties and maintaining your site’s reputation.
How to do it:
- Draft a privacy policy. Clearly explain how you collect, use, and protect user data. Include details on cookies, third-party services, and user rights. Use online generators like Termly or consult legal counsel for assistance.
- Implement cookie consent. If your website uses cookies, provide a cookie consent banner to inform users and obtain their permission. Tools like Cookiebot can automate this process.
- Ensure accessibility. Follow the Web Content Accessibility Guidelines (WCAG) to make your site usable for people with disabilities. Use tools like WAVE to identify accessibility issues and ensure compliance.
Example: For an eCommerce site, include a privacy policy link in the footer and use a cookie consent banner to inform users about data collection. Ensure all forms and navigation elements are accessible by screen readers and other assistive technologies.
15. Configure your site’s favicon
Category: Additional setup
A favicon is a small but important element that enhances brand recognition and adds professionalism to your website. It appears in browser tabs, bookmarks, and search results, making your site easily identifiable among many open tabs.
How to do it:
- Design a favicon. Create a simple, recognizable icon that reflects your brand identity. Favicons are typically 16×16 or 32×32 pixels. You can use tools like Canva or Favicon.io to design one.
- Upload to your site. Place the favicon file in your website’s root directory or use your CMS’s favicon management feature to upload it. Ensure the favicon is named favicon.ico so it is recognized automatically by browsers.
- Test across browsers. Check that the favicon appears correctly in different browsers and devices to ensure consistent branding.
Example: For a coffee shop website, a favicon might be a simple coffee cup icon, making it easy for users to recognize the brand at a glance when browsing multiple tabs.
16. Set up a business email
Category: Additional setup
A professional business email address enhances credibility and establishes trust with your audience. Using your domain name in your email address shows that your business is legitimate and serious about its communications.
How to do it:
- Choose an email hosting service. Hostinger’s business email hosting is an excellent choice for a reliable and affordable professional business email.
- Create email addresses. For a professional appearance, set up email addresses using your domain name, such as contact@yourdomain.com or support@yourdomain.com.
- Configure email clients. To ensure your email works seamlessly on all devices, configure email clients like Outlook, Apple Mail, or Thunderbird. For more information, follow our tutorial on how to use Hostinger email.
Example: A freelancer might create an email address like hello@janedesignstudio.com, adding a professional touch to client communications and making it easier for clients to remember. Using Hostinger’s Business Email service, they can efficiently manage their emails alongside robust security and support.

17. Create social media profiles and build anticipation
Category: Marketing and promotion
Building anticipation for your website launch through social media is an effective way to engage potential visitors and drive traffic once your site goes live. Social media platforms offer a space to reach your target audience, share your story, and create buzz around your launch.
How to do it:
- Set up profiles. Create accounts on social media platforms that align with your target audience, such as Instagram for visual brands or LinkedIn for B2B businesses.
- Share teaser content. Share sneak peeks, countdowns, and behind-the-scenes content to generate interest and excitement. Use hashtags relevant to your niche to expand your reach.
- Engage your audience. Encourage followers to share your content and participate in discussions. Consider hosting a giveaway or contest to increase engagement and attract new followers.
Example: A new fitness app might share teaser videos of its features and benefits on Instagram, using hashtags like #fitnessapp and #comingsoon to reach fitness enthusiasts and build excitement for the launch.
Website post-launch checklist
Once launching your new website, it doesn’t mean that the work is done. Here are a few things to double-check after the launch:
1. Crawl your website
After launching your website, ensuring that search engines can effectively crawl and index your pages is crucial. This step helps improve your site’s visibility in search results and identifies any potential issues affecting crawlability, such as broken links or missing metadata.
How to do it:
- Use a crawling tool. Tools like Screaming Frog SEO Spider or Semrush Site Audit can simulate a search engine’s crawling process and help you identify issues.
- Check for errors. Look for broken links, duplicate content, missing titles or meta descriptions, and other issues that might affect your site’s SEO.
- Submit an XML sitemap. Ensure your sitemap is up-to-date and submitted to search engines via platforms like Google Search Console and Bing Webmaster Tools.
Example: After running a crawl, you might discover several pages with missing meta descriptions. Adding these descriptions can improve your site’s search visibility and click-through rates.
2. Analyze current website performance
Category: Plan and research
Analyzing your current website performance or establishing benchmarks if you’re starting from scratch is crucial because it provides a clear picture of your site’s performance.
Benchmarking helps you understand your audience’s likes and dislikes, enabling you to make informed improvements. It also helps prioritize changes that significantly impact user satisfaction and business goals.
Benchmarking without a website
If you’re starting from scratch and don’t have a lot of website data to analyze, you can still establish valuable benchmarks.
Research industry standards and competitors to understand the typical metrics for similar websites. Identify key performance indicators (KPIs) that align with your business goals, such as average session duration, bounce rate, and conversion rate.
This information will help you set realistic benchmarks and guide your strategy as you go.
How to benchmark with an existing site:
- Set up Google Analytics. If you haven’t already done so, set up Google Analytics. This tool tracks visitor interactions and provides data on metrics like page views, session duration, bounce rates, and more. You can follow our beginner’s guide to setting up Google Analytics to get started.
- Review audience reports. Use Google Analytics to check the User attributes overview report. This will give you a sense of your audience size, demographics, and what devices they use to visit your site.
- Identify popular content. Look at the Reports → Examine user behavior → Page and screens report to see which pages are performing best. High-performing pages can provide insights into what your audience finds valuable.
- Spot weak points. Identify pages with high bounce rates. A high bounce rate means visitors leave your site quickly after viewing just one page, indicating potential issues with content relevance or user experience.
Example: Suppose your blog’s home page has a higher bounce rate than individual posts. This could suggest that visitors find your individual posts through search engines or social media but aren’t enticed to explore further. You might improve your homepage by adding popular posts, better navigation, or engaging calls to action.
3. Optimize the website for speed and performance
Website speed is a critical factor that affects user experience and search engine rankings. Slow-loading pages can lead to high bounce rates, frustrated users, and lost conversions. Optimizing your website for speed ensures a smooth experience for visitors, improving engagement and retention.
How to do it:
- Leverage browser caching. Configure your server to store files locally on users’ browsers, reducing load times for returning visitors.
- Minify CSS, JavaScript, and HTML. Remove unnecessary characters, spaces, and comments from your code to reduce file sizes and improve load times. Tools like Minify can help.
- Use a content delivery network (CDN). CDNs like Cloudflare distribute your site’s content across multiple servers worldwide, improving load times for users in different locations.
- Conduct a speed test. Use tools like GTmetrix or Google PageSpeed Insights to analyze your site’s speed and identify areas for improvement.
Example: If a speed test reveals that your homepage takes too long to load due to large image files, compress these images and enable lazy loading to improve performance.
4. Gather user feedback and conduct ongoing testing
Continuous feedback and testing help maintain and improve your website’s user experience. Regularly reviewing how users interact with your site and making adjustments based on their feedback will ensure your site remains relevant, engaging, and effective at achieving its goals.
How to do it:
- Use feedback tools. Implement feedback forms or pop-ups on your website to collect user opinions. Tools like Hotjar can help gather qualitative data.
- Conduct A/B testing. Test different versions of your pages to see which elements perform better. Tools like Optimizely let you test variations of your content, design and calls to action.
- Monitor analytics. Regularly review Google Analytics to track user behavior, engagement, and conversion metrics. Look for patterns or changes in user behavior that indicate areas for improvement.
Example: After conducting an A/B test on your landing page, you find that a version with a video introduction leads to higher conversion rates than a text-only version. You can then implement a more successful design across similar pages.
5. Ensure ongoing legal compliance and accessibility
As your website grows and evolves, maintaining compliance with legal standards and accessibility guidelines is crucial. Regular reviews ensure you stay updated with regulation changes and continue to offer an inclusive user experience.
How to do it:
- Review privacy policies. Update your privacy policy as needed to reflect any changes in data collection practices or legal requirements. Ensure it remains transparent and comprehensive.
- Check cookie consent. Regularly review your cookie consent settings and banners to ensure they comply with current regulations, such as GDPR or CCPA.
- Test accessibility. Continuously test your site for accessibility using tools like Axe tools or WAVE. Make adjustments to improve usability for users with disabilities.
Example: If new regulations require additional disclosures in your privacy policy, update the document and notify your users via email or a website announcement to maintain transparency.
6. Promote your website
Effective promotion drives traffic and increases brand awareness after your website launch. Utilizing a mix of marketing strategies helps you reach your target audience and encourages engagement with your content or products.
How to do it:
- Email marketing. Build and maintain an email list to send newsletters, promotions, and updates. Use tools like Mailchimp to manage your campaigns.
- Guest blogging. Write articles for reputable websites in your industry to reach a broader audience and acquire quality backlinks to improve SEO.
- Social media marketing. Leverage platforms like Facebook, Instagram, and LinkedIn to share content, engage with followers, and build a community around your brand.
- Paid advertising. Invest in pay-per-click (PPC) ads on Google or social media platforms to reach targeted audiences and boost website traffic.
Example: Launch a social media campaign using eye-catching graphics and engaging posts to promote a new product line, encouraging followers to visit your site for more information.
Conclusion
Launching a website is a complex process that requires careful planning and execution.
By following this comprehensive website launch checklist, you can ensure a smooth and successful launch, providing a solid foundation for long-term success.
Remember, the work doesn’t end at launch – continuously monitor, test, and optimize your website to maintain its effectiveness and relevance.
We hope this checklist has provided valuable insights and guidance for your website launch. If you have any additional tips or suggestions, feel free to share them in the comments section below.

Matleena is a seasoned Content Writer with 5 years of content marketing experience. She has a particular interest in emerging digital marketing trends, website building, and AI. In her free time, Matleena enjoys cups of good coffee, tends to her balcony garden, and studies Japanese. Follow her on LinkedIn