Jul 17, 2025
Ariffud M. & Edgaras G.
4min Read
SSH, or Secure Shell, is an essential protocol for securely accessing and managing remote servers. It encrypts all communication, ensuring that data remains protected from unauthorized interception.
By default, SSH runs on port 22, which is often targeted by brute force attacks. Changing the default SSH port can significantly enhance security by reducing the likelihood of automated attacks.
This article will guide you through all the steps to changing the SSH port on a Linux virtual private server (VPS), from selecting the appropriate new port to ensuring your server remains accessible after the change.
Download ultimate SSH commands cheat sheet
It’s important to select a port that is not already in use by other services to avoid potential conflicts and reduce security risks on your VPS. Here are some of the most commonly used port numbers with their associated services and protocols:
| Port number | Service | Protocol |
| 20 | FTP (data transfer) | TCP |
| 21 | FTP (control) | TCP |
| 22 | SSH | TCP |
| 23 | Telnet | TCP |
| 25 | SMTP | TCP |
| 53 | DNS | TCP/UDP |
| 67/68 | DHCP | UDP |
| 69 | TFTP | UDP |
| 80 | HTTP | TCP |
| 110 | POP3 | TCP |
| 123 | NTP | UDP |
| 137/138/139 | NetBIOS | TCP/UDP |
| 143 | IMAP | TCP |
| 161/162 | SNMP | TCP/UDP |
| 179 | BGP | TCP |
| 389 | LDAP | TCP/UDP |
| 443 | HTTPS | TCP |
| 636 | LDAPS | TCP/UDP |
| 989/990 | FTPS | TCP |
| 3306 | MySQL | TCP |
| 8080 | Alternative to HTTP (web) | TCP |
| 8443 | Alternative to HTTPS (web) | TCP |
Additionally, consider selecting a port outside the well-known range (0-1023) and the registered ports range (1024-49151). It’s advisable to opt for a custom port within the dynamic or private ports range (49152-65535).
SSH uses three different encryption techniques: symmetric, asymmetric, and hashing. Learn more about these methods in our SSH tutorial article.
Now that you have chosen a new port, let’s proceed with the steps to implement the change.
Before you can make any changes, you need to access your server securely. Follow these steps to connect to your server via SSH:
ssh username@server_ip
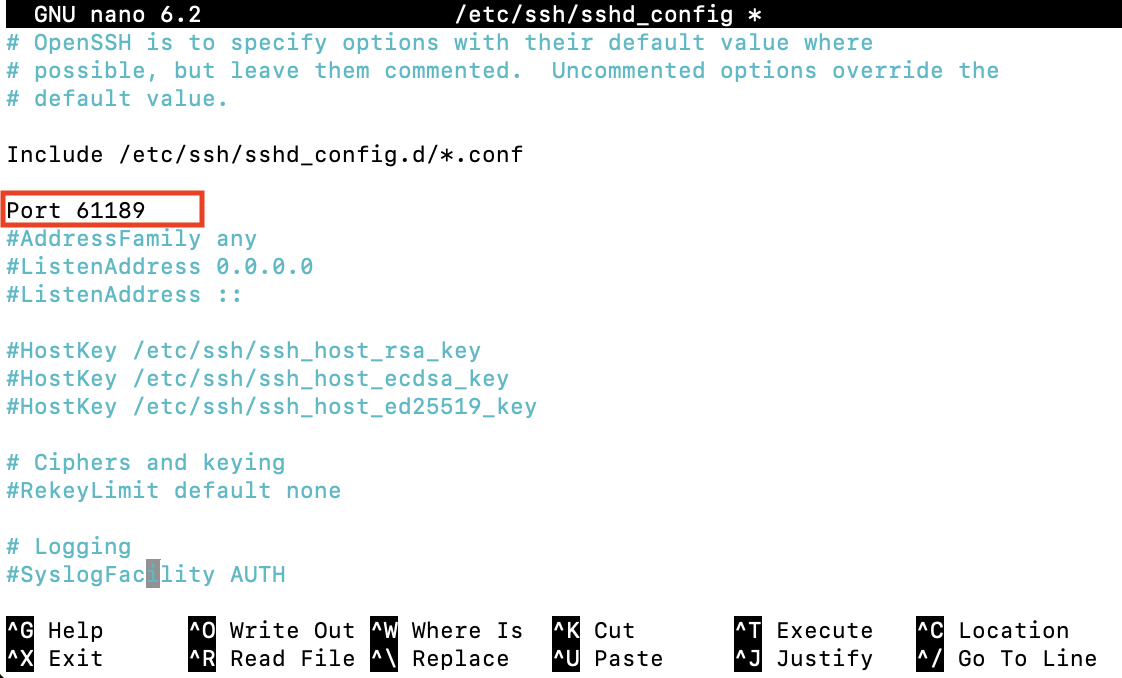
Once you’ve successfully accessed your server, the next step is modifying the SSH configuration to use a new port. This involves editing the sshd_config file, which controls various parameters of your SSH daemon.
sudo nano /etc/ssh/sshd_config
After updating your SSH port, it’s essential to adjust your firewall settings to allow traffic on the new port. However, if you’ve never configured any firewall rules, you can skip this step and proceed to the next section.
Here’s how to update firewall settings using Uncomplicated Firewall (UFW):
sudo ufw allow 61189/tcp
sudo ufw reload
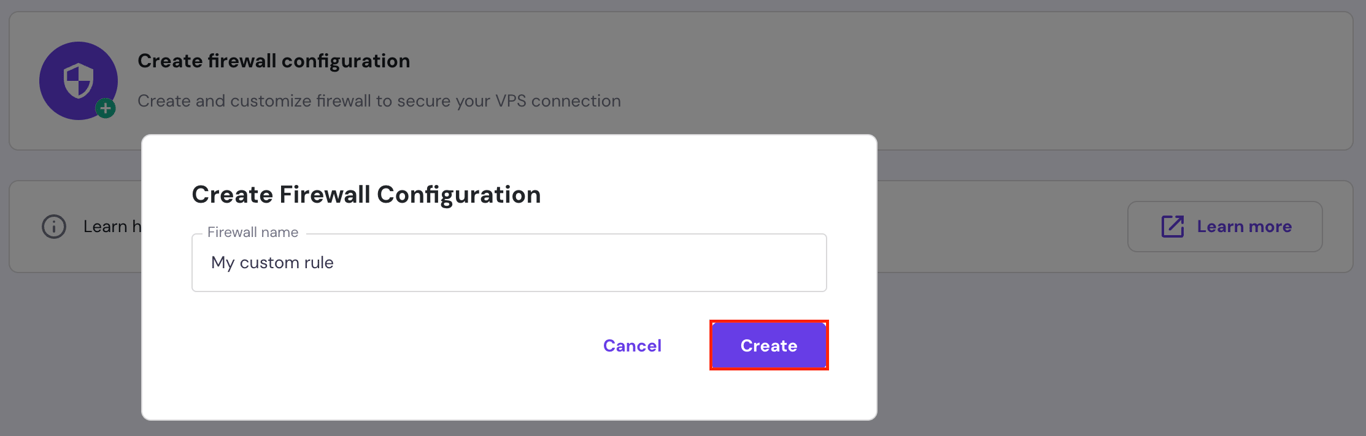
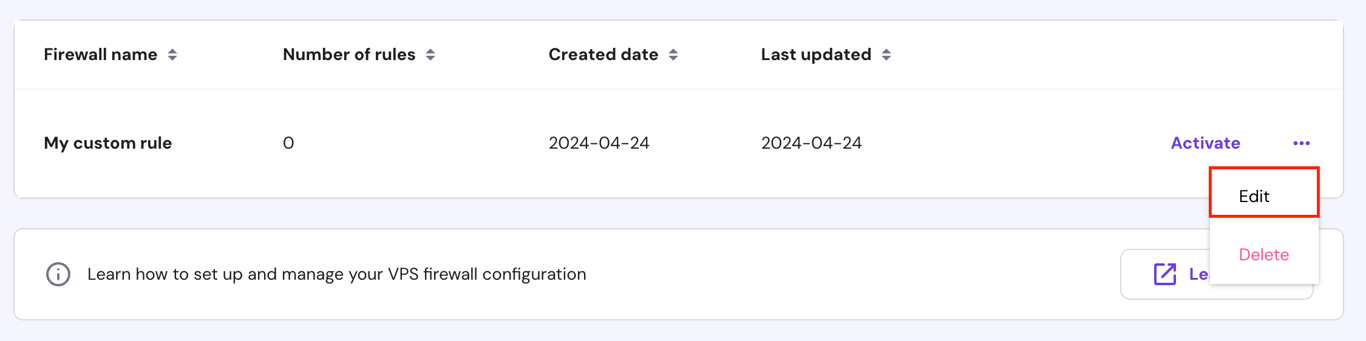
For Hostinger’s VPS hosting customers, you can easily configure firewall settings on hPanel. Follow these steps:
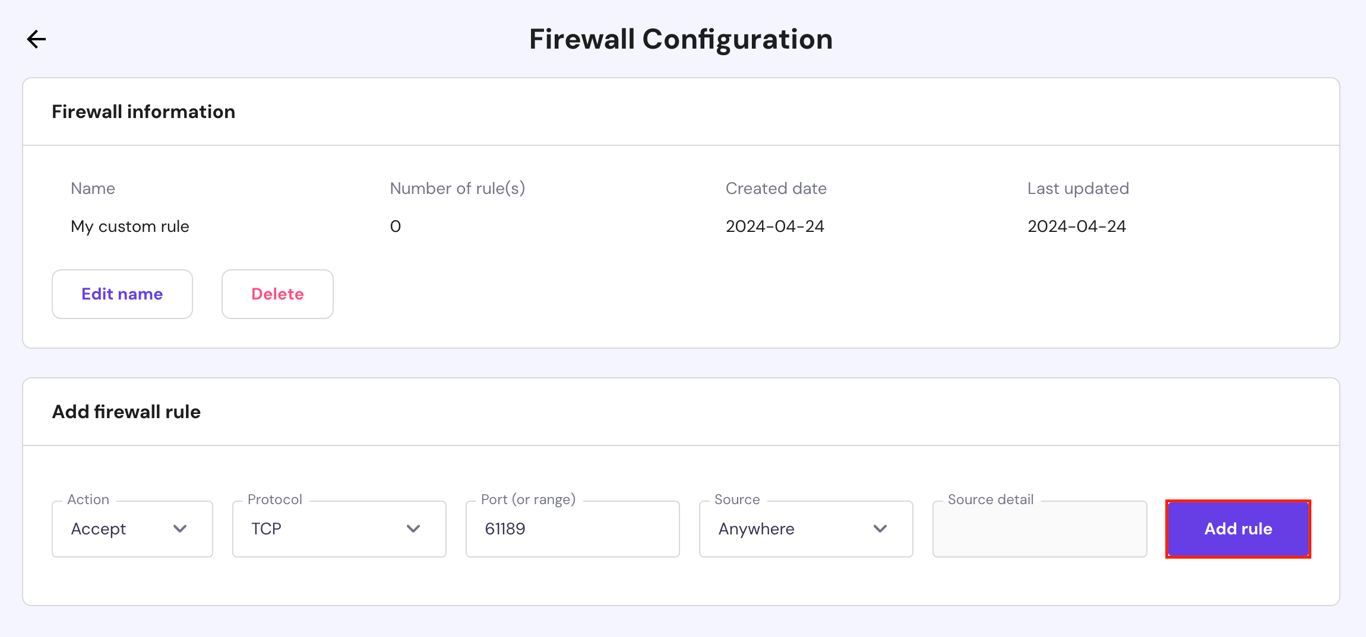

After setting up your firewall rules using either method, verify the current UFW status with this command:
sudo ufw status
Once you’ve updated the SSH configurations and firewall rules, it’s time to restart the SSH service to apply the new settings.
For systems using systemd, which is common in newer distributions like Ubuntu, Debian, and CentOS, restart the SSH service by running the following command:
sudo systemctl restart sshd
For older systems that use SysVinit, use this command instead:
sudo service ssh restart
After restarting, verify the SSH service status to make sure everything is running smoothly:
sudo systemctl status sshd
Now that you’ve restarted the SSH service, the final step is verifying that SSH is indeed operating on the new port. This ensures that your changes have been successfully implemented and the server is accessible.
Check the SSH port with ss or netstat
If you have ss installed, use the following command to list active connections, filtering for your new SSH port:
ss -tuln | grep [new_port_number]
Here’s the output you might see:

If you prefer using the netstat command, you can check with:
netstat -tuln | grep [new_port_number]
The output should resemble:

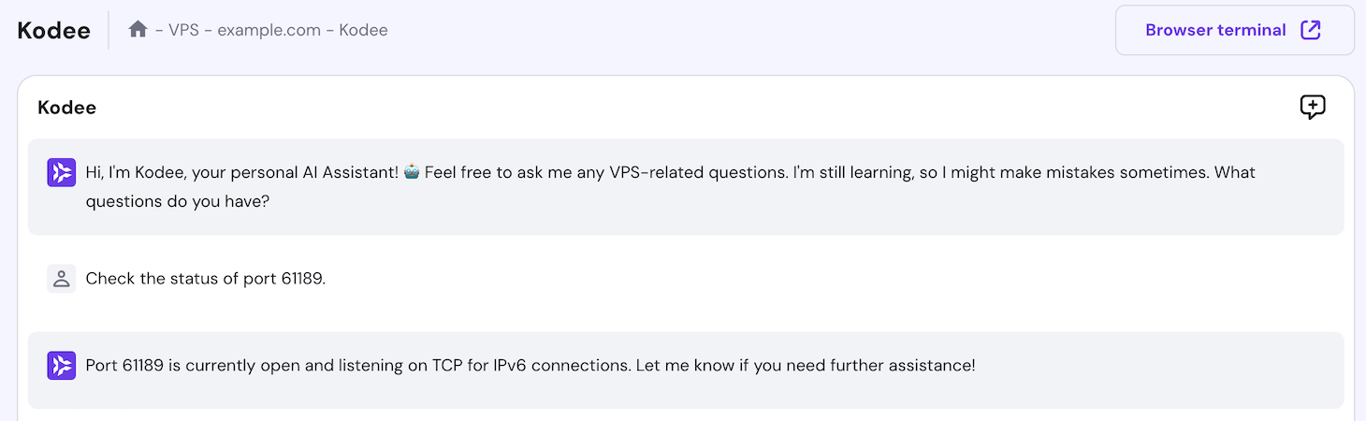
Alternatively, Hostinger VPS users can verify whether the new SSH port is open by asking the Kodee AI assistant. For example, ask Kodee “Check the status of port 61189,” and it will output the port status like so.
You can also ask Kodee to set up a new firewall rule for your VPS. For example, ask it, "Create and activate a new firewall rule that opens port 66189 TCP to any IP address."
Log in using the new port
Open a new terminal window to test connecting to the server with the new SSH port number by executing this command:
ssh -p new_port_number username@server_ip
Replace new_port_number, username, and server_ip with your specific details.
A successful SSH connection using the new port confirms that your server is functioning correctly with the changes.
Important! Do not log out of your previous root session until you’ve confirmed that the new setup is working correctly.
Changing the default SSH port is an effective security measure that can reduce your server’s vulnerability to attacks.
By implementing this change along with other best practices, such as using firewalls, regularly updating server packages, and setting up multi-factor authentication, you create a more secure environment for your SSH server.
Remember, security is an ongoing process that benefits from regular attention and adaptation.
This section will answer the most common questions on how to change the SSH port.
Changing the default port for SSH reduces your server’s visibility to automated attacks and port scans, enhancing security for sensitive data and root access.
Choose a port above 1024 that isn’t used by the most common privileged services to minimize conflicts and reduce exposure to attacks.
Changing the SSH port does not affect Linux server performance. It merely alters the entry point for SSH connections to improve security.
All of the tutorial content on this website is subject to Hostinger's rigorous editorial standards and values.

Ariffud is a Technical Content Writer with an educational background in Informatics. He has extensive expertise in Linux and VPS, authoring over 200 articles on server management and web development. Follow him on LinkedIn.

Edgaras is a veteran server administrator at Hostinger. He makes sure that every server runs at full throttle and has all the latest technological advancements. When he's not working, Edgaras enjoys skiing and exploring the world.

OpenClaw is a self-hosted, open-source AI personal assistant. It requires a VPS with root access, persistent resources, and always-on availability ...

Next.js is an open-source React framework for building production-ready, server-rendered, and full-stack web applications. Developed and maintained by...
Docker changed how apps are built and deployed. Instead of setting up a full server for every project, you package ...