Django tutorial: Understanding the Django framework fundamentals
Django is a high-level Python web framework used for rapid development and clean, pragmatic design. It simplifies many web development tasks, letting you focus on writing your app without having to reinvent the wheel.
This web framework is known for its “batteries-included” philosophy, providing Django developers with a wide range of tools and built-in features to handle things like user authentication, content administration, and database management.
This makes it one of the most popular and widely used web frameworks for building dynamic, data-driven websites and applications.
In this tutorial, we will walk you through the core fundamentals of Django and provide a solid foundation to build your first web application. We will cover everything from setting up a VPS and installing Python to deploying your Django project. Here’s what you’ll learn:
- Installing Django Framework: Setting up a VPS, installing Python, creating a virtual environment, and installing Django.
- Creating a New Django Project: Starting a project and understanding the project structure.
- Understanding Django Models and Databases: Defining models and integrating databases.
- Building Views and Templates: Connecting back-end views with front-end templates to display dynamic content.
- Working with URL Patterns: Routing URLs to the correct views.
- Managing Static Files in Django: Handling CSS, JavaScript, and other static assets.
- Implementing User Authentication and Authorization: Setting up secure login, registration, and access control for users.
- Handling Forms in Django: Creating and processing forms for user input.
- Deploying a Django Application: Preparing and deploying your project to a production environment.
By the end of this tutorial, you’ll have a fully functional web application and a solid understanding of how to continue developing your own projects using Django. Whether you’re new to web development or looking to expand your skills, this Django tutorial will help you master the essentials.
Installing Django framework
Before we dive into building your Django application, you’ll need to set up your development environment. This process includes setting up a VPS, installing Python, creating a virtual environment, and installing Django.
Prerequisites
Before you begin working with Django, it’s important to have a basic understanding of certain concepts. Here’s what you should be familiar with:
- Basic Python Knowledge:
Django is a Python-based web framework, so you should have a solid grasp of Python fundamentals. This includes understanding data types, control flow – if/else, loops – functions, classes, and modules. Familiarity with Python libraries and tools will also be helpful.
- HTML, CSS, and JavaScript Basics:
While Django handles much of the back-end, building web applications still requires basic knowledge of front-end technologies like HTML, CSS, and JavaScript. These are essential for creating templates and handling static files within your project.
- Understanding of Databases:
Django works closely with databases to store and manage data. You should know basic database concepts such as tables, records, primary keys, and foreign keys. Knowledge of SQL is a plus, although Django abstracts many database operations with its ORM (Object-Relational Mapping).
- Command-Line Interface (CLI) Familiarity:
Many of Django’s setup and development tasks are performed via the command line. Basic knowledge of essential Linux commands will be crucial for setting up and managing your project.
With these prerequisites in place, you’ll be well-prepared to understand and follow the steps required to install Django and start building your web applications.
Get a Django VPS
Choosing the right hosting environment is crucial for running your Django application smoothly. A Virtual Private Server (VPS) offers more control, scalability, and resources than shared hosting, making it ideal for Django projects. Hostinger’s Django VPS hosting is an excellent choice, providing affordable plans as well as servers that are easy to set up and manage.
When selecting a VPS plan from Hostinger, consider the needs of your project:
- CPU and RAM: A faster CPU and more RAM provide better performance, especially for more complex applications or higher traffic volumes.
- Storage: Django applications often work with databases and static files. Ensure your VPS has sufficient SSD storage for your needs.
- Bandwidth: Depending on your expected traffic, choose a plan with enough bandwidth to support your visitors without slowdowns.
For a basic Django project, a lower-tier VPS plan like KVM 1 or KVM 2 should be sufficient, but as your project grows, you can easily upgrade to higher-tier options for more resources.

Once you’ve chosen a VPS plan and completed the purchase, follow these steps to set up the server:
- Start VPS setup: Log in to hPanel – on the Home page, you’ll see a pending VPS setup, similar to this:

Press Setup and Start Now in the next window.
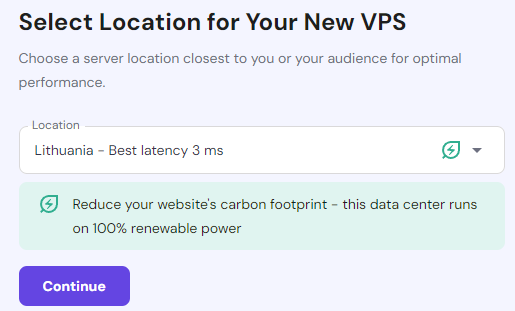
- Select a location for your VPS: Consider which region you’re expecting traffic from. The lowest latency region will not necessarily be the best for your application if expected traffic comes from Australia while you’re located in Europe.
- Select OS template: For this guide, you should select Plain OS Ubuntu; however, Hostinger also offers an OS with Panel options and an OS with Application stack (pre-installed software dependencies).
- Set up your VPS credentials: Enter the root password and add an SSH key if you’d like. Finish the setup.
- Connect via SSH: Use an SSH client (e.g., PuTTY for Windows or the terminal for macOS/Linux) to connect to the server. In your terminal, enter:
ssh root@your_vps_ip
Replace your_vps_ip with the VPS IP address from Hostinger. You’ll be prompted to enter your root password.
- Update the Server: It’s important to ensure your server is up-to-date. Run the following command to update the system packages:
apt update && apt upgrade -y
With the VPS ready, you can now install Python and other dependencies for Django development.
Install Python
To run Django, you’ll need to install Python and pip on your VPS. Most modern Linux distributions, like Ubuntu, come with Python pre-installed.
If you don’t have it installed or need to update it, you can do so easily. Use the following commands to check the current Python version and install the latest version of Python 3:
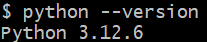
- Check if Python is installed:
python3 --version
- If your command-line interface returns the Python version number, the programming language is already installed. In that case, you simply need to install pip:
apt install python3-pip
- Install Python and pip (if necessary):
apt install python3 python3-pip -y
Once Python is installed, you’re ready to set up a virtual environment.
Set up a virtual environment
A virtual environment is an isolated space where you can install Python packages and dependencies for a specific project. This method does not affect the system-wide Python environment or other projects.
This is crucial when working with Django because different projects might require different versions of packages. A virtual environment ensures that each project’s dependencies are neatly contained and do not conflict with others.
Why use a Virtual Environment:
- Isolation: Keeps your project’s dependencies separate from other Python projects.
- Version Control: You can install different versions of packages in each virtual workspace, avoiding conflicts between projects.
- Cleaner Environment: It allows you to experiment with packages without affecting the global Python environment on your server.
Follow these steps to set up a virtual environment on your VPS:
- Install the venv package (if it’s not already installed):
apt install python3-venv -y
- Create and navigate to the directory where you want to store your Django project and create a virtual environment:
mkdir myprojectcd myproject
Replace myproject with whatever you want to name your project folder.
- Create a virtual environment using venv :
python3 -m venv env_name
- Activate the virtual environment:
source env_name/bin/activate
Once activated, the shell prompt will change to reflect the environment (e.g.,(env_name)), indicating that you’re working within your virtual environment.
This setup ensures that all Django-related dependencies are isolated within the virtual environment, keeping your server clean and organized.
Install Django
With your virtual environment set up, the next step is to install the web framework itself, which you can do using Python’s package manager, pip. Installing Django in your virtual environment ensures that it’s isolated from other projects and can be managed independently.
To install Django, follow these steps:
- With your virtual environment activated, use pip to install the latest version of Django:
pip install django
This will download and install all the dependencies and Django web framework within the virtual environment.
- Use the following command to confirm that Django is installed and to check the version:
django-admin --version

This will output the current Django version installed in your environment, further confirming that the installation was successful.
With your VPS prepared for Django hosting, you can start building your application.
Creating a new Django project
It’s time to create your first Django app. In this section, you will establish the codebase foundation needed to begin developing your website.
Let’s create a new Django project:
- Navigate to your project directory: If you’re not already in the directory where you want to create the project, use the cd command to navigate there.
- Run the startproject command: Use Django’s startproject command to create a new project. Replace myproject with the name of your project:
django-admin startproject myproject
This will create a new directory named myproject containing the default project structure.
- Then, navigate to your project’s inner folder:
cd myproject/myproject
- Add your servers IP to ALLOWED_HOSTS: Use one of the default Ubuntu text editors (nano or vim) and open the settings.py file:
vim settings.py
Locate the ALLOWED_HOSTS setting and edit it to add your VPS IP as follows:
ALLOWED_HOSTS = ['your_vps_ip']
Replace your_vps_ip with your actual VPS IP from the Hostinger console.
- Start the development server: To verify that everything is set up correctly, you can start the Django development server. Return to the parent project category and run runserver:
python manage.py runserver 0.0.0.0:8000
Now, open your browser and go to http://your_vps_ip:8000/ – replace your_vps_ip with your actual VPS IP. If everything was done correctly, you should see the Django welcome page:
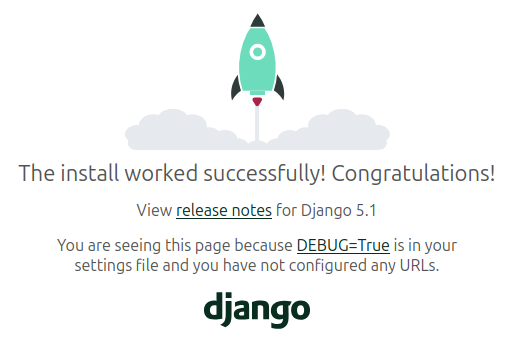
If you followed through with these steps, you successfully built and executed a default Django project on your VPS. The rest of this Django tutorial goes deeper into developing the application and understanding Django in general.
Understanding the Django Project Structure
Running the startproject command creates a basic Django project structure that includes several key files and directories. Here’s a breakdown of the structure and the purpose of each component:
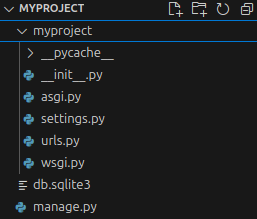
Each of these files and directories plays a specific role in your Django project:
- manage.py:
This is a command-line utility that helps you interact with your Django project. You use it for tasks such as running the development server, migrating databases, and managing your application.Here’s what it looks like:
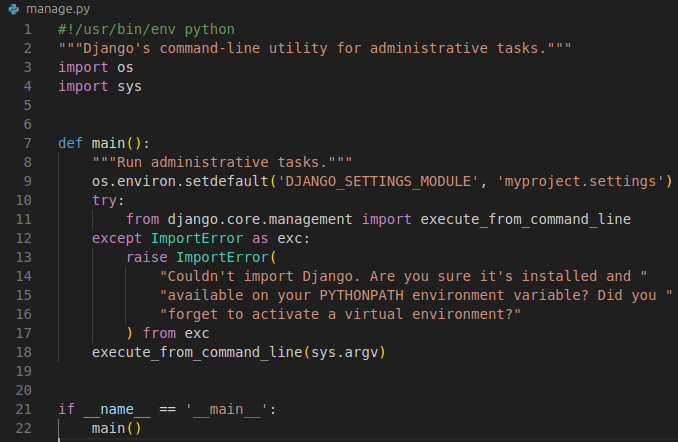
These are its key functions:

Sets the environment variable to tell Django which settings file to use.

Runs various Django commands such as runserver, migrate, and others.
- myproject/:
The inner project directory that holds the core settings, configurations, and other default files for a Django project.
- __init__.py:
This file marks the directory as a Python package, allowing the code to be imported as a module in Python. It’s empty by default.
- settings.py:
This is one of the most crucial files in Django. It contains all the configuration settings for your project, including database configurations, installed apps, middleware, and static file settings.
- urls.py:
This file defines the URL routes for your application. It maps URLs to views that process requests and return responses.
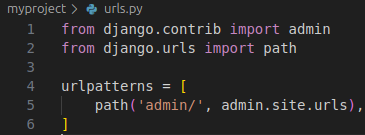
As you add more functionality to your application, you’ll extend urlpatterns to include the routes for your own views.
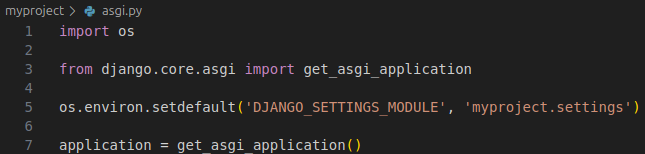
- asgi.py:
This file provides an entry point for ASGI-compatible web servers to serve your project. ASGI (Asynchronous Server Gateway Interface) is the standard for asynchronous Django applications.
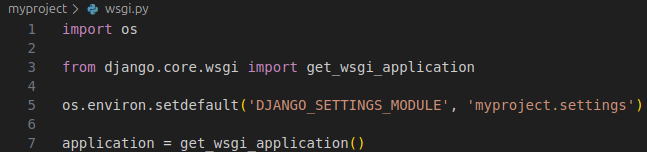
- wsgi.py:
This file is the entry point for WSGI-compatible web servers such as Gunicorn or uWSGI to serve your project in a production environment.
Understanding the role of each file and directory will equip you to modify settings, add URLs, and manage your project’s structure.
Understanding Django models and databases
With your Django project set up and running, the next step is to dive into one of the core components of any web application: managing data. Let’s explore how Django handles models and databases to power dynamic, data-driven applications.
Creating and migrating models
In Django, models define the structure of your database tables. They are Python classes that map directly to database tables, allowing you to interact with your data in a convenient way. Each model class represents a table, and each model attribute represents a field in the table.
Django abstracts away the SQL code, making it easier to create, update, and manage databases without writing raw SQL queries.
Creating a Model
To create a model, you’ll define a Python class inside the models.py file of one of your apps. Each attribute in the class corresponds to a database field, and Django will automatically handle the underlying database structure.
Here’s an example of a simple model in Django:
# In your app's models.py file
from django.db import models

class Book(models.Model):
    title = models.CharField(max_length=200)
    author = models.CharField(max_length=100)
    published_date = models.DateField()
    isbn = models.CharField(max_length=13, unique=True)

    def __str__(self):
        return self.title
- title and author: These are character fields (CharField) with a maximum length.
- published_date: This is a date field (DateField).
- isbn: A character field with a unique constraint.
The __str__() method ensures that when you query for a book, it will return the book’s title as a string representation.
Adding the Model to the Database
Once you’ve created your model, Django needs to translate it into a database table. This is done through migrations, which are files that Django uses to keep track of changes in your models.
- Create a migration: To create the migration file for your new model, run the following:
python manage.py makemigrations
Django will analyze the changes in your models.py file and generate a migration file that describes those changes in SQL-like statements.
You’ll see output similar to this:
Migrations for 'myapp':
  myapp/migrations/0001_initial.py
    - Create model Book
- Apply the migration: After generating the migration, apply it to the database with the migrate command:
python manage.py migrate
This will create the necessary tables in your database. Now, the Book model is represented by a corresponding Book table in your database, and you can start adding, querying, and managing data.
Setting up the database
Django supports multiple databases, allowing you to choose the best one for your project. The default database in Django is SQLite, which is lightweight and easy to set up, making it ideal for development and small projects.
However, for production environments, more robust databases like PostgreSQL, MySQL, or MariaDB are recommended due to their scalability and performance.
Django provides built-in support for all these databases. Let’s start by setting up the default SQLite database.
Setting Up the Default SQLite Database
By default, Django is configured to use SQLite, which comes pre-installed with Python, so no additional setup is needed. Here’s how to ensure your project is ready to use SQLite:
- Navigate to your project’s settings.py file, which is located in the project folder (myproject→myproject→settings.py).
- Go to the DATABASES section of settings.py, where Django will have already configured SQLite as the default database. Here’s what it looks like:
DATABASES = {
    'default': {
        'ENGINE': 'django.db.backends.sqlite3',
        'NAME': BASE_DIR / 'db.sqlite3',
    }
}
- ENGINE: Specifies the database back-end (in this case, SQLite).
- NAME: The path to the SQLite database file (db.sqlite3). Django automatically creates this file when you run the initial migration.
- After confirming the database settings, you need to apply the initial migrations to set up the default tables (like users and sessions). Run the following command:
python manage.py migrate
This command will create the db.sqlite3 file in the root of your project directory and set up all the necessary tables for your application to run.
- Once the migrations are complete, check that the db.sqlite3 file was created in your project folder. This file stores your database locally and will grow as you add more data.
Database integration
Once you’ve set up the default SQLite database for development, you may need to integrate a more robust database management system (DBMS) as your project grows. Django supports multiple DBMSes, including PostgreSQL, MySQL, MariaDB, and Oracle, each with its own strengths and integration process.
Let’s overview each of the options:
- SQLite: This is the default database in Django and is ideal for development and small projects. It is lightweight, file-based, and requires no setup beyond what Django provides out of the box. However, it’s not suitable for production environments because it lacks advanced features like concurrent writes, scalability, and robustness under heavy traffic.
Setup: SQLite requires no additional setup in Django; it is ready to use out of the box.
Configuration: Django is preconfigured to use SQLite with the following settings in settings.py:
DATABASES = {
    'default': {
        'ENGINE': 'django.db.backends.sqlite3',
        'NAME': BASE_DIR / 'db.sqlite3',
    }
}
Notice that SQlite only requires 2 parameters – ENGINE and NAME.
- PostgreSQL: A powerful, open-source database with advanced features such as support for complex queries, data types like JSON, and full-text search. It’s highly recommended for production Django applications due to its scalability and feature set. PostgreSQL is known for adhering strictly to SQL standards and being reliable for complex and large-scale applications.
Setup: PostgreSQL requires installing the psycopg2 package, which acts as the adapter between Django and the PostgreSQL database.
Configuration: Besides default ENGINE and NAME parameters for SQLite, PostgreSQL also requires USER, PASSWORD, HOST, and PORT. All are configured in the settings.py file, in the DATABASES section:
DATABASES = {
    'default': {
        'ENGINE': 'django.db.backends.postgresql',
        'NAME': 'mydatabase',
        'USER': 'mydatabaseuser',
        'PASSWORD': 'mypassword',
        'HOST': 'localhost',
        'PORT': '5432',
    }
}
Differences: Unlike SQLite, PostgreSQL is a fully-featured database that supports multiple concurrent users, advanced querying, and transactions. You’ll need to install PostgreSQL on your server, create a database and user, and handle more complex configurations.
- MySQL / MariaDB: Both are fast and reliable relational databases that are widely used in web development. MySQL is known for its speed, while MariaDB, a fork of MySQL, focuses more on community-driven development and is fully compatible with MySQL. These databases are excellent for high-traffic web applications and are often favored for their performance.
Setup: MySQL and MariaDB both use the mysqlclient package to interface with Django.
Configuration: Both use the same parameters as PostgreSQL, configured in the settings.py file, in the DATABASES section:
DATABASES = {
    'default': {
        'ENGINE': 'django.db.backends.mysql',  # or 'django.db.backends.mariadb' for MariaDB
        'NAME': 'mydatabase',
        'USER': 'mydatabaseuser',
        'PASSWORD': 'mypassword',
        'HOST': 'localhost',
        'PORT': '3306',
    }
}
Differences: MySQL and MariaDB are known for their performance with large datasets and high-traffic web applications. They support multiple storage engines, fast reads, and can handle millions of queries quickly.
- Oracle / Microsoft SQL Server: These enterprise-grade databases offer significant power, especially in large web applications. However, their setup can be more complex, and they are generally only used in specific enterprise environments where the business already uses Oracle or SQL Server for other software.
Setup: Both require additional drivers for integration with Django, such as cx_Oracle for Oracle or pyodbc for SQL Server. These databases are typically used in enterprise environments where other business software relies on these systems.
Configuration: Each of these systems requires more complex setup processes, including server installation, setting up drivers, and configuring database credentials in the settings.py, much like the previous options.
Differences: Oracle and SQL Server offer enterprise-grade features like advanced transaction handling, optimized performance, and integration with large-scale systems. Their setup is more complex and is often handled by specialized database administrators.
So, which one should you choose? Let’s make it simple and straightforward:
- Development and Testing: Stick with SQLite. It’s simple, needs no setup, and is ideal for local testing.
- Small-Scale Production: For smaller, low-traffic web applications, you might choose MySQL or MariaDB, as they provide better performance than SQLite and have an easier learning curve than PostgreSQL.
- Large-Scale Production: PostgreSQL is the most recommended for Django projects that require scalability, security, and advanced features.
- Enterprise Environments: If you work in an enterprise setting that uses Oracle or SQL Server for other applications, these databases may be the best choice due to integration requirements.
Setting Up PostgreSQL with Django
In this section, we will walk through the process of integrating PostgreSQL with Django, as it is one of the most commonly used databases for production applications.
- Install PostgreSQL: To integrate PostgreSQL with Django, you first need to install PostgreSQL on your system:
sudo apt update
sudo apt install postgresql postgresql-contrib
- Install PostgreSQL Adapter for Django: Django uses the psycopg2 package to interact with PostgreSQL. Install it using pip:
pip install psycopg2
- Switch to the PostgreSQL user:
sudo -u postgres psql
- Create a new database:
CREATE DATABASE mydatabase;
- Create a user with a password:
CREATE USER mydatabaseuser WITH PASSWORD 'mypassword';
- Grant mydatabaseuser all privileges on the database:
GRANT ALL PRIVILEGES ON DATABASE mydatabase TO mydatabaseuser;
- Exit the PostgreSQL shell:
\q
- Configure Django to use PostgreSQL: Open your settings.py file and locate the DATABASES section. Modify it for PostgreSQL as follows:
DATABASES = {
    'default': {
        'ENGINE': 'django.db.backends.postgresql',
        'NAME': 'mydatabase',
        'USER': 'mydatabaseuser',
        'PASSWORD': 'mypassword',
        'HOST': 'localhost',  # Use '127.0.0.1' if 'localhost' doesn't work
        'PORT': '5432',       # Default PostgreSQL port
    }
}
The actual PASSWORD and USER values should match the ones you set in Step 5.
- Apply migrations: Now that your database is configured, you need to apply your project’s migrations to set up the necessary tables in PostgreSQL:
python manage.py migrate
This command will create the required tables in your PostgreSQL database.
- Test the connection: Finally, run the Django development server using the runserver command, to verify that the PostgreSQL integration is successful:
python manage.py runserver
Open http://127.0.0.1:8000/ in your browser. If the Django welcome page appears without errors, your database connection is working correctly.
With your PostgreSQL database fully integrated, Django is now ready to handle larger, more complex datasets, making your project scalable and production-ready.
Building views and templates
With the database and models set up to manage your application’s data, the next step is to display this information to users and create interactive interfaces.
This is where views and templates come into play, allowing you to define the logic and structure behind the web pages users will interact with.
Understanding views
In Django, views are an essential component that defines the logic behind what a user sees when they interact with your application.
Simply put, a view takes a web request, processes it, and returns a response, typically in the form of a rendered HTML page. Views bridge your database and the user interface with the use of models and templates.
There are two primary types of views in Django: Function-Based Views (FBVs) and Class-Based Views (CBVs). Both serve the same purpose but offer different ways of organizing code.
Function-Based Views (FBVs)
Function-Based Views are straightforward Python functions that accept a request object and return a response. They’re often used for simpler use cases or where you need more control over the flow of the logic.
Here’s an example of a simple FBV that renders an HTML template:
from django.shortcuts import render

# Function-based view
def homepage(request):
    return render(request, 'homepage.html')
In this example:
- request: The HTTP request object sent by the user’s browser.
- render: Combines the template homepage.html with any provided context data and returns an HTTP response.
FBVs are easy to understand and implement, but as views become more complex, such as involving forms or authentication, they can become harder to maintain.
Class-Based Views (CBVs)
Class-Based Views, on the other hand, allow you to structure views more efficiently by using object-oriented programming principles. CBVs are more flexible and reusable since they are based on Python classes.
Django provides built-in generic views, like ListView and DetailView, that handle common use cases. These views allow you to focus more on customizing them rather than rewriting repetitive logic.
Here’s an example of a CBV that performs the same function as the previous FBV:
from django.views.generic import TemplateView

# Class-based view
class HomePageView(TemplateView):
    template_name = 'homepage.html'
In this example:
- TemplateView: A built-in generic view that renders a template.
- template_name: Specifies the template file to render, just like in the FBV example.
To use this CBV in the URL configuration, you’ll need to include the .as_view() method when adding it to urls.py:
from django.urls import path
from .views import HomePageView

urlpatterns = [
    path('', HomePageView.as_view(), name='home'),
]
When to Use FBVs vs. CBVs
- Use FBVs when you need simplicity and full control over your view logic. They are often more intuitive for small views or custom logic that doesn’t fit into Django’s predefined view patterns.
- Use CBVs when you want to follow DRY (Don’t Repeat Yourself) principles and reuse existing logic. CBVs are ideal when your views grow in complexity, such as when handling forms, paginated data, or standard CRUD operations.
Both FBVs and CBVs are integral to Django, and choosing between them depends on your project’s requirements and your personal preference.
Working with templates
The template system in Django is designed to separate the presentation of data from the underlying logic. Templates are essentially HTML files that contain dynamic content, allowing you to display data passed from your views. The Django Template Language (DTL) provides placeholders and logic, like loops and conditionals, to insert dynamic data into HTML.
Templates play a crucial role in defining the look and feel of your web pages while maintaining a clean separation of concerns between the logic, which is handled by views, and the user interface.
Creating a Template
To create a template in Django, you need to create an HTML file inside a templates directory. The directory structure might look like this:
myproject/
│
├── myapp/
│   ├── templates/
│   │   └── myapp/
│   │       └── homepage.html
│   └── views.py
│
└── manage.py
In this structure, Django automatically looks for templates in the templates directory of your app. You can further organize templates inside app-specific folders (like myapp/homepage.html), ensuring that each app has its own templates.
Here’s an example of a simple template (homepage.html):
<!DOCTYPE html>
<html lang="en">
<head>
    <meta charset="UTF-8">
    <meta name="viewport" content="width=device-width, initial-scale=1.0">
    <title>Home</title>
</head>
<body>
    <h1>Welcome to {{ site_name }}</h1>
    <p>{{ message }}</p>
</body>
</html>
In this template, {{ site_name }} and {{ message }} are placeholders that will be filled with dynamic data passed from the view.
Rendering a Template in a View
To render a template, you need to pass it to the view using Django’s render() function. Here’s an example of how to render the homepage.html template with some context data in a function-based view (FBV):
from django.shortcuts import render

def homepage(request):
    context = {
        'site_name': 'My Django Website',
        'message': 'This is the homepage content!'
    }
    return render(request, 'myapp/homepage.html', context)
In this example:
- render(): Combines the template (homepage.html) with the context data.
- context: A dictionary containing the data (site_name and message) to be inserted into the template.
When a user visits this page, the placeholders {{ site_name }} and {{ message }} in the template will be replaced by “My Django Website” and “This is the homepage content!” respectively.
Template Tags and Filters
Django templates also support template tags and filters, which allow you to add dynamic content and logic inside your HTML files.
- Template Tags: Perform logic inside templates, such as loops and conditionals.For example, an if condition:
{% if user.is_authenticated %}
    <p>Welcome back, {{ user.username }}!</p>
{% else %}
    <p>Hello, Guest!</p>
{% endif %}
- Template Filters: Modify variables for display purposes.For example, formatting dates with a filter:
<p>Published on {{ article.published_date|date:"F j, Y" }}</p>
Extending Templates
Django supports template inheritance, allowing you to create base templates that other templates can extend. This is especially useful for maintaining a consistent layout across multiple pages, such as a common header and footer.
- Create a base template (base.html):
<!DOCTYPE html>
<html lang="en">
<head>
    <meta charset="UTF-8">
    <meta name="viewport" content="width=device-width, initial-scale=1.0">
    <title>{% block title %}My Site{% endblock %}</title>
</head>
<body>
    <header>
        <h1>Site Header</h1>
    </header>

    <main>
        {% block content %}
        <!-- Page-specific content goes here -->
        {% endblock %}
    </main>

    <footer>
        <p>Footer Content</p>
    </footer>
</body>
</html>
- Extend the base template in a child template (homepage.html):
{% extends 'base.html' %}

{% block title %}Home Page{% endblock %}

{% block content %}
    <h2>Welcome to the homepage!</h2>
    <p>This is the homepage content.</p>
{% endblock %}
By extending the base template, you can reuse the header and footer across different pages, maintaining a consistent layout and avoiding repetition.
Using Static Files in Templates
Templates also allow you to reference static files (like CSS, JavaScript, or images) using the {% static %} template tag. For example, to include a CSS file:
<link rel="stylesheet" type="text/css" href="{% static 'css/style.css' %}">
Make sure you’ve set up your static file directories correctly in settings.py:
STATIC_URL = '/static/'
By effectively using Django’s template system, you can create dynamic, data-driven web pages and maintain a clean separation between logic and presentation.
Working with URL patterns
Django’s URL dispatcher relies on regular expressions or path converters to match incoming URL requests with specific views. These URL patterns are defined in urls.py, and Django uses this configuration to determine which view should handle a particular request.
Each Django project typically has two levels of URL configuration:
- Project-level URLs: Defined in the root urls.py file (found in the project’s main directory), this file contains the overall structure of the project’s URL routing.
- App-level URLs: Each app within your project can have its own urls.py file, allowing for modular URL management. These app-level URLs are then linked to the project-level URLs.
Basic URL configuration
Let’s look at how a simple project might set up URL patterns:
- Project-Level URLs (myproject→urls.py)
from django.contrib import admin
from django.urls import path, include

urlpatterns = [
    path('admin/', admin.site.urls),  # Admin site
    path('', include('myapp.urls')),  # Include app-level URLs for "myapp"
]
- path(): Django’s function for defining URL patterns.
- admin.site.urls: Handles all admin-related requests.
- include(): Used to include app-level URLs (from myapp.urls) in the main project configuration.
- App-Level URLs (myproject→myapp→urls.py)
from django.urls import path
from . import views

urlpatterns = [
    path('', views.homepage, name='home'),  # Maps the root URL to the homepage view
    path('about/', views.about, name='about'),  # Maps "/about/" to the about view
]
- The root URL (represented by ‘ ‘) is mapped to the homepage view.
- The /about/ URL is mapped to the about view.
URL Routing with Function-Based Views (FBVs)
Here’s how the corresponding views might look in views.py for the above URL configuration:
from django.shortcuts import render

def homepage(request):
    return render(request, 'homepage.html')

def about(request):
    return render(request, 'about.html')
This setup links the homepage and about URLs to their respective views, ensuring that when a user visits http://example.com/ or http://example.com/about/, the correct template is rendered.
URL Routing with Class-Based Views (CBVs)
You can also map URLs to class-based views (CBVs), which are handled slightly differently. Here’s an example of a CBV URL mapping:
And the corresponding class-based views in views.py:
from django.views.generic import TemplateView

class HomePageView(TemplateView):
    template_name = 'homepage.html'

class AboutPageView(TemplateView):
    template_name = 'about.html'
In this case, the .as_view() method is used to link the class-based views to the URL patterns.
URL Parameters and Dynamic RoutingDjango also allows you to capture URL parameters and pass them to views, which is useful for dynamic URL mapping for things like blog posts or product pages.
Here’s an example where the URL captures an integer parameter:
from django.urls import path
from . import views

urlpatterns = [
    path('article/<int:id>/', views.article_detail, name='article_detail'),
]
In this case, <int:id> captures an integer from the URL and passes it to the article_detail view as an argument:
def article_detail(request, id):
    # Fetch the article using the provided ID
    article = get_object_or_404(Article, pk=id)
    return render(request, 'article_detail.html', {'article': article})
If a user visits http://example.com/article/5/, Django will pass 5 as the id argument to the article_detail view, allowing you to retrieve and display the specific article
Named URL Patterns
It’s a good practice to name your URL patterns. This allows you to reference URLs by name in your templates and views rather than having to hard-code them.
In the urls.py example above, each URL has a name argument:
path('about/', views.about, name='about')
In your templates, you can then use the {% url %} template tag to reference these named URLs:
<a href="{% url 'about' %}">About Us</a>
This way, if the about URL ever changes, you only need to update it in the URL configuration rather than in every template.
By configuring and working with Django’s URL patterns, you can efficiently map different URLs to their respective views. This flexibility allows you to handle both simple static pages and more complex, dynamic content that’s tailored to user input.
Managing static files in Django
We’ve set up views, templates, and URL patterns. Now, to build a fully functional Django application, we need to start handling static files, such as CSS, JavaScript, and images.
Luckily, Django provides a simple and efficient way to manage static files, ensuring they are properly served and organized during development and deployment.
Setting Up Static Files in Django
To manage static files in Django, you need to configure your project to know where to look for and serve them.
Define the Static URL and Directory in settings.py:
# settings.py
STATIC_URL = '/static/'
STATICFILES_DIRS = [
    BASE_DIR / "static",  # Optional: Add this if you want to store static files in a 'static' folder within your project
]
- STATIC_URL: Defines the URL prefix Django will use when serving static files.
- STATICFILES_DIRS: Specifies additional directories where Django will look for static files during development.
By default, Django will also look for static files inside each app’s static directory. For example, if you have an app named myapp, you can create a folder structure like this:
myapp/
│
├── static/
│   └── myapp/
│       └── style.css
└── views.py
Django will automatically recognize and serve these files during development.
Using Static Files in Templates
To use static files in your templates, you must first load Django’s {% static %} template tag. Then, you can reference your static files by their relative paths:
<!DOCTYPE html>
<html lang="en">
<head>
    <meta charset="UTF-8">
    <meta name="viewport" content="width=device-width, initial-scale=1.0">
    <title>Home Page</title>
    {% load static %}
    <link rel="stylesheet" href="{% static 'myapp/style.css' %}">
</head>
<body>
    <h1>Welcome to My Django App</h1>
    <img src="{% static 'myapp/images/logo.png' %}" alt="Logo">
</body>
</html>
In this example:
- {% load static %}: Loads the static files template tag.
- {% static ‘myapp/style.css’ %}: Resolves the path to the style.css file in the static/myapp directory.
- {% static ‘myapp/images/logo.png’ %}: Resolves the path to an image file.
Collecting Static Files for Deployment
During development, Django serves static files automatically when DEBUG = True. However, in production, Django does not serve static files directly. Instead, you need to collect all static files from various locations and store them in a single directory.
To do this, Django provides the collectstatic management command:
- Make sure django.contrib.staticfiles is included in the INSTALLED_APPS setting:
INSTALLED_APPS = [
    # Other installed apps
    'django.contrib.staticfiles',
]
- Configure the Static Root Directory in settings.py:
STATIC_ROOT = BASE_DIR / 'staticfiles'
STATIC_ROOT: Defines the directory where Django will collect static files for deployment.
- Run the collectstatic command:
python manage.py collectstatic
This command collects all static files from each app’s static directory and any additional locations specified in STATICFILES_DIRS, and then stores them in the STATIC_ROOT directory.
Serving Static Files in Production
In a production environment, you typically use a web server (like Nginx or Apache) to serve static files. Django recommends configuring your web server to serve static content efficiently, reducing the load on your Django application.
Here’s how you might configure static file serving in an Nginx setup:
- Nginx Configuration for Static Files:
server {
    listen 80;
    server_name yourdomain.com;

    location /static/ {
        alias /path/to/your/project/staticfiles/;  # The path to STATIC_ROOT
    }

    location / {
        proxy_pass http://127.0.0.1:8000;  # Pass requests to Django app
    }
}
In this configuration, Nginx serves static files directly from the /static/ directory, while forwarding all other requests to the Django application.
By properly managing static files in Django, you ensure that your application not only looks good with styles and images but also performs efficiently when deployed.
Implementing user authentication and authorization
As we continue building more dynamic and complex web applications, the need to manage users, secure content, and control access becomes critical.
Django provides a built-in authentication system that makes it easy to handle user login, logout, registration, and permissions. This allows a Django developer to efficiently manage both user authentication and authorization.
User Authentication
Django’s built-in authentication system simplifies user management with features like login, logout, password management, and registration. By default, Django offers user model functionality and authentication views that handle most of these tasks out of the box.
Setting Up User Login and Logout
To implement login and logout functionality, you can use Django’s built-in views found in django.contrib.auth.views. These views handle the authentication process and simplify the code required for these operations.
- Set up URLs for login and logout in your urls.py file:
from django.urls import path
from django.contrib.auth import views as auth_views

urlpatterns = [
    path('login/', auth_views.LoginView.as_view(), name='login'),
    path('logout/', auth_views.LogoutView.as_view(), name='logout'),
]
- LoginView: Handles user login.
- LogoutView: Logs the user out and redirects them to the specified page.
- Create a login form template:You can create a simple login template (login.html) inside your app’s templates directory:
<form method="post">
    {% csrf_token %}
    <div>
        <label for="username">Username:</label>
        <input type="text" id="username" name="username" required>
    </div>
    <div>
        <label for="password">Password:</label>
        <input type="password" id="password" name="password" required>
    </div>
    <button type="submit">Login</button>
</form>
This template will handle user authentication when a valid username and password are submitted.
- Create logout:You don’t need a separate template to log out, as Django’s LogoutView handles it. You can simply add a logout link in your template:
<a href="{% url 'logout' %}">Logout</a>
Creating a User Registration View
Django doesn’t provide a built-in registration view by default, but you can create one using Django’s UserCreationForm:
- Create a registration view in views.py:
from django.shortcuts import render, redirect
from django.contrib.auth.forms import UserCreationForm
from django.contrib.auth import login

def register(request):
    if request.method == 'POST':
        form = UserCreationForm(request.POST)
        if form.is_valid():
            user = form.save()
            login(request, user)  # Automatically log the user in after registration
            return redirect('home')  # Redirect to home page after successful registration
    else:
        form = UserCreationForm()
    return render(request, 'register.html', {'form': form})
- Set up the URL for registration in urls.py:
urlpatterns = [
    path('register/', views.register, name='register'),
]
- Create the registration form template (register.html):
<form method="post">
    {% csrf_token %}
    {{ form.as_p }}
    <button type="submit">Register</button>
</form>
This registration view allows users to create an account using a simple form. After successful registration, users are automatically logged in.
User Authorization
User authorization allows controlling access to certain views and actions based on the user’s permissions or roles. Django’s permission system makes it easy to manage which users can access specific parts of your application.
Restricting Access with Login Required
To restrict access to certain views, you can use Django’s @login_required decorator, which ensures that only authenticated users can access a view:
- Using @login_required in views:
from django.contrib.auth.decorators import login_required

@login_required
def dashboard(request):
    return render(request, 'dashboard.html')
This ensures that if a user is not logged in, they will be redirected to the login page.
- Applying @login_required in URLs:Alternatively, you can apply @login_required directly in your urls.py using Django’s LoginRequiredMixin for class-based views:
from django.contrib.auth.mixins import LoginRequiredMixin
from django.views.generic import TemplateView

class DashboardView(LoginRequiredMixin, TemplateView):
    template_name = 'dashboard.html'
Managing User Permissions
Django allows you to assign different permissions to users and groups, which can be used to control access to specific views or actions. Permissions can be added to user models and checked within your views.
- Assigning permissions: When creating users or groups, you can assign permissions. For example, an admin might have permission to add or delete content, while regular users can only view content.
- Checking permissions in views: You can check if a user has the required permissions before allowing access to certain views using the @permission_required decorator:
from django.contrib.auth.decorators import permission_required

@permission_required('app.add_article')
def add_article(request):
    # View code for adding an article
Only users with the add_article permission will be able to access this view.
Restricting Access Based on User Roles
Django’s groups feature allows you to create roles (such as “editor” or “viewer”) and assign users to these groups. You can then check a user’s group membership to control access.
- Assigning users to groups: Groups can be created in the Django admin panel or programmatically:
from django.contrib.auth.models import Group, User

group = Group.objects.get(name='editors')
user = User.objects.get(username='john')
user.groups.add(group)  # Assign the user to the 'editors' group
- Checking group membership in views: You can restrict views based on group membership:
from django.contrib.auth.decorators import user_passes_test

def is_editor(user):
    return user.groups.filter(name='editors').exists()

@user_passes_test(is_editor)
def editor_dashboard(request):
    return render(request, 'editor_dashboard.html')
In this example, only users who belong to the “editors” group can access the editor_dashboard view.
By leveraging Django’s built-in authentication and authorization systems, you can securely manage user login, registration, and permissions, ensuring that sensitive content is protected and access is properly controlled.
Handling forms in Django
After implementing user authentication and authorization, the next crucial feature in any web page is handling user input through forms. Django provides a powerful and flexible system for creating, processing, and validating forms.
Django’s form-handling system is built on Python classes that represent forms as objects. These forms can be rendered in templates, validated, and processed using just a few lines of code. Forms can either be created manually using Django’s Form class or generated automatically from models using ModelForm.
Creating Forms Using Django’s Form Class
To create a form in Django, you start by defining a form class in your forms.py file. This class will define the fields and validation rules.
- Defining a form: Here’s an example of a simple contact form:
# forms.py
from django import forms

class ContactForm(forms.Form):
    name = forms.CharField(max_length=100, label='Your Name')
    email = forms.EmailField(label='Your Email')
    message = forms.CharField(widget=forms.Textarea, label='Your Message')
This form includes three fields: name, email, and message. Each field is represented by a form field class, such as CharField for short text, EmailField for emails, and Textarea for longer text inputs.
- Rendering the form in a template: To display the form on a webpage, you need to render it inside a template. You can render the form manually or use Django’s built-in form rendering helpers:
<form method="post">
    {% csrf_token %}
    {{ form.as_p }}
    <button type="submit">Send Message</button>
</form>
- {% csrf_token %}: Adds a CSRF token to protect against cross-site request forgery attacks.
- {{ form.as_p }}: Renders the form fields with each field wrapped in a <p> tag for easy styling.
- Handling form submissions: In the view that handles the form submission, you’ll need to validate the form data and process it if the form is valid:
# views.py
from django.shortcuts import render
from .forms import ContactForm

def contact_view(request):
    if request.method == 'POST':
        form = ContactForm(request.POST)
        if form.is_valid():
            # Process the data, e.g., send an email or save it to the database
            name = form.cleaned_data['name']
            email = form.cleaned_data['email']
            message = form.cleaned_data['message']
            # Redirect to a success page or show a success message
            return render(request, 'thanks.html')
    else:
        form = ContactForm()
    return render(request, 'contact.html', {'form': form})
In this view:
- If the form is submitted via a POST request, the form data is validated.
- form.is_valid(): Checks whether the form data passes validation.
- form.cleaned_data: Contains the validated form data that can now be processed (e.g., sending an email).
- If the request is not a POST, an empty form is displayed for the user to fill out.
Form validation and error handling
Django’s forms come with built-in validation that ensures the data submitted is correct and secure. Fields such as EmailField automatically validate that the input is a valid email address. You can also create custom validation logic to enforce specific rules.
Built-in validation
Django automatically performs some validation checks for you:
- Required fields: By default, all fields are required unless you specify required=False.
- Field types: Fields like EmailField, IntegerField, and URLField automatically validate the type of data entered.
Custom validation
You can also define custom validation logic by overriding the clean() method or creating custom field validators.
- Adding a custom validator for the name field:
# forms.py
from django import forms
from django.core.exceptions import ValidationError

class ContactForm(forms.Form):
    name = forms.CharField(max_length=100, label='Your Name')
    email = forms.EmailField(label='Your Email')
    message = forms.CharField(widget=forms.Textarea, label='Your Message')

    def clean_name(self):
        name = self.cleaned_data.get('name')
        if "spam" in name.lower():
            raise ValidationError("Invalid name: 'spam' is not allowed.")
        return name
In this example, if the name contains the word spam, Django will raise a validation error.
- Handling form errors in templates: You can customize how form errors are displayed in templates. Django automatically adds error messages to each field, which you can display like this:
<form method="post">
    {% csrf_token %}
    <div>
        {{ form.name.label_tag }} {{ form.name }}
        {% if form.name.errors %}
            <div class="error">{{ form.name.errors }}</div>
        {% endif %}
    </div>
    <div>
        {{ form.email.label_tag }} {{ form.email }}
        {% if form.email.errors %}
            <div class="error">{{ form.email.errors }}</div>
        {% endif %}
    </div>
    <div>
        {{ form.message.label_tag }} {{ form.message }}
        {% if form.message.errors %}
            <div class="error">{{ form.message.errors }}</div>
        {% endif %}
    </div>
    <button type="submit">Send Message</button>
</form>
This ensures users can see relevant error messages next to the fields they need to correct.
Creating forms from models using ModelForm
In many cases, forms are tied to models. Django makes it easy to create forms directly from models using ModelForm. This saves time by automatically generating form fields based on the model’s fields.
- Creating a ModelForm: Suppose you have a Post model in your models.py file:
# models.py
from django.db import models

class Post(models.Model):
    title = models.CharField(max_length=200)
    content = models.TextField()
    created_at = models.DateTimeField(auto_now_add=True)
You can create a form for this model as follows:
# forms.py
from django import forms
from .models import Post

class PostForm(forms.ModelForm):
    class Meta:
        model = Post
        fields = ['title', 'content']
- Using the ModelForm in a view:
# views.py
from django.shortcuts import render
from .forms import PostForm

def create_post(request):
    if request.method == 'POST':
        form = PostForm(request.POST)
        if form.is_valid():
            form.save()  # Saves the form data to the database
            return redirect('post_list')  # Redirect to a list of posts
    else:
        form = PostForm()
    return render(request, 'create_post.html', {'form': form})
By using ModelForm, Django automatically generates form fields based on the Post model’s fields and handles saving the form to the database.
Deploying a Django application
Once your application is fully developed and tested on your local machine, the final step is deploying it to a live server so that users can access it. Deploying a Django project requires careful consideration of best practices to ensure security, scalability, and performance. In this section, we’ll cover the essential steps for deploying your application on a VPS that every Django developer should know.
Best practices for deploying a Django project
Before diving into the technical steps, it’s important to follow some best practices when preparing your Django project for deployment:
- Use Environment Variables: Store sensitive information such as secret keys, database credentials, and API keys in environment variables instead of hard-coding them into your settings.
- Enable Debug Mode Off: Make sure to set DEBUG = False in your settings.py file before deploying your project to production. Debug mode can expose sensitive information to attackers.
- Set Allowed Hosts: In your settings.py, set the ALLOWED_HOSTS parameter to include the domain name(s) where your app will be hosted. For example:
ALLOWED_HOSTS = ['yourdomain.com', 'www.yourdomain.com']
- Secure the Application: Consider using HTTPS for secure communication between the server and users, and use Django’s built-in security settings such as SECURE_SSL_REDIRECT, CSRF_COOKIE_SECURE, and SESSION_COOKIE_SECURE.
- Static Files Handling: Ensure static files like CSS and JavaScript are properly collected and served. Django provides the collectstatic command to handle this.
- Database Configuration: Ensure the database is properly configured, and avoid using SQLite for production. Use a more robust database like PostgreSQL or MySQL.
Deploying Django on a VPS
Now that you’ve learned the best practices for preparing a Django project, it’s time to deploy it to a Virtual Private Server (VPS). In this section, we’ll guide you through the steps to set up your server, configure necessary services, and get your Django application live and accessible to users.
Creating a Python requirements.txt file
A requirements.txt file lists all the Python dependencies your Django project needs to run. This file allows you to install all required packages with a single command.
Make sure you’re in your project’s main directory, where you have the manage.py file, and ensure that your virtual environment is active.
Then, generate the requirements.txt file with the following command:
pip3 freeze > requirements.txt
This command will create a requirements.txt file in your present directory with all installed packages and their versions that you have in your current virtual environment.
Afterward, open the requirements.txt and ensure all the dependencies necessary to run your project are listed.
Uploading the project to a remote repository (GitHub)
Before deploying your project on a VPS, it’s a good practice to upload your code to a remote repository, such as GitHub, for version control and easy collaboration. Plus, it simplifies the deployment process itself.
- Install Git CLI and initialize a local repository.Make sure you’re in your main project folder, where you have the manage.py file, and run these commands:
sudo apt install git-all
git init
- Create a .gitignore file and add contents to it.The .gitignore file tells Git which files to ignore when pushing code to your remote repository. This is done in order to skip files holding sensitive information as well as local, irrelevant files like logs from being published. Here’s an example .gitignore file for a Django project:
venv/
__pycache__/
db.sqlite3
*.pyc
*.log
media/
- Sanitize sensitive information in your settings.py.Make sure you sanitize sensitive information in your settings.py file, such as passwords, usernames, etc. Once the project is deployed, you can add the credentials to your VPS.
- Add and Commit your files.
git add .
git commit -m "Initial commit"
- Register on GitHub and create a remote repositoryGo to GitHub and register or log in to your account. Create a new repository, set it to private, and copy its remote link.
- Set up remote Git origin and branch.
git remote add origin https://github.com/url-to-repository-you-created
git branch -M main
- Check the status of your local repository and push files.Prior to pushing files, you should run the status command and make sure no files you do not want to push are added:
git status
Confirm that only files that you want to upload are added and push them to the remote repository:
git push -u origin main
- Go to your remote repository on GitHub and confirm the files uploaded.
Prepare your VPS and retrieve the project code
Next, you need to prepare your VPS for deployment and download your code to it:
- SSH into your VPS
ssh root@your_vps_ip
- Instal Nginx and Gunicorn
sudo apt install nginx
sudo pip3 install gunicorn
We’ll use Nginx as the web server and Gunicorn as the application server
- Retrieve code from GitHub
git clone https://github.com/your-repository/project-name.git
cd project-name
- Start a virtual environment and install dependencies
python3 -m venv env_namesource env_name/bin/activate
pip3 install -r requirements.txt
- Fill in sanitized data back into your settings.py file
- Run migrations and collect static files
python manage.py migrate
python manage.py collectstatic
- Set up Gunicorn as the application serverCreate a service file:
sudo nano /etc/systemd/system/gunicorn.service
Add the following configuration:
[Unit]
Description=gunicorn daemon
After=network.target

[Service]
User=your-username
Group=www-data
WorkingDirectory=/your/project/directory
ExecStart=/your/project/directory/env_name/bin/gunicorn --access-logfile - --workers 3 --bind unix:/your/project/directory.sock myproject.wsgi:application

[Install]
WantedBy=multi-user.target
Make sure to enter your factual username and project directory path instead of your-username and /your/project/directory.
- Start and enable Gunicorn
sudo systemctl start gunicorn
sudo systemctl enable gunicorn
- Configure Nginx as the web serverCreate a configuration file:
sudo nano /etc/nginx/sites-available/myproject
Add the following configuration:
server {
    listen 80;
    server_name yourdomain.com www.yourdomain.com;

    location / {
        proxy_pass http://unix:/your/project/directory/project-name.sock;
        proxy_set_header Host $host;
        proxy_set_header X-Real-IP $remote_addr;
        proxy_set_header X-Forwarded-For $proxy_add_x_forwarded_for;
        proxy_set_header X-Forwarded-Proto $scheme;
    }

    location /static/ {
        alias /your/project/directory/static/;
    }

    location /media/ {
        alias /your/project/directory/media/;
    }
}
Make sure to enter your factual directory path instead of /your/project/directory.
- Enable the site and restart Nginx
sudo ln -s /etc/nginx/sites-available/myproject /etc/nginx/sites-enabled
sudo systemctl restart nginx
- Secure the server with SSLWe’ll use Certbot to apply an SSL certificate and redirect traffic from HTTP to HTTPS:
sudo apt install certbot python3-certbot-nginxsudo certbot --nginx -d yourdomain.com -d www.yourdomain.com
By following these steps, you’ve successfully deployed your Django application on a VPS using best practices, ensuring both security and performance.
With Nginx and Gunicorn handling the web and application serving, your app is now ready to handle live traffic. Visit your domain – if you’ve set everything right you should now see your web application live.
Conclusion
In this tutorial, we covered the essential steps to get started with Django, from setting up your development environment to deploying your project on a VPS. You’ve learned how to create a project, manage models and store data, build views and templates, work with URLs, handle static files, implement user authentication, and deploy your application to a live server.
With these foundational skills, you’re now equipped to start building your own Django projects. Whether it’s a simple blog or a more complex web application, Django provides you with the tools to bring your ideas to life. Dive in, experiment, and see what you can create with this powerful web framework.
Django tutorial FAQ
Now that you have a solid understanding of Django fundamentals, let’s address some common questions in the Django FAQ.
What is Django?
Django is a high-level Python web framework designed for rapid development and clean, pragmatic design. It simplifies the process of building web applications by providing reusable components such as authentication, ORM, and routing, while promoting best practices like DRY (Don’t Repeat Yourself) and security.
Why use Django?
Django is used for its speed, security, and scalability. It simplifies web development with built-in features like authentication, an ORM for database management, and URL routing. Its “batteries-included” philosophy allows Django developers to build robust applications quickly while following best practices.
Do I need to know Python to learn Django?
Yes, knowing Python is essential to learning Django, a Python-based web framework. Familiarity with Python’s syntax, data structures, and object-oriented programming will help you understand Django’s structure and functionality, making the learning process smoother and more efficient.

Valentinas Čirba is a VPS Product Manager. His physics degree and 10+ years of experience in the software industry make him an expert in virtualization and cloud technologies. He is passionate about making complex things simple for end users. When he's not working, Valentinas likes to spend time with his family and friends. He also enjoys playing chess and doing crossword puzzles.